WW1 General Paul Ludwig Hans Anton Von Hindenburg

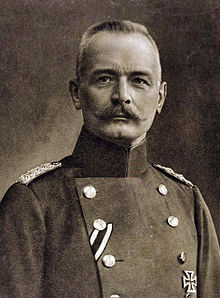
Paul Ludwig Hans Anton von Beneckendorff und von Hindenburg (2 October 1847 – 2 August 1934), known as simply Paul von Hindenburg, was a German military officer and statesman who led the Imperial German Army during World War  and later became president of Germany from 1925 until his death. He played a key role in the Nazi seizure of power in 1933 when, under pressure from advisers, he appointed Adolf Hitler as chancellor of Germany.

Hindenburg was born to a family of minor Prussian nobility in Posen. Upon completing his education as a cadet, he enlisted in the Third Regiment of Foot Guards as a second lieutenant. He saw combat during the Austro-Prussian and Franco-Prussian wars. In 1873, he was admitted to the prestigious Kriegsakademie in Berlin, where he studied before being appointed to the General Staff Corps. In 1885, he was promoted to major and became a member of the German General Staff. After teaching at the Kriegsakademie, Hindenburg rose to become a lieutenant general by 1900. Around the time of his promotion to General of the Infantry in 1905, Count Alfred von Schlieffen recommended Hindenburg succeed him as Chief of the Great General Staff, but the post went to Helmuth von Moltke in 1906. In 1911, Hindenburg retired.

After World War I began in 1914, Hindenburg was recalled and achieved fame on the Eastern Front as victor of Tannenberg. He oversaw crushing victories against the Russians that made him a national hero and center of a personality cult. By 1916, his popularity had risen to the point he replaced General Erich von Falkenhayn as Chief of the Great General Staff. He and General Erich Ludendorff exploited Emperor Wilhelm II‘s delegation of power to the Supreme Army Command to establish a de facto military dictatorship. Under their leadership, Germany secured Russia’s defeat and achieved the largest advance on the Western Front since the conflict’s outbreak. However, improvements in Germany’s fortunes were reversed, after its Army was decisively defeated in the Second Battle of the Marne and the Allies’ Hundred Days Offensive. Upon the armistice, Hindenburg stepped down as commander-in-chief and retired again in 1919.

In 1925, Hindenburg returned to public life to become the second elected president of the German Weimar Republic. Opposed to Hitler and his Nazi Party, Hindenburg nonetheless played a major role in the instability that resulted in their rise to power. After twice dissolving the Reichstag in 1932, Hindenburg agreed in January 1933 to appoint Hitler as chancellor in coalition with the Deutschnationale Volkspartei. In response to the February 1933 Reichstag fire, Hindenburg approved the Reichstag Fire Decree, which suspended various civil liberties. He signed the Enabling Act of 1933, which gave the Nazi regime emergency powers. After Hindenburg died the following year, Hitler combined the presidency with the chancellery before declaring himself Führer (lit. ’Leader’) of Germany and transforming the country into a totalitarian state.

Early life

House of Hindenburg in Posen (Poznań) on Podgórna Street (former Hindenburgstrasse)

Hindenburg was born in Posen, Prussia, the son of Prussian junker Hans Robert Ludwig von Beneckendorff und von Hindenburg (1816–1902) and his wife Luise Schwickart (1825–1893), the daughter of physician Karl Ludwig Schwickart and wife Julie Moennich. His paternal grandparents were Otto Ludwig Fady von Beneckendorff und von Hindenburg (1778–1855), through whom he was remotely descended from the illegitimate daughter of Count Heinrich VI of Waldeck, and his wife Eleonore von Brederfady (d. 1863). Hindenburg’s younger brothers and sister were Otto (b. 1849), Ida (b. 1851) and Bernhard (b. 1859). His family was all Lutheran Protestants in the Evangelical Church of Prussia, which since 1817 included both Calvinist and Lutheran parishioners.

Paul von Hindenburg as a cadet in Wahlstatt (1860)

Paul was proud of his family and could trace his ancestors back to 1289. The dual surname was adopted in 1789 to secure an inheritance and appeared in formal documents, but in everyday life, they were von Beneckendorffs. True to family tradition, his father supported his family as an infantry officer; he retired as a major. In the summer, they visited his grandfather at the Hindenburg estate of Neudeck in East Prussia. At age 11, Paul entered the Cadet Corps School at Wahlstatt (now Legnickie Pole, Poland).At 16, he was transferred to the School in Berlin, and, at 18, he served as a page to the widow of King Frederick William IV of Prussia. Graduates entering the army were presented to King William I, who asked for their father’s name and rank. He became a second lieutenant in the Third Regiment of Foot Guards.

In the Prussian Army

Hindenburg as a lieutenant in the 3rd Garderegiment in 1870[clarification needed]

Action in two wars

When the Austro-Prussian War of 1866 broke out, Hindenburg wrote to his parents: ‘I rejoice in this bright-coloured future. For the soldier war is the normal state of things[…]If I fall, it is the most honorable and beautiful death.’ During the decisive Battle of Königgrätz, he was briefly knocked unconscious by a bullet that pierced his helmet and creased the top of his skull. Quickly regaining his senses, he wrapped his head in a towel and resumed leading his detachment, winning a decoration. He was a battalion adjutant when the Franco-Prussian War (1870–71) broke out. After weeks of marching, the Guards attacked the village of Saint Privat (near Metz). Climbing a gentle slope, they came under heavy fire from the superior French rifles. After four hours the Prussian artillery came up to blast the French lines while the infantry, filled with the “holy lust of battle”, swept through the French lines. His regiment suffered 1096 casualties, and he became a regimental adjutant. The Guards were spectators at the Battle of Sedan and for the following months sat in the siege lines surrounding Paris. He was his regiment’s elected representative at the Palace of Versailles when the German Empire was proclaimed on 18 January 1871; at 1.98m (6 feet 6 inches) tall with a muscular frame and striking blue eyes, he was an impressive figure. After the French surrender, he watched from afar the suppression of the Paris Commune.

General Staff

Hindenburg became a major general of the General Staff in 1897.

In 1873, he passed the highly competitive entrance examination for admission to the Kriegsakademie in Berlin. After three years of study, his grades were high enough for an appointment with the General Staff. He was promoted to captain in 1878 and assigned to the staff of the II Corps. He married the intelligent and accomplished Gertrud von Sperling (1860–1921), daughter of General Oskar von Sperling, in 1879. The couple would have two daughters, Irmengard Pauline (1880) and Annemaria (1891), and one son, Oskar (1883). Next, he commanded an infantry company, in which his men were ethnic Poles.

He was transferred in 1885 to the General Staff and was promoted to major. His section was led by Count Alfred von Schlieffen, a student of encirclement battles like Cannae, whose Schlieffen Plan proposed to pocket the French Army. For five years Hindenburg also taught tactics at the Kriegsakademie. At the maneuvers of 1885, he met the future Kaiser Wilhelm II; they met again at the next year’s war game in which Hindenburg commanded the “Russian army“. He learned the topography of the lakes and sand barrens of East Prussia during the annual Great General Staff’s ride in 1888. The following year, he moved to the War Ministry, to write the field service regulations on field-engineering and on the use of heavy artillery in field engagements; both were used during the First World War. He became a lieutenant colonel in 1891, and, two years later, was promoted to colonel, commanding an infantry regiment. He became chief of staff of the VIII Corps in 1896.

Field commands and retirement

Hindenburg became a major-general (equivalent to a British and US brigadier general) in 1897, and in 1900 he was promoted to lieutenant general (equivalent to major-general) and received command of the 28th Infantry Division. Five years later he was made commander of the IV Corps based in Magdeburg as a General of the Infantry (lieutenant-general; the German equivalent to four-star rank was Colonel-General). The annual maneuvers taught him how to maneuver a large force; in 1908 he defeated a corps commanded by the Kaiser.Schlieffen recommended him as Chief of the General Staff in 1909, but he lost out to Helmuth von Moltke. He retired in 1911 “to make way for younger men”. He had been in the army for 46 years, including 14 years in General Staff positions. During his career, Hindenburg did not have political ambitions and remained a staunch monarchist.

World War I

1914

Assumption of command in East Prussia

Field Marshal Hindenburg in 1914

When WWI broke out, Hindenburg was retired in Hannover. On 22 August, due to the purge of German command following Russian success in East Prussia, he was selected by the War Cabinet and the German Supreme Army Command (Oberste Heeresleitung, OHL) to assume command of the German Eighth Army in East Prussia, with General Erich Ludendorff as his chief of staff. After the Eighth Army had been defeated by the Russian 1st Army at Gumbinnen, it had found itself in danger of encirclement as the Russian 2nd Army under General Alexander Samsonov advanced from the south towards the Vistula River. Momentarily panicked, Eighth Army commander Maximilian von Prittwitz notified OHL of his intent to withdraw his forces into Western Prussia. The Chief of the German General StaffGeneraloberst Helmuth von Moltke, responded by relieving Prittwitz and replacing him with Hindenburg.

Tannenberg

Upon arriving at Marienburg on 23 August, Hindenburg and Ludendorff were met by members of the 8th Army’s staff led by Lieutenant Colonel Max Hoffmann, an expert on the Russian army. Hoffman informed them of his plans to shift part of the 8th Army south to attack the exposed left flank of the advancing Russian Second Army. Agreeing with Hoffman’s strategy, Hindenburg authorized Ludendorff to transfer most of the 8th Army south while leaving only two cavalry brigades to face the Russian First Army in the north. In Hindenburg’s words the line of soldiers defending Germany’s border was “thin, but not weak”, because the men were defending their homes. If pushed too hard by the Second Army, he believed they would cede ground only gradually as German reinforcements continued to mass on the invading Russians’ flanks before ultimately encircling and annihilating them. On the eve of the ensuing battle, Hindenburg reportedly strolled close to the decaying walls of the fortress of the Knights of Prussia, recalling how the Knights of Prussia were defeated by the Slavs in 1410 at nearby Tannenberg.

Depiction of Hindenburg and Erich Ludendorff at the battle of Tannenberg (painting by Hugo Vogel)

On the night of 25 August, Hindenburg told his staff, “Gentlemen, our preparations are so well in hand that we can sleep soundly tonight”. On the day of the battle, Hindenburg reportedly watched from a hilltop as his forces’ weak center gradually gave ground until the sudden roar of German guns to his right heralded the surprise attack on the Russians’ flanks. Ultimately, the Battle of Tannenberg resulted in the destruction of the Russian 2nd Army, with 92,000 Russians captured together with four hundred guns, while German casualties numbered only 14,000. According to British field marshal Edmund Ironside it was the “greatest defeat suffered by any of the combatants during the war”. Recognizing the victory’s propaganda value, Hindenburg suggested naming the battle “Tannenberg” as a way of “avenging” the defeat inflicted on the Order of the Teutonic Knights by the Polish and Lithuanian knights in 1410, even though it was fought nowhere near the field of Tannenberg.

After this decisive victory, Hindenburg re-positioned the Eighth Army to face the Russian First Army. Hindenburg’s tactics spurned head-on attacks all along the front in favor of schwerpunkte: sharp, localized hammer blows. Two schwerpunkte struck in the First Battle of the Masurian Lakes. Two columns drove east from these breakthrough points to pocket the Russians led by General Paul von Rennenkampf, who managed to retreat 100 km (62 mi) with heavy losses. In the first six weeks of the war the Russians had lost more than 310,000 men. Eight hundred thousand refugees were able to return to their East Prussian homes, thanks to victories that strikingly contrasted with the bloody deadlock of the Western Front following the failure of the Schlieffen Plan.

Partnership with Ludendorff

Erich Ludendorff, Hindenburg’s chief of staff on the Eastern Front and partner throughout the war

The Hindenburg-Ludendorff duo’s successful performance on the Eastern Front in 1914 marked the beginning of a military and political partnership that lasted until the end of the war. As Hindenburg wrote to the Kaiser a few months later: “[Ludendorff] has become my faithful adviser and a friend who has my complete confidence and cannot be replaced by anyone.” Despite their strikingly dissimilar temperaments, the older general’s calm decisiveness proved to be an outstanding fit for Ludendorff’s energy and tactical ingenuity. Ludendorff’s nerves twice drove him to consider changing their plans for Tannenberg at the last minute; both times Hindenburg talked to him privately and his confidence wavered no further.

Defending Silesia

On the east bank of the Vistula in Poland the Russians were mobilizing new armies which were shielded from attack by the river; once assembled they would cross the river to march west into Silesia. To counter the Russians’ pending invasion of Silesia, Hindenburg advanced into Poland and occupied the west bank of the Vistula opposite from where Russian forces were mobilizing. He set up headquarters at Posen in West Prussia, accompanied by Ludendorff and Hoffmann.When the Russians attempted to cross the Vistula, the German forces under his command held firm, but the Russians were able to cross into the Austro-Hungarian sector to the south. Hindenburg retreated and destroyed all railways and bridges so that the Russians would be unable to advance beyond 120 km (75 mi) west of their railheads—well short of the German frontier.

On 1 November 1914 Hindenburg was appointed Ober Ost (commander in the east) and was promoted to field marshal. To meet the Russians’ renewed push into Silesia, Hindenburg moved the Ninth Army by rail north to Thorn and reinforced it with two corps from the Eighth Army. On 11 November, in a raging snowstorm, his forces surprised the Russian flank in the fierce Battle of Łódź, which ended the immediate Russian threat to Silesia and also captured Poland’s second largest city.

1915

Disagreements with Falkenhayn

General Erich von Falkenhayn, Chief of Germany’s Great General Staff (1914–1916)

Hindenburg argued that the still miserably equipped Russians—some only carried spears—in the huge Polish salient were in a trap in which they could be snared in a cauldron by a southward pincer from East Prussia and a northward pincer from Galicia, using motor vehicles for speed, even though the Russians outnumbered the Germans by three to one. From Hindenburg’s point of view, such an overwhelming triumph could end the war in the Eastern FrontErich von Falkenhayn, the Chief of Germany’s Great General Staff, rejected his plan as a pipe dream. Nevertheless, urged on by Ludendorff and Hoffman, Hindenburg spent the winter fighting for his strategy by badgering the Kaiser while his press officer recruited notables like the Kaiserin and the Crown Prince to “stab the Kaiser in the back”. The Kaiser compromised by keeping Falkenhayn in supreme command but replacing him as Prussian war minister. In retaliation, Falkenhayn reassigned some of Hindenburg’s forces to a new army group under Prince Leopold of Bavaria and transferred Ludendorff to a new joint German and Austro-Hungarian Southern Army. Hindenburg and Ludendorff reacted by threatening to resign thereby resulting in Ludendorff’s reinstatement under Hindenburg’s command.

Counterattacks in East Prussia and Poland

Following his return, Ludendorff provided Hindenburg with a depressing evaluation of their allies’ army, which already had lost many of their professional officers[33] and had been driven out of much of the Kingdom of Galicia and Lodomeria, their part of what once had been Poland. Meanwhile, the Russians were inexorably pushing from Galicia toward Hungary through the Carpathian passes. Under orders from Falkenhayn to contain the resurgent Russians, Hindenburg mounted an unsuccessful attack in Poland with his Ninth Army as well as an offensive by the newly formed Tenth Army which made only local gains. Following these setbacks, he set up temporary headquarters at Insterburg, and made plans to eliminate the Russians’ remaining toehold in East Prussia by ensnaring them in a pincer movement between the Tenth Army in the north and Eighth Army in the south. The attack was launched on 7 February. Hindenburg’s forces encircled an entire corps and captured more than 100,000 men in the Second Battle of the Masurian Lakes.

Shortly thereafter, Hindenburg and Ludendorff played a key role in the Central Powers’ Gorlice–Tarnów Offensive. After the Austro-Hungarian fortress of Przemyśl fell on 23 March, Austria-Hungary’s high command pushed for a joint strike on the Russian right flank that could potentially drive their forces out of the Carpathians. Agreeing to the proposal, Falkenhayn moved OHL east to the castle of Pless while forming Army Group von Mackensen from a new German Eleventh Army and the Austro-Hungarian Fourth Army. As Field Marshal August von Mackensen broke through Russian lines between Gorlice and Tarnów, Hindenburg’s Ninth and Tenth Army launched diversionary attacks that threatened Riga in the north. In one of the war’s most successful cavalry actions, three cavalry divisions swept east into Courland, the barren, sandy region near the Baltic coast. The cavalry’s gains were held by Hindenburg’s new Nieman army, named after the river.

In June, the Supreme Army Command ordered Hindenburg to launch a Bug-Narew Offensive in Poland toward the Narew River north of Warsaw. Hindenburg created Army Group Gallwitz, named after its commander. Von Gallwitz was one of many able commanders selected by Hindenburg, who stayed at the new army’s headquarters to be available if needed. (When Berlin approved the new army group, it became Twelfth Army.) The army group broke through the Russian lines after a brief, but intense, bombardment directed by Lieutenant Colonel Georg Bruchmüller, an artillery genius recalled from medical retirement. One-third of the opposing Russian First Army were casualties in the first five hours. From then on Hindenburg often called on Bruchmüller. The Russians withdrew across the Narev River. However, steamroller frontal attacks cost dearly: by 20 August Gallwitz had lost 60,000 men.

Evacuation of Poland

The Emperor presents the Iron Cross to the Heroes of Novogeorgievsk (painting by Ernst Zimmer).

As the Russians withdrew from the Polish Salient, Falkenhayn insisted on pursuing them into Lithuania. However, Hindenburg and Ludendorff were dissatisfied with this plan. Hindenburg would later claim that he saw it as “a pursuit in which the pursuer gets more exhausted than the pursued”.

On 1 June, Hindenburg’s Nieman and Tenth Armies spearheaded attacks into Courland in an attempt to pocket the defenders. Ultimately, this plan was foiled by the prudent commander of the Fifth Russian Army who defied orders by withdrawing into defensible positions shielding Riga.

Despite the setback in Latvia, Hindenburg, and Ludendorff continued to rack up victories on the Eastern Front. In August, the Germans stormed the Novogeorgievsk fortress. Numerous Russian sources call the fall of Novogeorgievsk the most shameful page in the history of the Russian Imperial army. The German Tenth Army besieged Kovno, a Lithuanian city on the Nieman River defended by a circle of forts. It fell on 17 August, along with 1,300 guns and almost 1 million shells. On 5 August his forces were consolidated into Army Group Hindenburg, which took the city of Grodno after bitter street fighting but could not trap the retreating defenders because the rail lines lacked the capacity to bring up the needed men. They occupied Vilnius on 18 September, then halted on ground favorable for a defensive line. On 6 August, German troops under Hindenburg used chlorine gas against Russian troops defending Osowiec Fortress. The Russians demolished much of Osowiec and withdrew on 18 August.

In October, Hindenburg moved headquarters to Kovno. They were responsible for 108,800 km2 (42,000 mi2) of conquered Russian territory, which was home to three million people and became known as Ober Ost. The troops built fortifications on the eastern border while Ludendorff “with his ruthless energy” headed the civil government, using forced labor to repair the war damages and to dispatch useful products, like hogs, to Germany. A Hindenburg son-in-law, who was a reserve officer and a legal expert, joined the staff to write a new legal code. Baltic Germans who owned vast estates feted Hindenburg and he hunted their game preserves.

Hindenburg would later judge German operations in 1915 to be “unsatisfactory”. In his memoirs, he recounted that “[t]he Russian bear had escaped our clutches” and abandoning the Polish salient had shortened their lines substantially. Conversely, victorious Falkenhayn believed that “The Russian Army has been so weakened by the blows it has suffered that Russia need not be seriously considered a danger in the foreseeable future”. The Russians replaced their experienced supreme commander, Grand Duke Nicholas Nikolaevich, a man whose skill Hindenburg held in high regard, with the Tsar.

1916

Brusilov Offensive

Main article: Brusilov Offensive

Hindenburg in 1916

In the spring of 1916, the Central Powers experienced a military catastrophe in the East that left Germany bearing much of the war effort until the end of hostilities. On 4 June, the Russian Army began a massive offensive along 480 km (300 mi) of the southwestern front in present-day western Ukraine. In the ensuing onslaught, four armies commanded by General Aleksei Brusilov overwhelmed entrenchments that the Austro-Hungarians long regarded as impregnable. Probing assault troops located three weak spots which then were struck in force. In nine days they captured more than 200,000 men and 200 guns and pushed into the open country.

Under Hindenburg’s command, Ober Ost desperately shored up weak points with soldiers stripped from less threatened positions. Ludendorff was so distraught on the phone to OHL that General Wilhelm Groener (who directed the army’s railroads and had been a competitor with Ludendorff on the General Staff) was sent to evaluate his nerves, which were judged satisfactory. For a week the Russians kept attacking: they lost 80,000 men; the defenders 16,000. On 16 July the Russians attacked the German lines west of Riga but were ultimately thwarted. When looking back on the Russian offensive, Hindenburg admitted that another attack of such scale and ferocity would have left his forces “faced with the menace of a complete collapse.”

Commander of the Eastern Front

After having their strength decimated by the Russians in the Brusilov Offensive, the Austro-Hungarian forces submitted their Eastern Front forces to Hindenburg’s command on 27 July (except for Archduke Karl’s Army Group in southeast Galicia, in which General Hans von Seeckt was chief of staff). General von Eichhorn took over Army Group Hindenburg, while Hindenburg and Ludendorff, on a staff train equipped with the most advanced communication apparatus, visited their new forces. At threatened points, they formed mixed German and Austro-Hungarian units while other Austro-Hungarian formations were bolstered by a sprinkling of German officers. Officers were exchanged between the German and Austro-Hungarian armies for training. The derelict citadel of the Brest Fortress was refurbished as their headquarters. Their front was almost 1,000 km (620 mi) and their only reserves were a cavalry brigade plus some artillery and machine gunners.

Supreme Commander of the Central Powers

Hindenburg drawn by his friend Hugo Vogel

In the west, the Germans were hemorrhaging in the battles of Verdun and the Somme. Influential Army officers, led by the artillery expert Lieutenant Colonel Max Bauer, a friend of Ludendorff’s, lobbied against Falkenhayn, deploring his futile steamroller at Verdun and his inflexible defense along the Somme, where he packed troops into the front-line to be battered by the hail of shells and sacked commanders who lost their front-line trench. German leaders contrasted Falkenhayn’s bludgeon with Hindenburg’s deft parrying. The tipping point came when Falkenhayn ordered a spoiling attack by Bulgaria on Entente lines in Macedonia, which failed with heavy losses. Thus emboldened, Romania declared war on Austro-Hungary on 27 August, adding 650,000 trained enemies who invaded Hungarian Transylvania. Falkenhayn had been adamant that Romania would remain neutral. During the Kaiser’s deliberations about who should command Falkenhayn said “Well, if the Herr Field Marshall has the desire and the courage to take the post”. Hindenburg replied “The desire, no, but the courage—yes”. Chancellor Bethmann Hollweg favored Hindenburg, supposing him amenable to moderate peace terms, mistaking his amiability as tractability and unaware that he was intent on enlarging Prussia.[citation needed]

Hindenburg was summoned to Pless on 29 August where he was named Chief of the Great General Staff and, by extension, the Supreme Army Command. Ludendorff demanded joint responsibility for all decisions”;Hindenburg did not demur. Henceforth, Ludendorff was entrusted with signing most orders, directives, and daily press reports. The eastern front was commanded by Leopold of Bavaria, with Hoffmann as his chief of staff. Hindenburg was also appointed the Supreme War Commander of the Central Powers, with nominal control over six million men. Until the end of the war, this arrangement formed the basis of Hindenburg’s leadership which would come to be known as the Third OHL.

The British were unimpressed: General Charteris, Haig’s intelligence chief, wrote to his wife “poor old Hindenburg is sixty-four years of age, and will not do very much.” Conversely, the German War Cabinet was impressed by his swift decision-making. They credited “Old Man Hindenburg” with ending the “Verdun folly” and setting in motion the “brilliant” conquest of Romania.

Hindenburg and Ludendorff visited the Western Front in September, meeting the Army commanders and their staffs as well as their leaders: Crown Prince Rupprecht of BavariaAlbrecht, Duke of Württemberg and Crown Prince Wilhelm of Prussia. Both crown princes, with Prussian chiefs of staff, commanded Army Groups. Rupprecht and Albrecht were presented with field marshal’s batons. Hindenburg told them that they must stand on the defensive until Romania was dealt with, meanwhile defensive tactics must be improved—ideas were welcome. A backup defensive line, which the Entente called the Hindenburg Line, would be constructed immediately. Ludendorff promised more arms. Rupprecht was delighted that two such competent men had “replaced the dilettante ‘Falkenhayn’.” Bauer was impressed that Hindenburg “saw everything only with the eye of the soldier.”

Bolstering defense

Hindenburg, Wilhelm IILudendorff, January 1917

Under Field Marshal Hindenburg’s leadership, the German Supreme Army Command issued a Textbook of Defensive Warfare that recommended fewer defenders in the front line relying on light machine guns. If pushed too hard, they were permitted to pull back. Front-line defenses were organized so that penetrating enemy forces found themselves cut down by machine gun fire and artillery from those who knew the ranges and location of their own strong points. Subsequently, the infantry would counterattack while the attacker’s artillery was blind because they were unsure where their own men were. A reserve division was positioned immediately behind the line, if it entered the battle it was commanded by the division whose position had been penetrated. (Mobile defense was also used in World War II.) Responsibilities were reassigned to implement the new tactics: front-line commanders took over reserves ordered into the battle and for flexibility, infantry platoons were subdivided into eight-man units under a noncom.

Field officers who visited headquarters often were invited to speak with Hindenburg, who inquired about their problems and recommendations. At this time he was especially curious about the eight-man units, which he regarded as “the greatest evidence of the confidence which we placed in the moral and mental powers of our army, down to its smallest unit.” Revised Infantry Field Regulations were published and taught to all ranks, including at a school for division commanders, where they maneuvered a practice division. A monthly periodical informed artillery officers about new developments. In the last months of 1916, the British battering along the Somme produced fewer German casualties. Overall, “In a fierce and obstinate conflict on the Somme, which lasted five months, the enemy pressed us back to a depth of about six miles on a stretch of nearly twenty-five miles Thirteen new divisions were created by reducing the number of men in infantry battalions, and divisions now had an artillery commander. Every regiment on the western front created an assault unit of stormtroopers selected from their fittest and most aggressive men. Lieutenant General Ernst von Höppner was given responsibility for both aerial and antiaircraft forces; the army’s vulnerable zeppelins went to the navy. Most cavalry regiments were dismounted and the artillery received their badly needed horses.

In October General Philippe Pétain began a series of limited attacks at Verdun, each starting with an intense bombardment coordinated by his artillery commander General Robert Nivelle. Then a double creeping barrage led the infantry into the shattered first German lines, where the attackers stopped to repel counterattacks. With repeated nibbles by mid-December 1916 the French retook all the ground the Germans had paid for so dearly. Nivelle was given command of the French Army.

Headquarters routine

Hindenburg’s day at OHL began at 09:00 when he and Ludendorff discussed the reports—usually quickly agreeing on what was to be done. Ludendorff would give their staff of about 40 officers their assignments, while Hindenburg walked for an hour or so, thinking or chatting with guests. After conferring again with Ludendorff, he heard reports from his departmental heads, met with visitors, and worked on correspondence. At noon Ludendorff gave the situation report to the Kaiser unless an important decision was required when Hindenburg took over. He lunched with his personal staff, which included a son-in-law who was an Army officer. Dinner at 20:00 was with the general staff officers of all ranks and guests—crowned heads, allied leaders, politicians, industrialists and scientists. They left the table to subdivide into informal chatting groups. At 21:30 Ludendorff announced that time was up and they returned to work. After a junior officer summarized the daily reports, he might confer with Ludendorff again before retiring.

The Hindenburg program

Under Hindenburg, the Third OHL set ambitious benchmarks for arms production in what became known as the Hindenburg Programme, which was directed from the War Office by General Groener. Major goals included a new light machine gun, updated artillery, and motor transport, but no tanks because they considered them too vulnerable to artillery. To increase output they needed skilled workers. The army released a million men.For total war, the Supreme Army Command wanted all German men and women from 15 to 60 enrolled for national service. Hindenburg also wanted the universities closed, except for medical training, so that empty places would not be filled by women. To swell the next generation of soldiers he wanted contraceptives banned and bachelors taxed.When a Polish army was being formed he wanted Jews excluded. Few of these ideas were adopted, because their political maneuvering was vigorous but inept, as Admiral Müller of the Military Cabinet observed “Old Hindenburg, like Ludendorff, is no politician, and the latter is at the same time a hothead.” For example, women were not included in the service law that ultimately passed, because in fact more women were already seeking employment than there were openings.

The extent of his command

Following the death of Austro-Hungarian emperor Franz Joseph on 21 November, Hindenburg met his successor Charles, who was frank about hoping to stop the fighting. Hindenburg’s Eastern Front ran south from the Baltic to the Black Sea through what now are the Baltic States, Ukraine, and Romania. In Italy, the line ran from the Swiss border on the west to the Adriatic east of Venice. The Macedonian front extended along the Greek border from the Adriatic to the Aegean. The line contested by the Russians and Ottomans between the Black and Caspian Sea ran along the heights of the Caucasus mountains. Hindenburg urged the Ottomans to pull their men off the heights before winter but they did not. In his memoirs, he would later allege this was because of their “policy of massacre of the Armenians“. The front in Palestine ran from the Mediterranean to the southern end of the Dead Sea, and the defenders of Baghdad had a flank on the Tigris River. The Western Front ran southward from Belgium until near Laon, where it turned east to pass Verdun before again turning south to end at the Swiss Border. The remaining German enclaves in Africa were beyond his reach; an attempt to resupply them by dirigible failed. The Central Powers were surrounded and outnumbered.

1917

Arms buildup and unrestricted submarine warfare

Field Marshal Hindenburg and Gen. Ludendorff in 1917. Their partnership formed the core of a dictatorship that dominated Germany for the rest of the war.

By the second quarter of 1917, Hindenburg and Ludendorff were able to assemble 680,000 more men in 53 new divisions[70] and provide them with an adequate supply of new light machine guns. Field guns were increased from 5,300 to 6,700 and heavies from 3,700 to 4,340. They tried to foster fighting spirit by “patriotic instruction” with lectures and films[71] to “ensure that a fight is kept up against all agitators, croakers and weaklings”.[72] Meanwhile, to mitigate the risk of being attacked before their buildup was complete, Germany’s new military leadership waged unrestricted submarine warfare on allied shipping, which they claimed would defeat the British in six months. Chancellor Bethmann Hollweg and his allies expressed opposition to this policy, not wanting to bring the United States and other neutrals into the war. After securing the Dutch and Danish borders, Hindenburg announced that unrestricted submarine warfare was imperative and Ludendorff added his voice. On 9 January the chancellor was forced to bow to their unsound military judgments.[citation needed]

OHL moved west to the pleasant spa town of Bad Kreuznach in southwest Germany, which was on a main rail line. The Kaiser’s quarters were in the spa building, staff offices were in the orange court, and the others lived in the hotel buildings. In February a third Army Group was formed on the Western Front to cover the front in Alsace-Lorraine, commanded by Archduke Albrecht of Württemberg. Some effective divisions from the east were exchanged for less competent divisions from the west. Since their disasters of the previous year, the Russian infantry had shown no fight and in March the revolution erupted in Russia. Shunning opportunity, the Central Powers stayed put; Hindenburg feared that invaders would resurrect the heroic resistance of 1812.[citation needed]

The great withdrawal and defending the Western Front

[edit]

On the Western Front, the Third OHL deduced the German Army’s huge salient between the valley of the Somme and Laon obviously was vulnerable to a pincer attack, which indeed the French were planning. The new Hindenburg line ran across its base. Subsequently, On 16 March, Hindenburg authorized Operation Alberich whereby German forces were ordered to move out all able-bodied inhabitants and portable possessions to this line. In the process, they destroyed every building, leveled all roads and bridges, cut down every tree, fouled every well, and burned every combustible. In 39 days the Germans withdrew from a 1000 mi2 (2,590 km2) area, more ground than they had lost to all Allied offensives since 1914.[73] The cautiously following Allies also had to cope with booby traps, some exploding a month later. The new German front called the Hindenburg line was 42 km (26 mi) shorter freeing-up 14 German divisions.[citation needed]

On 9 April, the British attacked at Arras and overtook two German lines while occupying part of a third as the Canadians swept the Germans completely off the Vimy Ridge. When the excitable Ludendorff became distraught over such developments, Hindenburg reportedly calmed his First Quartermaster-General by “pressing his hand” and assuring him, “We have lived through more critical times than today together.[74] Ultimately, the British tried to exploit their opening with a futile cavalry charge but did not press further. In the battle’s aftermath, the Third OHL discovered one reason behind the British attack’s success was that the Sixth Army commander, Ludwig von Falkenhausen, had failed to properly apply their instructions for a defense in depth by keeping reserve troops too far back from the front lines.[75][76] As a result of this failure, Falkenhausen along with several staff officers were stripped of their command.[77]

The Eastern Front

[edit]

After the Romanov dynasty’s fall from power, Russia remained at war under the new revolutionary government led by Alexander Kerensky. In the Kerensky Offensive launched on 1 July, the Russian army pushed Austro-Hungarian forces in Galicia on 1 July. In order to counter this success, six German divisions mounted a counterattack on 18 July that tore a hole through the Russian front through which they sliced southward toward Tarnopol. The ensuing German advance threatened to encircle the Russian attackers, thereby causing them to retreat. At the end of August, the advancing Central Powers stopped at the frontier of Moldavia. To keep up the pressure and to seize ground he intended to keep, Hindenburg shifted north to the heavily fortified city of Riga (today in Latvia) which has the broad Dvina River as a moat. On 1 September the Eighth Army, led by Oskar von Hutier, attacked; Bruchmüller’s bombardment, which included gas and smoke shells, drove the defenders from the far bank east of the city, the Germans crossed in barges and then bridged the river, immediately pressing forward to the Baltic coast, pocketing the defenders of the Riga salient. Next, a joint operation with the navy seized Oesel and two smaller islands in the Gulf of Riga. The Bolshevik revolution took Russia out of the war, and an armistice was signed on 16 December.

The Reichstag peace resolution

Kaiser Wilhelm II and Hindenburg

Hindenburg detested Chancellor Bethmann Hollweg for arguing against unrestricted submarine warfare. Then in July, the Reichstag debated a resolution for peace without “annexations or indemnities”. Colonel Bauer and the Crown Prince hurried to Berlin to block the move. The Minister of War urged Hindenburg and Ludendorff to join them, but when they arrived the Kaiser told them that “there could be no justification for their presence in Berlin”. They should “return in haste to Headquarters where they certainly would be much better occupied.”In a letter to the Emperor dated 12 July 1917, Ludendorff threatened to resign, and Hindenburg joined in the ultimatum. The Kaiser declined to accept. By then the majority parties in the Reichstag saw Bethmann Hollweg as an unacceptable negotiator for peace because he had been chancellor too long and was too weak in his dealings with the Supreme Army Command. The crisis was resolved when Bethmann Hollweg voluntarily resigned. Ludendorff and Bauer wanted to replace both the Kaiser and chancellor with a dictator, but Hindenburg would not agree. On 19 July, the Reichstag passed the resolution calling for a peace of understanding without “territorial acquisitions achieved by force and violations of political, economic or financial integrity”, which the new chancellor Georg Michaelis agreed to “interpret”.

The resolution became advantageous in August when Pope Benedict XV called for peace. The German response cited the resolution to finesse specific questions like those about the future of Belgium. The industrialists opposed Groener’s advocacy of an excess profits tax and insistence that workers take a part in company management. Ludendorff relieved Groener by telegram and sent him off to command a division.[citation needed]

Hindenburg’s 70th birthday was celebrated lavishly all over Germany, 2 October was a public holiday, an honor that until then had been reserved only for the Kaiser. Hindenburg published a birthday manifesto, which ended with the words:

With God’s help our German strength has withstood the tremendous attack of our enemies, because we were one, because each gave his all gladly. So it must stay to the end. ‘Now thank we all our God’ on the bloody battlefield! Take no thought for what is to be after the war! This only brings despondency into our ranks and strengthens the hopes of the enemy. Trust that Germany will achieve what she needs to stand there safe for all time, trust that the German oak will be given air and light for its free growth. Muscles tensed, nerves steeled, eyes front! We see before us the aim: Germany honored, free, and great! God will be with us to the end!”

Victory in Italy

Bavarian mountain warfare expert von Dellmensingen was sent to assess the Austro-Hungarian defenses in Italy, which he found poor. Then he scouted for a site from which an attack could be mounted against the Italians. Hindenburg created a new Fourteenth Army with ten Austro-Hungarian and seven German divisions and enough airplanes to control the air, commanded by Otto von Below. The attackers slipped undetected into the mountains opposite to the opening of the Soča valley. The attack began during the night when the defender’s trenches in the valley were abruptly shrouded in a dense cloud of poison gas released from 894 canisters fired simultaneously from simple mortars. The defenders fled before their masks would fail. The artillery opened fire several hours later, hitting the Italian reinforcements hastening up to fill the gap. The attackers swept over the almost empty defenses and marched through the pass, while mountain troops cleared the heights on either side. The Italians fled west, too fast to be cut off. Entente divisions were rushed to Italy to stem the retreat by holding a line on the Piave River. Below’s Army was dissolved and the German divisions returned to the Western Front, where in October Pétain had directed a successful limited objective attack in which six days of carefully planned bombardment left crater-free pathways for 68 tanks to lead the infantry forward on the Lassaux plateau south of Laon, which forced the Germans off of the entire ridge—the French Army had recovered.

Treaty of Brest-Litovsk

In the negotiations with Soviet Russia, Hindenburg wanted to retain control of all Russian territory that the Central Powers occupied, with German grand dukes ruling Courland and Lithuania, as well as a large slice of Poland. Their Polish plan was opposed by Foreign Minister Richard von Kühlmann, who encouraged the Kaiser to listen to the views of Max Hoffmann, chief of staff on the Eastern Front. Hoffmann demurred but when ordered argued that it would be a mistake to bring so many Slavs into Germany, when only a small slice of Poland was needed to improve defenses. Ludendorff was outraged that the Kaiser had consulted a subordinate, while Hindenburg complained that the Kaiser “disregards our opinion in a matter of vital importance.” The Kaiser backed off, but would not approve Ludendorff’s order removing Hoffmann, who is not even mentioned in Hindenburg’s memoir. When the Soviets refused the terms offered at Brest-Litovsk the Germans repudiated the armistice and in a week occupied the Baltic statesBelarus and Ukraine, which had signed the treaty as a separate entity. Now the Russians signed also. Hindenburg helped to force Kühlmann out in July 1918.[citation needed]

1918

In January more than half a million workers went on strike; among their demands was a peace without annexations. The strike collapsed when its leaders were arrested, the labor press suppressed, strikers in the reserve called for active duty, and seven great industrial concern taken under military control, which put their workers under martial law. On 16 January Hindenburg demanded the replacement of Count von Valentini, the chief of the Civil Cabinet. The Kaiser bridled, responding “I do not need your parental advice”, but nonetheless fired his old friend. The Germans were unable to tender a plausible peace offer because OHL insisted on controlling Belgium and retaining the French coalfields. All of the Central Powers’ cities were on the brink of starvation and their armies were on short rations. Hindenburg realized that “empty stomachs prejudiced all higher impulses and tended to make men indifferent.” He blamed his allies’ hunger on poor organization and transportation, not realizing that the Germans would have enough to eat if they collected their harvest efficiently and rationed its distribution effectively.

Opting for a decision in the west

Map of the Michael offensive showing in red the section of the British front that was not assaulted frontally; its defenders were to be encircled by the attackers on their flanks.[90]

German troops were in Finland, the Baltics, Poland, Belarus, Ukraine, much of Romania, the Crimea, and in a salient east of Ukraine extending east almost to the Volga and south into Georgia and Armenia. Hundreds of thousands of men were needed to hold and police these conquests. More Germans were in Macedonia and in Palestine, where the British were driving north; Falkenhayn was replaced by Otto Liman von Sanders, who had led the defense of Gallipoli. All Hindenburg required was that these fronts stand firm while the Germans won in the west, where now they outnumbered their opponents. He firmly believed that his opponents could be crushed by battlefield defeats regardless of their far superior resources.

Offensive tactics were tailored to the defense. Their opponents were adopting defense in depth. He would attack the British because they were less skillful than the French. The crucial blow would be in Flanders, along the River Lys, where the line was held by the Portuguese Army. However, winter mud prevented action there until April. Consequently, their first attack, named Michael, was on the southern part of the British line, at a projecting British salient near Saint-Quentin. Schwerpunkts would hit on either side of the salient’s apex to pocket its defenders, the V Corps, as an overwhelming display of German power.

Additional troops and skilled commanders, like von Hutier, were shifted from the east. Army Group von Gallwitz was formed in the west on 1 February. One quarter of the western divisions were designated for attack; to counter the elastic defense, during the winter each of them attended a four-week course on infiltration tactics. Storm troops would slip through weak points in the front line and slice through the battle zone, bypassing strong points that would be mopped up by the mortars, flamethrowers, and manhandled field guns of the next wave. As always surprise was essential, so the artillery was slipped into attack positions at night, relying on camouflage for concealment; the British aerial photographers were allowed free rein before D-day. There would be no preliminary registration fire; the gunners were trained for map firing in schools established by Bruchmüller. In the short, intense bombardment each gun fired in a precise sequence, shifting back and forth between different targets, using many gas shells to keep defenders immersed in a toxic cloud. On D-day, the air force would establish air supremacy and strafe enemy strong points, and also update commanders on how far the attackers had penetrated. Signal lamps were used for messaging on the ground. Headquarters moved close to the front and as soon as possible would advance to pre-selected positions in newly occupied ground. OHL moved to Spa, Belgium while Hindenburg and Ludendorff were closer to the attack at Avesnes, France, which re-awoke his memories of occupied France 41 years before.

Breaking the trench stalemate

Operation Michael began on 21 March. The first day’s reports were inconclusive, but by day two the Germans knew they had broken through some of the enemy artillery lines. But the encirclement failed because British stoutness gave their V Corps time to slip out of the targeted salient. On day four, German forces moved on into the open country, and the Kaiser prematurely celebrated by awarding Hindenburg the Grand Cross of the Iron Cross, a medal first created for von Blücher. As usual, Hindenburg set objectives as the situation evolved. South of the salient, the Germans had almost destroyed the British Fifth Army, so they pushed west to cut between the French and British armies. However, they advanced too slowly through the broken terrain of the former Somme battlefields and the ground devastated when withdrawing the year before, and because troops stopped to loot food and clothing, and the Allies maintained a fluid defensive line, manned by troops brought up and supplied by rail and motor transport. Hindenburg hoped the Germans would get close enough to Amiens to bombard the railways with heavy artillery, but they were stopped just short, after having advanced a maximum of 65 km (40 mi). Hindenburg also hoped that civilian morale would crumble, because Paris was being shelled by naval guns mounted on rail carriages 120 km (75 mi) away, but he underestimated French resilience.

The Allied command was dismayed. French headquarters realized: “This much became clear from the terrible adventure, that our enemies were masters of a new method of warfare. … What was even more serious was that it was perceived that the enemy’s power was due to a thing that cannot be improvised, the training of officers and men.”

Prolonging Michael with the drive west delayed and weakened the attack in Flanders. Again the Germans broke through, smashing the Portuguese defenders and forcing the British from all of the ground they had paid so dearly for in 1917. However, French support enabled the British to save Hazebrouck, the rail junction that was the German goal. To draw the French reserves away from Flanders, the next attack was along the Aisne River where Nivelle had attacked the year before. Their success was dazzling. The defender’s front was immersed in a gas cloud fired from simple mortars. Within hours the Germans had reoccupied all the ground the French had taken by weeks of grinding, and they swept south through Champagne until they halted for resupply at the Marne River.

However, the Germans had lost 977,555 of their best men between March and the end of July, while Allied ranks were swelling with Americans. Their dwindling stock of horses were on the verge of starvation, and the ragged troops thought continually of food. One of the most effective propaganda handbills, which the British showered on the German lines, listed the rations received by prisoners of war. The German troops resented their officers’ better rations and reports of the ample meals at headquarters; in his memoirs, Ludendorff devotes six pages to defending officer’s rations and perks.After an attack, the survivors needed at least six weeks to recuperate, but now crack divisions were recommitted much sooner. Tens of thousands of men were skulking behind the lines. Determined to win, Hindenburg decided to expand the salient pointing toward Paris to strip more defenders from Flanders. The attack on Gouraud‘s French Fourth Army followed the now familiar scenario, but was met by a deceptive elastic defense and was decisively repelled at the French main line of resistance. Hindenburg still intended to make a decisive attack in Flanders, but before the Germans could strike, the French and Americans, led by light tanks, smashed through the right flank of the German salient on the Marne. The German defense was halfhearted; they had lost. Hindenburg went on the defensive. The Germans withdrew one by one from the salients created by their victories, evacuating the wounded and supplies, and retiring to shortened lines. Hindenburg hoped to hold a line until their enemies were ready to bargain.

Ludendorff’s breakdown

Hindenburg and Ludendorff in 1918

After the retreat from the Marne, Ludendorff became distraught, shrieking orders and often in tears. At dinner on 19 July, he responded to a suggestion of Hindenburg’s by shouting “I have already told you that is impossible”—Hindenburg led him from the room. On 8 August, the British completely surprised the Germans with a well-coordinated attack at Amiens, breaking well into the German lines. Most disquieting was that some German commanders surrendered their units and that reserves arriving at the front were taunted for prolonging the war. For Ludendorff, Amiens was the “black day in the history of the German Army.” Bauer and others wanted Ludendorff replaced, but Hindenburg stuck by his friend; he knew that “Many a time has the soldier’s calling exhausted strong characters.” A sympathetic physician who was Ludendorff’s friend persuaded him to leave headquarters temporarily to recuperate. (His breakdown is not mentioned in Hindenburg’s or his own memoirs.) On 12 August, Army Group von Boehn was created to firm up the defenses in the Somme sector. On 29 September Hindenburg and Ludendorff told the incredulous Kaiser that the war was lost and that they must have an immediate armistice.

Defeat and revolution

A new chancellor, Prince Maximilian of Baden, opened negotiations with President Woodrow Wilson, who would deal only with a democratic Germany. Prince Max told the Kaiser that he would resign unless Ludendorff was dismissed, but that Hindenburg was indispensable to hold the army together. On 26 October the Kaiser slated Ludendorff before curtly accepting his resignation—then rejecting Hindenburg’s. Afterwards, Ludendorff refused to share Hindenburg’s limousine. Colonel Bauer was retired. Hindenburg promptly replaced Ludendorff with Groener, the chief of staff of Army Group Kiev, which was assisting a breakaway Ukrainian State to fend off the Bolsheviks while receiving food and oil.

The Germans were losing their allies. In June the Austro-Hungarians in Italy attacked the Entente lines along the Piave River but were repelled decisively. On 24 October the Italians crossed the river in the Battle of Vittorio Veneto. After a few days of resolute resistance the defense collapsed, weakened by the defection of men from the empire’s subject nations and by starvation: the men in their Sixth Army had an average weight of 120 lb (54 kg). On 14 October, Austria-Hungary asked for an armistice in Italy, but the fighting went on. In September the Entente and their Greek allies attacked in Macedonia. The Bulgarians begged for more Germans to stiffen their troops, but Hindenburg had none to spare. Many Bulgarian soldiers deserted as they retreated toward home, opening the road to Constantinople. The Austro-Hungarians were pushed back in Serbia, Albania and Montenegro, and signed an armistice on 3 November. The Ottomans were overextended, trying to defend Syria while exploiting the Russian collapse to move into the Caucasus, despite Hindenburg’s urging them to defend what they had. The British and Arabs broke through in September, capturing Damascus. The Armistice of Mudros was signed on 30 October.

Woodrow Wilson’s 23 October diplomatic note to Germany had indirectly called for the Kaiser’s abdication when it stated that the United States would negotiate only with representatives of the German people, not the monarchy. Wilhelm, determined to lead the Army home in the event of disturbances in Berlin, refused to abdicate.A week later, Admiral Franz von Hipper and Admiral Reinhard Scheer without authorization made plans to dispatch the Imperial Fleet on a last battle against the British. Sailors in Kiel mutinied and set up workers’ and soldiers’ councils that spread quickly across Germany, sparking the German Revolution of 1918–1919. On 8 November, Hindenburg and the Kaiser met with 39 regimental officers at Spa. There he delivered a situation report and answered questions. Then Hindenburg left and Groener asked the officers to answer confidentially two questions about whether their troops would follow the Kaiser. The answers were decisive: the army would not. The Kaiser then agreed to abdicate without doing so at the time. In Berlin, however, Prince Max had already publicly announced the Kaiser’s abdication and his own resignation, and that the Social Democrat leader Friedrich Ebert, was the new chancellor. The Empire had crumbled all but bloodlessly. That evening Groener telephoned Ebert, whom he knew and trusted, to tell him that if the new government would fight Bolshevism and support the Army, then the Field Marshal would lead a disciplined army home. Hindenburg’s remaining in command bolstered the new government’s position.

The Hindenburg villa in Hanover

The withdrawal became more fraught when the armistice obliged all German troops to leave Belgium, France, and Alsace-Lorraine in 14 days and to be behind the Rhine in 30 days. Stragglers would become prisoners. When the seven men from the executive committee of the soldiers’ council formed at Spa arrived at OHL they were greeted politely by a lieutenant colonel, who acknowledged their leadership. When they broached the march home he took them to the map room, explaining allocation of roads, and scheduling unit departures, billeting, and feeding. They agreed that the existing staffs should make these arrangements. To oversee the withdrawals OHL transferred headquarters from Belgium to Kassel in Germany, unsure how their officers would be received by the revolutionaries. They were greeted by the chairman of the workers’ and soldiers’ councils who proclaimed “Hindenburg belongs to the German nation.” His staff intended to billet him in the Kaiser’s palace there, Wilhelmshöhe. Hindenburg refused because they did not have the Kaiser’s permission, instead settling into a humble inn, thereby pleasing both his monarchist staff and the revolutionary masses. In the west 1.25 million men and 500,000 horses were brought home in the time allotted.

Hindenburg did not want to involve the Army in the defense of the new government against their civil enemies. Instead the Army supported the independent Freikorps (modeled on formations used in the Napoleonic wars), supplying them with weapons and equipment. In February 1919, OHL moved east to Kolberg to mount an offensive against impinging Soviet troops, but they were restrained by the Allied occupation administration, which in May 1919 ordered all German troops in the east home. On 25 June 1919, Hindenburg retired to Hanover once again. He settled in a splendid new villa, which was a gift of the city, despite his admittedly having “lost the greatest war in history”.

Military reputation

“Victory comes from movement” was Schlieffen’s principle for war. Hindenburg expounded on Schlieffen’s ideas as an instructor and later applied them during World War I. By employing such tactics, retreats and mobile defenses commanded by Hindenburg proved effective, and his Schwerpunkt attacks broke through the trench barrier on the Western Front. However, they failed to produce decisive victories because penetrating forces proved too slow to capitalize on their breakthroughs.

Hindenburg has undergone a historical revalution: his teaching of tactics and years on the General Staff have been less emphasised while he is remembered as a commander in Ludendorff’s shadow. Winston Churchill in 1923, depicted Hindenburg as a figurehead awed by the mystique of the General Staff, concluding that “Ludendorff throughout appears as the uncontested master.” Parkinson stated that he is a “beloved figurehead”,while to Stallings he is “an old military booby”. These judgements stem from Ludendorff, who was famous during the war and immediately thereafter wrote his comprehensive memoir with himself center stage. Hindenburg’s less detailed memoir never disputed his colleague’s claims, military decisions were made collectively not individually, and it is less useful to historians because it was written for general readers. Ludendorff continued emphasising his preeminence in print, which Hindenburg never disputed publicly.

Others did though, the OHL officers who testified before the Reichstag committee investigating the collapse of 1918 agreed that Hindenburg was always in command. He managed by setting objectives and appointing capable people to do their jobs, for instance “giving full scope to the intellectual powers” of Ludendorff. These subordinates often felt he did little, even though he was setting the overall course. Ludendorff may have overrated himself, repressing repeated demonstrations that he lacked resilience essential to command. Postwar he displayed poor judgment and an attraction to unusual ideas, contrasting with his former commander’s adaptation to changing times.

Most of their conferences were in private, but on 26 July 1918 the chief of staff of the Seventh Army, Fritz von Lossberg traveled to OHL to request permission to withdraw to a better position 

Without knocking I entered Ludendorff’s office and found him loudly arguing with the field marshal. I assumed it was over the situation at the Seventh Army. In any case as soon as I entered the field marshall asked me to give my assessment of the situation at the Seventh Army. I described it in short terms and emphasized especially that based on my own observations I thought the condition of the troops was cause for serious concern. For the past few days the Seventh Army commanding general, the staff, and I had all been recommending a withdrawal from the increasingly untenable front lines. I told Hindenburg that I had come to Avesenes with the concurrence of the Seventh Army commanding general to secure such an order. The field marshall turned to Ludendorff, saying something to the effect of ‘Now Ludendorff, make sure that the order goes out immediately. ‘ He then left Ludendorff’s office rather upset.

— Lossberg

Hindenburg’s record as a commander starting in the field at Tannenberg, then leading four national armies, culminating with breaking the trench deadlock in the west, and then holding a defeated army together, is unmatched by other soldiers in World War I. However, military skill is only one component of the record: “… in general, the maladroit politics of Hindenburg and Ludendorff led directly to the collapse of 1918….”

German General WW1 Erich Georg Sabastian Anton von Falkenhayn

Erich Georg Sebastian Anton von Falkenhayn (11 September 1861 – 8 April 1922) was a German general who was the second Chief of the German General Staff of the First World War from September 1914 until 29 August 1916. Falkenhayn replaced General Helmuth von Moltke the Younger after his invasion of France was stopped at the First Battle of the Marne and was in turn removed on 29 August 1916 after the failure of his offensive strategy in the west at the Battle of Verdun, the opening of the Battle of the Somme, the Brusilov Offensive and the Romanian entry into the war. Having planned to win the war before 1917, the German army was reduced to hanging on.

Falkenhayn was given important field commands in Romania and Syria. His reputation as a war leader was attacked in Germany during and after the war, especially by the faction supporting Field Marshal Paul von Hindenburg. Falkenhayn held that Germany could not win the war by a decisive battle but would have to reach a compromise peace; his enemies said he lacked the resolve necessary to win a decisive victory. Falkenhayn’s relations with the Chancellor Theobald von Bethmann Hollweg were troubled and undercut Falkenhayn’s plans.

Early life

Falkenhayn was born in Burg Belchau, a village near Graudenz, now Białochowo in Poland, to Fedor von Falkenhayn (1814–1896) and Franziska von Falkenhayn, née von Rosenberg (1826–1888). His ancestors could be traced to 1504. His brother Arthur (1857–1929) became tutor of Crown Prince Wilhelm and another brother Eugen (1853–1934) became a Prussian General of Cavalry. His only sister Olga von Falkenhayn was the mother of Field Marshal Fedor von Bock.

Military career

Becoming a cadet at the age of 11, Falkenhayn joined the Army in 1880 as Second Lieutenant. He served as an infantry and staff officer. He became First Lieutenant in 1889 and Hauptmann (captain) in 1893, subsequently transferring to the topographical department of the German General Staff. He was seen as a capable, deliberate officer with an open mind. Between 1896 and 1903 Falkenhayn took a leave of absence and served Qing-Dynasty China as a military consultant and helped to establish some Chinese sea ports. In 1889 he returned to German service in the new Kiautschou Bay Leased Territory in China, serving in a Seebataillon (Marine Battalion) until March 1899, when he became a Major in the Army. He saw action during the Boxer Rebellion as a general staff officer of Alfred von Waldersee and spent time in Manchuria and Korea.

Service in Asia made Falkenhayn to be a favourite of the Kaiser and he became one of the military instructors of Crown Prince Wilhelm of Prussia. After his service in Asia, the army posted him to BrunswickMetz and Magdeburg as a battalion commander in the posted area. On 10 April 1906, Falkenhayn became a section chief of the German General Staff. In 1907, Falkenhayn became Chief of Staff of the XVI Corps. In 1908, Falkenhayn was promoted to Oberst (colonel). On 27 January 1911, Falkenhayn was appointed as the commander of the 4th Guards Regiment. On 20 February 1913, he became the chief of staff of the IV Corps and Generalmajor on 22 April 1912.[3] Before becoming Prussian Minister of War, he was posted to the General Staff for a year as the Supply department head of the General Staff. Despite being a department head, Falkenhayn did not play a significant role on the General Staff.

Prussian Minister of War (1913–1914)

On 8 July 1913 Falkenhayn became Prussian Minister of War, succeeding Josias von Heeringen, who was considered to be inactive. During the Zabern Affair, Falkenhayn, as the minister, was part of the conference to end the affair. During the July Crisis, he was at the meeting on 5 July 1914 when Germany announced to Austria-Hungary its support for war. Like most German military leaders, he did not expect a great European war but he soon embraced the idea and joined others in wanting Wilhelm II to declare war. He later noted in his diary, after a discussion with the Kaiser in the Neues Palais in Potsdam, “He makes confused speeches. The only thing that emerges clearly is that he no longer wants war, even if it means letting Austria down. I point out that he no longer has control over the situation”. Falkenhayn wanted early mobilisation since the Kaiser started to secure his palace; when the war began Falkenhayn viewed this with enthusiasm. He assured the Kaiser that the German Army was ready for the conflict. He told the chancellor, Theobald von Bethmann Hollweg that “Even if we perish over this, it will still have been worth it”.

Chief of Staff (1914–1916)

Falkenhayn succeeded Helmuth von Moltke the Younger, who was considered mentally unstable, as Chief of the Oberste Heeresleitung (the German General Staff) on 14 September 1914. Falkenhayn was 53 years old, making him the youngest man to become chief of staff. Falkenhayn continued in office as minister of war for another five months. Falkenhayn recommended Adolf Wild von Hohenborn as the new war minister; the Kaiser agreed with his recommendation, making Hohenborn the next war minister. Falkenhayn moved OHL to Mézières, to put OHL at the centre of the right wing of the German armies in the west and ordered the southern armies to dig in, part of the beginning of trench warfare.The responsibility of Falkenhayn increased when the Kaiser failed to decide a grand strategy. Falkenhayn did not want diplomatic interference in the course of war. For the first few weeks, lack of success led to widespread criticism. Falkenhayn recognized the pending failure of the Schlieffen-Moltke Plan and attempted to outflank the British and French in the Race to the Sea, a series of meeting engagements in northern France and Belgium, in which each side made reciprocal attempts to turn the other’s flank, until they reached the North Sea coast and ran out of room for manoeuvre.

In November 1914, Falkenhayn acknowledged that Germany would not be able to gain a decisive victory. He advocated a mild peace with the Russian Empire to Bethmann Hollweg, the better to concentrate against the French and British. Neither Bethmann Hollweg nor the generals on the Eastern Front, such as Paul von HindenburgErich Ludendorff or Max Hoffmann, supported the idea since they believed that negotiation with the Russian Empire was impossible. While Helmuth von Moltke the Younger and Hindenburg were highly critical of Falkenhayn and sought to have him dismissed, the Emperor continued to support him. Falkenhayn did not perceive the need to deploy troops on the Vistula, he favoured sending troops to East Prussia, where the Russians took advantage of the weakening 8th Army. A Breakthrough Army (Durchbruchsarmee) for an offensive down the Somme river valley, consisting of nine new divisions, was formed in the first quarter of 1915 but three divisions were not ready in time. The new army was transferred to the Eastern Front and was re-named the 11th Army. The army had success during the Second Battle of the Masurian Lakes but creating more new divisions was difficult because of the shortage of junior officers and equipment.

Falkenhayn found that the Die Fliegertruppen des deutschen Kaiserreiches (Imperial German Flying Corps, Die Fliegertruppe), needed to be expanded. Falkenhayn noticed that the scepticism of the Ministry of War to airships, made by Ferdinand von Zeppelin, was justified. He tried to use the airships and develop rapidly the air force. Wild von Hohenborn was appointed minister of war and on 20 January 1915, Falkenhayn was promoted to General der Infanterie. As the chief of staff, Falkenhayn had many enemies because of his strategic thinking but he had Franz Conrad von Hötzendorf, chief of staff of the Austro-Hungarian Army, as his uneasy ally. They differed on war aims; Hötzendorf wanting a war against Russia, Falkenhayn against France. Falkenhayn attempted to keep Italy out of the war but failed. Attacks on the Eastern front to support the Austrians, such as the Gorlice–Tarnów Offensive, caused the Russians to evacuate Russian Poland and then to retreat deeper into the Russian interior. On 8 September 1915, Falkenhayn signed a military convention with Conrad von Hötzendorf, which called for an immediate attack on Serbia. In the fall of 1915, Falkenhayn launched an attack against Serbia. Late in the year the favourable situation gave Falkenhayn hope to achieving peace in the east.

Falkenhayn in Romania in November 1915

Falkenhayn preferred to conduct an offensive strategy on the Western Front, while conducting a limited campaign in the east; he hoped that Russia could be persuaded to accept a separate peace. Hindenburg and Ludendorff opposed this policy and wanted the main offensive effort to be in the east. Falkenhayn tried to weaken the French and British with renewed attacks and unrestricted submarine warfare. According to Admiral Reinhard Scheer, Falkenhayn was an advocate of submarine warfare because countering Britain was an important war aim but this was opposed by Bethmann Hollweg. Falkenhayn conducted a battle of attrition, as claimed in his post-war memoirs, in the Battle of Verdun in early 1916. Falkenhayn argued to the Kaiser that the war would end by causing many casualties to the French Army using methods that limited German losses.

Falkenhayn hoped that the French would fight for Verdun, the gateway to France from the east. Verdun offered the Germans the advantages of their artillery firing from three sides into a large salient in the German lines, excellent German communications and Verdun being bisected by the Meuse, which made it difficult for the French to defend. He ordered the Crown Prince to feint in Verdun and annihilate the French armies, which would try to defend the city by sending more troops. Falkenhayn’s strategy backfired, the Crown Prince and his chief of staff, Konstantin Schmidt von Knobelsdorf disobeyed the order and tried to seize the city. French artillery on the west back of the Meuse began to inflict many casualties on the 5th Army.Because more than a quarter of a million soldiers during the battle eventually died, Falkenhayn was sometimes called “the Blood-Miller of Verdun”.

Contrary to Falkenhayn’s expectations, the French were able to limit casualties in the divisions sent to Verdun, General Philippe Pétain kept the divisions in front of Verdun until casualties reached 50 per cent of the infantry, and then relieved them. The procession of divisions back and forth was analogous to the operation of a “noria“, a type of water-wheel that continuously lifts water and empties it into a trough. On 27 August 1916 Falkenhayn received news that the Kingdom of Romania had declared war on Austria-Hungary. After the relative failure at Verdun, coupled with reverses on the Eastern Front (the Brusilov Offensive and the entry of Romania into the war), the beginning of the Anglo-French offensive on the Somme and the intrigues of Hindenburg and Ludendorff, Falkenhayn was replaced as chief of staff by Hindenburg on 29 August 1916.

Romania (1916–1917)

Main article: Romania during World War I

Falkenhayn then assumed command of the 9th Army in Transylvania (6 September 1916) and in August launched a joint offensive against Romania with August von Mackensen who attacked from Bulgaria, through the Dobruja. As the commander of the 9th Army, Falkenhayn settled his army in Brașov and deceived the Romanians into believing that there would be no offensives in western Romania. The 9th Army fought the Romanian First Army in Hațeg. After the battle, Falkenhayn joined with Austrian forces to surround the Romanian forces. Falkenhayn delayed the offensive against Romanian forces and as a result came into conflict with Archduke Karl of Austria, who would later become Charles I of Austria. He justified the postponement by pointing to the bad conditions of roads. Even with the conflict with the Austrian Army, in late 1916 and early 1917, Falkenhayn and Mackensen were able to drive the Romanian forces into Russia.

Palestine (1917–1918)

Main article: Sinai and Palestine campaign

Following his success in Romania in Brașov during mid-July 1917, Falkenhayn went to take military command of the Ottoman Yildirim Army Group (Heeresgruppe F [Army Group F]), which was being formed in Mesopotamia and at Aleppo. After long discussions with the Ottoman general staff, Falkenhayn was sent on 7 September 1917 as supreme commander of two Ottoman armies in Palestine, with the rank of Mushir (equivalent to field marshal) of the Ottoman Army. In the Sinai and Palestine Campaign, Falkenhayn failed to prevent the conquest of Jerusalem by the British Egyptian Expeditionary Force (General Edmund Allenby) in December 1917 and was replaced by Otto Liman von Sanders.[5] Falkenhayn is credited with avoiding a battle for the Old City of Jerusalem with its many holy sites, as well as with a crucial role in stopping the forced removal of the Jewish population of Palestine, which Governor Djemal Pasha had planned along the lines of the Armenian genocide.The evacuation of the population of Jerusalem during the harsh winter months had also been planned by Djemal Pasha and was thwarted by German officers including Falkenhayn.

Belarus (1918–1919)

In February 1918, Falkenhayn became commander of the 10th Army in Belarus. The unit carried out the occupation tasks in Belarus after Treaty of Brest-Litovsk. As an Army unit commander, he witnessed the end of the war in Belarus. In December 1918 he oversaw the withdrawal of the 10th Army to Germany. The formation disbanded in February 1919 and Falkenhayn retired from the army following the dissolution of his unit.

Retirement

In 1919, Falkenhayn retired from the army and withdrew to his estate, where he wrote his autobiography and several books on war and strategy. His war memoirs were translated into English as The German General staff and Its Critical Decisions, 1914–1916 (1919). With the benefit of hindsight, he remarked that the German declarations of war on Russia and France in 1914 were “justifiable but overly-hasty and unnecessary”.Falkenhayn died in 1922, at Schloss Lindstedt, near Potsdam and was buried in Potsdam.

Family life

In 1886, Falkenhayn married Ida Selkmann, with whom he had a son, Fritz Georg Adalbert von Falkenhayn (1890–1973), and a daughter, Erika Karola Olga von Falkenhayn (1904–1975), who married Henning von Tresckow (1901–1944), a general who participated in the 20 July plot to assassinate Hitler.

Assessment

Falkenhayn in many ways typified the Prussian generals; a militarist in the literal sense, he had undeniable political and military competence and showed contempt for democracy and the representative Reichstag. He addressed the Reichstag in 1914, saying, “Only through the fact that the Prussian army is removed by the constitution from the party struggle and the influence of ambitious party leaders has it become what it is: the secure defence of peace at home and abroad”. Militarily, Falkenhayn had a mixed record. His offensive at Verdun proved a strategic failure. During the campaign against Romania in 1916 Falkenhayn demonstrated considerable skill in command of the 9th Army, driving the Romanians from Transylvania, breaking through the Southern Carpathians and forcing the shattered Romanian forces north-east into Moldavia.

Winston Churchill considered him to be the ablest of the German generals in World War I. Trevor Dupuy also ranked him near the top of the German commanders, just below Hindenburg and Ludendorff. Robert Foley wrote that Germany’s enemies were far more able to apply a strategy of attrition, because they had greater amounts of manpower, industry and economic control over the world, resorting to many of the methods used by Falkenhayn in Russia in 1915 and France in 1916. As the cost of fighting the war increased, the war aims of the Entente expanded, to include the overthrow of the political elites of the Central Powers and the ability to dictate peace to a comprehensively defeated enemy, which was achieved by a strategy of attrition.

During his term as the Chief of the General Staff, one staff officer wrote that Falkenhayn had lacked decisiveness and foresight in the matters of organization and tactics. All sources portray Falkenhayn as a loyal, honest and punctilious friend and superior. His positive legacy is his conduct during the war in Palestine in 1917. As his biographer Holger Afflerbach wrote, “An inhuman excess against the Jews in Palestine was prevented only by Falkenhayn’s conduct, which against the background of the German history of the 20th century has a special meaning, and one that distinguishes Falkenhayn”.

WW1 The use of horses in the Great War

The use of horses in World War I marked a transitional period in the evolution of armed conflict. Cavalry units were initially considered essential offensive elements of a military force, but over the course of the war, the vulnerability of horses to modern machine gunmortar, and artillery fire reduced their utility on the battlefield. This paralleled the development of tanks, which ultimately replaced cavalry in shock tactics. While the perceived value of the horse in war changed dramatically, horses still played a significant role throughout the war.

All of the major combatants in World War I (1914–1918) began the conflict with cavalry forces. Imperial Germany stopped using them on the Western Front soon after the war began, but continued with limited use on the Eastern Front, well into the war. The Ottoman Empire used cavalry extensively during the war. On the Allied side, the United Kingdom used mounted infantry and cavalry charges throughout the war, but the United States used cavalry only briefly. Although not particularly successful on the Western Front, Allied cavalry had some success in the Middle Eastern theatre due to the open nature of the front, allowing a more traditional war of movement, in addition to the lower concentration of artillery and machine guns. Russia used cavalry forces on the Eastern Front but with limited success.

The military used horses mainly for logistical support; they were better than mechanized vehicles at traveling through deep mud and over rough terrain. Horses were used for reconnaissance and for carrying messengers as well as for pulling artillery, ambulances, and supply wagons. The presence of horses often increased morale among the soldiers at the front, but the animals contributed to disease and poor sanitation in camps, caused by their manure and carcasses. The value of horses and the increasing difficulty of replacing them were such that by 1917, some troops were told that the loss of a horse was of greater tactical concern than the loss of a human soldier. Ultimately, the blockade of Germany prevented the Central Powers from importing horses to replace those lost, which contributed to Germany’s defeat. By the end of the war, even the well-supplied US Army was short of horses.

Conditions were severe for horses at the front; they were killed by rifle and artillery fire, suffered from skin disorders among other diseases, and were injured by poison gas. Hundreds of thousands of horses died, and many more were treated at veterinary hospitals and sent back to the front. Procuring fodder was a major issue, and Germany lost many horses to starvation. Several memorials have been erected to commemorate the horses that died. Artists, including Alfred Munnings, extensively documented the work of horses in the war, and horses were featured in war poetry. Novels, plays and documentaries have also featured the horses of World War I.

Cavalry

Members of the Royal Scots Greys near Brimeux, France, in 1918

Many British tacticians outside of the cavalry units realized before the war that advances in technology meant that the era of mounted warfare was coming to an end. However, many senior cavalry officers disagreed, and despite limited usefulness, maintained cavalry regiments at the ready throughout the war. Scarce wartime resources were used to train and maintain cavalry regiments that were rarely used. The continued tactical use of the cavalry charge resulted in the loss of many troops and horses in fruitless attacks against machine guns. Early in the war, cavalry skirmishes occurred on several fronts, and horse-mounted troops were widely used for reconnaissance. Britain’s cavalry were trained to fight both on foot and mounted, but most other European cavalry solely relied on the shock tactic of mounted charges. There were isolated instances of successful shock combat on the Western Front, where cavalry divisions also provided important mobile firepower. Beginning before the war, cavalry was deployed alongside armoured cars and aircraft, this was later extended to working in co-operation with tanks, notably at the Battle of Cambrai, where cavalry was expected to exploit breakthroughs in the lines that the slower tanks could not. This plan never came to fruition due to missed opportunities by command. At Cambrai, troops from Great Britain, Canada, India and Germany participated in mounted actions Cavalry was still deployed late in the war, with Allied cavalry troops harassing retreating German forces in 1918 during the Hundred Days Offensive, when horses and tanks continued to be used in the same battles “Cavalry was literally indispensable” on the Eastern front and in the Middle East.

The Cavalry Manual, written in 1912, was unchanged throughout the war as the tactics within were still effective, more so than many authors and commentators have given credit for. The ambitions of senior officers however, Haig in particular, was that the cavalry arm could also be effective strategically. This was proven to be wrong and the blame is laid with the higher echelons who were unable to establish a Command, Control and Communications structure which could effectively involve the use of cavalry divisions or corps. Cavalry was also used with good effect in Palestine, at the Third Battle of Gaza and Battle of Megiddo British cavalry officers, far more than their continental European counterparts, persisted in using and maintaining cavalry, believing that mounted troops would be useful for exploiting infantry breakthroughs, and under the right circumstances would be able to face machine guns.

British Empire

United Kingdom

Further information: British cavalry during the First World War

A large group of men and horses drawn up into lines in a field and on the adjoining road. A hill with trees and tents can be seen in the background.
The 20th Deccan Horse drawn up in ranks during the Battle of Bazentin Ridge, 1916

Britain had increased its cavalry reserves after seeing the effectiveness of mounted Boers during the Second Boer War (1899–1902). Horse-mounted units were used from the earliest days of World War I: on August 22, 1914, the first British shot of the war in France was fired by a cavalryman, Corporal Edward Thomas of the 4th Royal Irish Dragoon Guards, near Casteau, during a patrol in the buildup to the Battle of Mons. Within 19 days of Britain beginning mobilization for war, on August 24, 1914, the 9th Lancers, a cavalry regiment led by David Campbell, engaged German troops with a squadron of 4th Dragoon Guards against German infantry and guns. Campbell obeyed his orders to charge, although he believed the more prudent course of action would have been to fight dismounted. The charge resulted in a British loss of 250 men and 300 horses. On September 7, Campbell’s troops charged again, this time towards the German 1st Guard Dragoons, another lancer cavalry regiment.

The Cavalry Training Manual of 1912 continued to be used by junior commanders to great effect (significantly Douglas Haig was a contributor) and wasn’t changed significantly during the war years. What did change however, to the advantage of small cavalry formations, was how the German army changed tactics (to deep defence) allowing the cavalry more freedom on the battlefield. The last British fatality from enemy action before the armistice went into effect was a cavalryman, George Edwin Ellison, from C Troop 5th Royal Irish Lancers. Ellison was shot by a sniper as the regiment moved into Mons on November 11, 1918.

Horses proved indispensable to the British war effort in Palestine, particularly under Field Marshal Edmund Allenby, for whom cavalry made up a large percentage of his forces. Most of his mounted troops were not British regular cavalry, but the Desert Mounted Corps, consisting of a combination of Australian, New Zealand, Indian units and English Yeomanry regiments from the Territorial Force, largely equipped as mounted infantry rather than cavalry. By mid-1918, Ottoman intelligence estimated that Allenby commanded around 11,000 cavalry. Allenby’s forces routed the Ottoman armies in a running series of battles that included the extensive use of cavalry by both sides. Some cavalry tacticians view this action as a vindication of cavalry’s usefulness, but others point out that the Ottoman were outnumbered two to one by late 1918, and were not first-class troops. Horses were also ridden by the British officers of the Egyptian Camel Transport Corps in Egypt and the Levant during the Sinai and Palestine Campaigns.

It is clear that between 1914 and 1918 the cavalry were effective in combat at a tactical level, in spite of the prevailing conditions of the battlefield (or as effective as their infantry counterparts, at any rate).The premise that cavalry were incapable of moving around on the battlefields of the Western Front is simply false. Advance planning was required but this was the case for all arms in the advance.

The origin of much of the discriminatory comments about cavalry on the Western Front is attributed to General Sir James Edmonds, an engineer officer who was responsible for writing much of the official history of the war. The main and recurring statements attributable to him are:

♦ The “cavalry generals” myth – that the British Army on the Western Front was dominated by general officers from the cavalry arm.

♦ The “Last Machine Gun Myth” which incorrectly stated that cavalry couldn’t operate until the last machine gun was destroyed.

♦ The “Fodder” myth which stated that cavalry resources would have been better spent in the supply of other arms.

Additionally writers such as J. F. C. Fuller and B. H. Liddell Hart were enthusiastic exponents of tank warfare and used similar statements to discredit cavalry as “traditional and outdated” 

The curious aspect of these allegations is that, despite being proven wrong on many occasions over the decades since WW1, these myths persist in the psyche of some authors and indeed with the general public.

India

Indian cavalry participated in actions on both the Western and Palestinian fronts throughout the war. Members of the 1st and 2nd Indian Cavalry Divisions were active on the Western Front, including in the German retreat to the Hindenburg Line and at the Battle of Cambrai.During the battle of the Somme, the 20th Deccan Horse made a successful, mounted charge, assaulting a German position on Bazentin Ridge. The charge overran the German position. A charge by the 5th (Mhow) Cavalry Brigade of the 1st Division ended successfully at the Battle of Cambrai despite being against a position fortified by barbed wire and machine guns. Such successful endings were unusual occurrences during the war. Several Indian cavalry divisions joined Allenby’s troops in the spring of 1918 after being transferred from the Western Front.

Canada

Further information: Canadian Cavalry Brigade

Members of the Canadian Cavalry Brigade perform a cavalry charge during the Battle of Moreuil Wood.

When the war began, Lord Strathcona’s Horse, a Canadian cavalry regiment, was mobilized and sent to England for training. The regiment served as infantry in French trenches during 1915, and were not returned to their mounted status until February 16, 1916. In the defense of the Somme front in March 1917, mounted troops saw action, and Lieutenant Frederick Harvey was awarded the Victoria Cross for his actions. Canadian cavalry generally had the same difficulties as other nations in breaking trench warfare deadlocks and were of little use on the front lines. However, in the spring of 1918, Canadian cavalry was essential in halting the last major German offensive of the war.On March 30, 1918, Canadian cavalry charged German positions in the Battle of Moreuil Wood, defeating a superior German force supported by machine gun fire. The charge was made by Lord Strathcona’s Horse, led by Gordon Flowerdew, later posthumously awarded the Victoria Cross for his actions during the charge. Although the German forces surrendered, three-quarters of the 100 cavalry participating in the attack were killed or wounded in the attack against 300 German soldiers.

Australia and New Zealand

The Australian and New Zealand Mounted Division (known as the ANZAC Mounted Division) was formed in Egypt in 1916, after the Australian and New Zealand Army Corps (ANZAC) was disbanded. Comprising four brigades, the 1st, 2nd and 3rd Australian Light Horse and the New Zealand Mounted Rifles Brigade. All had fought at Gallipoli dismounted. In August the division’s dynamic capabilities were effectively combined with the static 52nd (Lowland) Infantry Division at the Battle of Romani, where they repelled an attempted Ottoman attack on the Suez Canal. This victory stopped the advance of Kress von Kressenstein‘s Expeditionary Force (3rd Infantry Division and Pasha I formation) towards the Suez Canal and forced his withdrawal under pressure. An Ottoman garrison at Magdhaba was defeated in December 1916 by the division with the Imperial Camel Corps Brigade attached and the other major Ottoman fortification at Rafah was captured in January 1917. They participated mounted in the First Battle of Gaza in March, and the Third Battle of Gaza (including the Battle of Beersheba) in October 1917. They attacked dismounted in the Second Battle of Gaza in April 1917. In 1918, the ANZAC and Australian Mounted Divisions, along with the Yeomanry Mounted Division in the Desert Mounted Corps, conducted two attacks across the Jordan River to Amman in March, then moved on to Es Salt in April. The Australian Mounted Division were armed with swords mid year, and as part of the Battle of Megiddo captured Amman (capturing 10,300 prisoners), NazarethJenin and Samakh in nine days. After the Armistice they participated in the reoccupation of Gallipoli in December.

Two men carrying rifles on horseback; another horse and rider are partially visible in the background.
Australian Imperial Force light horsemen, 1914

The ANZAC and Australian Mounted Divisions carried rifles, bayonets and machine guns, generally using horses as swift transport and dismounting to fight. Troops of four men were organised, so that three were fighting while the fourth held the horses. Sometimes they fought as mounted troops: at the Battle of Beersheba during the Sinai and Palestine Campaign in 1917, the Australian Mounted Division’s 4th Light Horse Brigade made what is sometimes called “the last successful cavalry charge in history”, when two regiments successfully overran Ottoman trenches. They formed up over a wide area, to avoid offering a target for enemy artillery, and galloped 3 kilometres (1.9 mi) into machine gun fire, equipped only with rifles and bayonets. Some of the front ranks fell, but most of the brigade broke through, their horses jumping the trenches into the enemy camp. Some soldiers dismounted to fight in the trenches, while others raced on to Beersheba, to capture the town and its vital water supplies. The charge was “instrumental in securing Allenby’s victory [in Palestine]”.

The Australians primarily rode Waler horses. The English cavalry officer, Lieutenant Colonel RMP Preston DSO, summed up the animals’ performance in his book, The Desert Mounted Corps:

… (November 16th, 1917) The operations had now continued for 17 days practically without cessation, and a rest was absolutely necessary especially for the horses. Cavalry Division had covered nearly 170 miles … and their horses had been watered on an average of once in every 36 hours … The heat, too, had been intense and the short rations, 9+12 lb of grain per day without bulk food, had weakened them greatly. Indeed, the hardship endured by some horses was almost incredible. One of the batteries of the Australian Mounted Division had only been able to water its horses three times in the last nine days—the actual intervals being 68, 72 and 76 hours respectively. Yet this battery on its arrival had lost only eight horses from exhaustion, not counting those killed in action or evacuated wounded … The majority of horses in the Corps were Walers and there is no doubt that these hardy Australian horses make the finest cavalry mounts in the world …

Continental Europe

You can’t make a cavalry charge until you have captured the enemy’s last machine gun.

—An American observer of French cavalry tactics, 1917

French horsemen crossing a river on their way to Verdun.
Italian veterinary technicians perform surgery on horse.

Further information: German cavalry in World War I

Before the war began, many continental European armies still considered the cavalry to hold a vital place in their order of battle. France and Russia expanded their mounted military units before 1914. Of the Central Powers, Germany added thirteen regiments of mounted riflemen, Austria–Hungary expanded their forces,and the Bulgarian army also readied the cavalry in their army. When the Germans invaded in August 1914, the Belgians had one division of cavalry.

French cavalry had similar problems with horses on the Western Front as the British, although the treatment of their horses created additional difficulties. Opinion generally was that the French were poor horsemen: “The French cavalryman of 1914 sat on his horse beautifully, but was no horsemaster. It did not occur to him to get off his horse’s back whenever he could, so there were thousands of animals with sore backs …”. One French general, Jean-François Sordet, was accused of not letting horses have access to water in hot weather. By late August 1914, a sixth of the horses in the French cavalry were unusable. The French continued to eschew mounted warfare when in a June 1918 charge by French lancers the horses were left behind and the men charged on foot.

Russia possessed thirty-six cavalry divisions when it entered the war in 1914, and the Russian government claimed that its horsemen would thrust deep into the heart of Germany. Although Russian mounted troops entered Germany, they were soon met by German forces. In the August 1914 Battle of Tannenberg, troops led by German Field Marshal Paul von Hindenburg and Lieutenant-General Erich Ludendorff surrounded the Russian Second Army and destroyed the mounted force of Don Cossacks that served as the special guard of Russian General Alexander Samsonov. Other Russian cavalry units successfully harassed retreating Austro-Hungarian troops in September 1914, with the running battle eventually resulting in the loss of 40,000 of the 50,000 men in the Austro-Hungarian XIV Tyrolean Corps, which included the 6th Mounted Rifle Regiment. Transporting cavalry created a hardship for the already strained Russian infrastructure, as the great distances they needed to be moved meant that they had to be transported by train. Approximately the same number of trains (about 40) were required to transport a cavalry division of 4,000 as to transport an infantry division of 16,000.

The cavalries of the Central Powers, Germany and Austria–Hungary, faced the same problems with transport and the failure of tactics as the Russians. Germany initially made extensive use of cavalry, including a lance-against-lance battle with the British in late 1914, and an engagement between the British 1st Cavalry Brigade and the German 4th Cavalry Division in the lead-up to the First Battle of the Marne in September 1914. That battle ended “decidedly to the disadvantages of the German cavalry”, partially due to the use of artillery by the accompanying British L Battery of horse artillery. The Germans stopped using cavalry on the Western Front not long after the beginning of the war, in response to the Allied Forces’ changing battle tactics, including more advanced weaponry. They continued to use cavalry to some extent on the Eastern Front, including probes into Russian territory in early 1915. The Austrians were forced to stop using cavalry because of large-scale equipment failures; Austrian military saddles were so poorly designed as to rub the skin off the back of any horse not already hardened to the equipment from parade ground practice; only a few weeks into the war half of all Austrian cavalry mounts were disabled, and the rest nearly so.

Ottoman Empire

Ottoman cavalry south of Jerusalem in April 1917

In 1914, the Ottoman Empire began the war with one cavalry regiment in their armed forces and four reserve regiments (originally formed in 1912) under the control of the Third Army. These reserve regiments were composed of Kurds, rural Turks and a few Armenians. The performance of the reserve divisions was poor, and in March 1915 the forces that survived were turned into two divisions totalling only two thousand men and seventy officers. Later that month, the best regiments were consolidated into one division and the rest disbanded. Nonetheless, cavalry was used by Ottoman forces throughout 1915 in engagements with the Russians,and one cavalry unit even exchanged small arms fire with a submarine crew in the Dardanelles in early 1915. Ottoman cavalry was used in engagements with the Allies, including the Third Battle of Gaza in late 1917. In this battle, both sides used cavalry forces as strategic parts of their armies. Cavalry continued to be involved in engagements well into 1918, including in conflicts near the Jordan River in April and May that year, which the Ottomans called the First and Second Battles of Jordan, part of the lead-up to the Battle of Megiddo. By September 1918, regular army cavalry forces were stationed throughout the Middle Eastern front, and the only remaining operationally ready reserve forces in the Ottoman military were two cavalry divisions, one formed after the initial problems in 1915.

United States

A man wearing a gas mask and helmet stands next to a tacked up horse wearing a gas mask.
An American soldier demonstrating a gas mask for his horse

By 1916, the United States Cavalry consisted of 15,424 members organized into 15 regiments, including headquarters, supply, machine-gun and rifle troops. Just before formally joining the war effort, the US had gained significant experience in 1916 and 1917 during the Pancho Villa Expedition in Mexico, which helped to prepare the US Cavalry for entry into World War I. In May 1917, a month after the US declaration of war, the National Defense Act went into effect, creating the 18th through the 25th US Cavalry regiments, and later that month, twenty more cavalry regiments were created. However, British experiences during the first years of the war showed that trench warfare and weapons that included machine guns and artillery made cavalry warfare impractical. Thus, on October 1, eight of the new cavalry regiments were converted to field artillery regiments by order of Congress, and by August 1918, twenty National Army horse units were converted to thirty-nine trench mortar and artillery batteries. Some horse units of the 2nd3rd6th and 15th Cavalry regiments accompanied the US forces in Europe. The soldiers worked mainly as grooms and farriers, attending to remounts for the artillery, medical corps and transport services. It was not until late August 1918 that US cavalry entered combat. A provisional squadron of 418 officers and enlisted men, representing the 2nd Cavalry Regiment, and mounted on convalescent horses, was created to serve as scouts and couriers during the St. Mihiel Offensive. On September 11, 1918, these troops rode at night through no man’s land and penetrated five miles behind German lines. Once there, the cavalry was routed and had to return to Allied territory. Despite serving through the Meuse-Argonne Offensive, by mid-October the squadron was removed from the front with only 150 of its men remaining.

Logistical support

Two mules pulling a wagon loaded by supplies. A man rides one of the mules, while another man stands on the wagon.
Mules hauling supplies at Gallipoli, 1915

Horses were used extensively for military trains. They were used to pull ambulances, carry supplies and ordnance. At the beginning of the war, the German army depended upon horses to pull its field kitchens, as well as the ammunition wagons for artillery brigades. The Royal Corps of Signals used horses to pull cable wagons, and the promptness of messengers and dispatch riders depended on their mounts. Horses often drew artillery and steady animals were crucial to artillery effectiveness. The deep mud common in some parts of the front, caused by damaged drainage systems flooding nearby areas, made horses and mules vital, as they were the only means of getting supplies to the front and guns moved from place to place. After the April 1917 Battle of Vimy Ridge, one Canadian soldier recalled, “the horses were up to their bellies in mud. We’d put them on a picket line between the wagon wheels at night and they’d be sunk in over their fetlocks the next day. We had to shoot quite a number.”

Thousands of horses were employed to pull field guns; six to twelve horses were required to pull each gun. During the Battle of Cambrai, horses were used to recover guns captured by the British from no man’s land. In one instance, two teams of sixteen horses each had their hooves, tack and pulling chains wrapped to reduce noise. The teams and their handlers then successfully pulled out two guns and returned them to British lines, the horses jumping a trench in the process and waiting out an artillery barrage by German troops on the road they needed to take.

Dummy horses were sometimes used to deceive the enemy into misreading the location of troops. They were effectively used by Allenby during his campaigns in the east, especially late in the war. Evidence exists that the Germans used horses in their experimentations with chemical and biological warfare. German agents in the US are suspected of infecting cattle and horses bound for France with glanders, a disease which can fatally spread to humans; similar tactics were used by the Germans against the Russians, causing breakdowns in their ability to move artillery on the Eastern Front.

In 1917 at the Battle of Passchendaele, men at the front understood that “at this stage to lose a horse was worse than losing a man because after all, men were replaceable while horses weren’t.”

Procurement

Allied forces

A group of men unloading a horse from a ship thorough the use of a sling. Another horse is partially visible, while other men watch from the ground and the deck of the ship.
Unloading horses from a ship at Gallipoli, 1915

To meet its need for horses, Britain imported them from Australia, Canada, the US, and Argentina, and requisitioned them from British civilians. Lord Kitchener ordered that no horses under 15 hands (60 inches, 152 cm) should be confiscated, at the request of many British children, who were concerned for the welfare of their ponies. The British Army Remount Service, in an effort to improve the supply of horses for potential military use, provided the services of high quality stallions to British farmers for breeding their broodmares. The already rare Cleveland Bay was almost wiped out by the war; smaller members of the breed were used to carry British troopers, while larger horses were used to pull artillery. New Zealand found that horses over 15.2 hands (62 inches, 157 cm) fared worse than those under that height. Well-built Thoroughbreds of 15 hands and under worked well, as did compact horses of other breeds that stood 14.2 to 14.3 hands (58 to 59 inches, 147 to 150 cm). Larger crossbred horses were acceptable for regular work with plentiful rations, but proved less able to withstand short rations and long journeys. Riflemen with tall horses suffered more from fatigue, due to the number of times they were required to mount and dismount the animals. Animals used for draught work, including pulling artillery, were also found to be more efficient when they were of medium size with good endurance than when they were tall, heavy and long-legged.

The continued resupply of horses was a major issue of the war. One estimate puts the number of horses that served in World War I at around six million, with a large percentage of them dying due to war-related causes. In 1914, the year the war began, the British Army owned only about 25,000 horses. This shortfall required the US to help with remount efforts, even before it had formally entered the war.Between 1914 and 1918, the US sent almost one million horses overseas, and another 182,000 were taken overseas with American troops. This deployment seriously depleted the country’s equine population. Only 200 returned to the US, and 60,000 were killed outright. By the middle of 1917, Britain had procured 591,000 horses and 213,000 mules, as well as almost 60,000 camels and oxen. Britain’s Remount Department spent £67.5 million on purchasing, training and delivering horses and mules to the front. The British Remount Department became a major multinational business and a leading player in the international horse trade, through supplying horses to not only the British Army but also to Canada, Belgium, Australia, New Zealand, Portugal, and even a few to the US. Shipping horses between the US and Europe was both costly and dangerous; American Expeditionary Force officials calculated that almost seven times as much room was needed per ton for animals than for average wartime cargo, and over 6,500 horses and mules were drowned or killed by shell fire on Allied ships attacked by the Germans. In turn, New Zealand lost around 3 percent of the nearly 10,000 horses shipped to the front during the war.

Due to the high casualty rates, even the well-supplied American army was facing a deficit of horses by the final year of the war. After the American First Army, led by General John J. Pershing, pushed the Germans out of the Argonne Forest in late 1918, they were faced with a shortage of around 100,000 horses, effectively immobilizing the artillery. When Pershing asked Ferdinand FochMarshal of France, for 25,000 horses, he was refused. It was impossible to obtain more from the US, as shipping space was limited, and Pershing’s senior supply officer stated that “the animal situation will soon become desperate.” The Americans, however, fought on with what they had until the end of the war, unable to obtain sufficient supplies of new animals.

Central Powers

A horse-drawn German supply wagon in France in 1917

Before World War I, Germany had increased its reserves of horses through state-sponsored stud farms (GermanRemonteamt) and annuities paid to individual horse breeders. These breeding programs were designed specifically to provide high-quality horses and mules for the German military. These efforts, and the horse-intensive nature of warfare in the early 20th century, caused Germany to increase the ratio of horses to men in the army, from one to four in 1870 to one to three in 1914. The breeding programs allowed the Germans to provide all of their own horses at the beginning of the war. Horses were considered army reservists; owners had to register them regularly, and the army kept detailed records on the locations of all horses. In the first weeks of the war, the German army mobilized 715,000 horses and the Austrians 600,000. Overall, the ratio of horses to men in Central Powers nations was estimated at one to three.

The only way Germany could acquire large numbers of horses after the war began was by conquest. More than 375,000 horses were taken from German-occupied French territory for use by the German military. Captured Ukrainian territory provided another 140,000. Ardennes were used to pull artillery for the French and Belgian armies. Their calm, tolerant disposition, combined with their active and flexible nature, made them an ideal artillery horse. The breed was considered so useful and valuable that when the Germans established the Commission for the Purchase of Horses in October 1914 to capture Belgian horses, the Ardennes was one of two breeds specified as important, the other being the Brabant. The Germans were not able to capture the horses belonging to the Belgian royal family, as they were successfully evacuated, although they captured enough horses to disrupt Belgian agriculture and breeding programs. Horses used for the transport of goods were also taken, resulting in a fuel crisis in Belgium the next winter as there were no horses to pull coal wagons. The Germans sold some of their captured horses at auction.Prevented by the Allies from importing remounts, the Germans ultimately ran out of horses, making it difficult for them to move supplies and artillery, a factor contributing to their defeat.

Casualties and upkeep

[edit]

A horse undergoes treatment for a skin disease at a British veterinary hospital in 1916

Battle losses of horses were approximately 25 percent of all war-related equine deaths between 1914 and 1916. Disease and exhaustion accounted for the remainder. The highest death rates were in East Africa, where in 1916 alone deaths of the original mounts and remounts accounted for 290% of the initial stock numbers, mainly due to infection from the tsetse fly. On average, Britain lost about 15 percent (of the initial military stock) of its animals each year of the war (killed, missing, died or abandoned), with losses at 17 percent in the French theatre. This compared to 80 percent in the Crimean War, 120 percent in the Boer War and 10 percent in peacetime. During some periods of the war, 1,000 horses per day were arriving in Europe as remounts for British troops, to replace horses lost. Equine casualties were especially high during battles of attrition, such as the 1916 Battle of Verdun between French and German forces. In one day in March, 7,000 horses were killed by long-range shelling on both sides, including 97 killed by a single shot from a French naval gun. By 1917, Britain had over a million horses and mules in service, but harsh conditions, especially during winter, resulted in heavy losses, particularly amongst the Clydesdale horses, the main breed used to haul the guns. Over the course of the war, Britain lost over 484,000 horses, one horse for every two men.A small number of these, 210, were killed by poison gas.

Feeding horses was a major issue, and horse fodder was the single largest commodity shipped to the front by some countries, including Britain. Horses ate around ten times as much food by weight as a human, and hay and oats further burdened already overloaded transport services. In 1917, Allied operations were threatened when horse feed rations were reduced after German submarine activity restricted supplies of oats from North America, combined with poor Italian harvests. The British rationed hay and oats, although their horses were still issued more than those from France or Italy. The Germans faced an even worse fodder crisis, as they had underestimated the amount of food they needed to import and stockpile before the beginning of the war. Sawdust was mixed with food during times of shortage to ease animals’ sense of hunger, and many animals died of starvation. Some feed was taken from captured territories on the Eastern Front, and more from the British during the advances of the 1918 spring offensive.

Animals bolstered morale at the front, due to the soldiers’ affection for them. Some recruitment posters from World War I showcased the partnership between horse and man in attempts to gain more recruits. Despite the boost in morale, horses could also be a health hazard for the soldiers, mainly because of the difficulty of maintaining high levels of hygiene around horses, which was especially noted in camps in Egypt. Horse manure was commonplace in the battle and staging areas on several fronts, creating breeding grounds for disease-carrying insects. Manure was supposed to be buried, but fast-moving battle conditions often made this impossible. Sanitation officers were responsible for the burial of horse carcasses, among other duties.

A horse undergoing an operation at a US Army veterinary hospital
A mule stuck in a shell hole on the Western Front.

Many horses died as a result of the conditions at the front—of exhaustion, drowning, becoming mired in mud and falling in shell holes. Other horses were captured after their riders were killed. Horses also endured poor feeding and care, poison gas attacks that injured their respiratory systems and skin, and skin conditions such as mange. When gas warfare began in 1915, nose plugs were improvised for the horses to allow them to breathe during attacks. Later, several types of gas masks were developed by both the Central and Allied nations, although horses often confused them with feedbags and destroyed them. Soldiers found that better-bred horses were more likely to suffer from shell shock and act up when exposed to the sights and sounds of war than less-well-bred animals, who often learned to lie down and take cover at the sound of artillery fire. Veterinary hospitals were established to assist horses in recovering from shell shock and battle wounds, but thousands of equine corpses still lined the roads of the Western Front. In one year, 120,000 horses were treated for wounds or disease by British veterinary hospitals alone. Ambulances and field veterinary hospitals were required to care for the horses, and horse trailers were first developed for use on the Western Front as equine ambulances. Disease was also a major issue for horses at the front, with equine influenzaringwormsand colic, sores from fly bites, and anthrax among the illnesses that affected them. British Army Veterinary Corps hospitals treated 725,216 horses over the course of the war, successfully healing 529,064. Horses were moved from the front to veterinary hospitals by several methods of transportation, including on foot, by rail and by barge. During the last months of the war, barges were considered ideal transportation for horses suffering wounds from shells and bombs.[78]

When the war ended, many horses were killed due to age or illness, while younger ones were sold to slaughterhouses or to locals, often upsetting the soldiers who had to give up their beloved mounts. There was a trade in fresh meat from, amongst other equines, old war horses and army mules from Britain to abattoirs on the continent despite the Exportation of Horses Act passed in 1914. Because of the brutal way this trade was carried out, efforts were made by Ada Cole to stop it. There were 13,000 Australian horses remaining at the end of World War I, but due to quarantine restrictions, they could not be shipped back to Australia. Two thousand were designated to be killed, and the remaining 11,000 were sold, most going to India as remounts for the British Army Of the 136,000 horses shipped from Australia to fighting fronts in the war, only one, Sandy, was returned to Australia. New Zealand horses were also left behind; those not required by the British or Egyptian armies were shot to prevent maltreatment by other purchasers. The horses left behind did not always have good lives—the Brooke Trust was established in 1930 when a young British woman arrived in Cairo, only to find hundreds of previously Allied-owned horses living in poor conditions, having been sold to Egyptians after the cessation of the war. In 1934, the Old War Horse Memorial Hospital was opened by the trust, and is estimated to have helped over 5,000 horses that had served in World War I; as of 2011, the hospital continues to serve equines in the Cairo area.

Legacy

[edit]

photograph
The Animals in War Memorial exists as a memorial to the countless animals that have served and died under British military command throughout history

The horse is the animal most associated with the war, and memorials have been erected to its service, including that at St. Jude on the HillHampstead, which bears the inscription “Most obediently and often most painfully they died – faithful unto death.” The Animals in War Memorial in London commemorates animals, including horses, that served with the British and their allies in all wars. The inscription reads: “Animals In War. This monument is dedicated to all the animals that served and died alongside British and allied forces in wars and campaigns throughout time. They had no choice.” In Minneapolis, a monument by Lake of the Isles is dedicated to the horses of the Minnesota 151st Field Artillery killed in battle during World War I.

The men of the Australian Light Horse Brigade and New Zealand Mounted Rifles who died between 1916 and 1918 in Egypt, Palestine and Syria are commemorated by the Desert Mounted Corps Memorial, or Light Horse Memorial, on Anzac Parade, in Canberra, Australia. The original version of this monument was in Port Said in Egypt, and was mostly destroyed during the 1956 Suez War. A piece from the original memorial, a shattered horse’s head, was brought back to Australia and used as part of a new statue in the A is for Animals exhibition honoring animals who have served with the Australian military. The exhibition also contains the preserved head of Sandy, the only horse to return to Australia after the war.

A statue of two men and two horses stands atop a pedestal in a paved courtyard. Large trees provide a background.
Desert Mounted Corps Memorial, an Australian memorial to ANZAC troops in World War I, located on Anzac Parade, Canberra

War artist Alfred Munnings was sent to France in early 1918 as an official war artist with the Canadian Cavalry Brigade. The Canadian Forestry Corps invited Munnings to tour their work camps in France after seeing some of his work at the headquarters of General Simms, the Canadian representative. He produced drawings, watercolors, and paintings of their work, including Draft Horses, Lumber Mill in the Forest of Dreux in 1918. Forty-five of his paintings were displayed at the Canadian War Records Exhibition at the Royal Academy, many of which featured horses in war. Numerous other artists created works that featured the horses of World War I, including Umberto Boccioni with Charge of the Lancersand Terence Cuneo with his celebrated postwar painting of the saving of the guns at Le Cateau during the Retreat from Mons.[91] During World War I, artist Fortunino Matania created the iconic image Goodbye Old Man that would be used by both British and American organizations to raise awareness of the suffering of animals affected by war. The painting was accompanied by a poem, The Soldiers Kiss, that also emphasized the plight of the horse in war.

Writing poetry was a means of passing the time for soldiers of many nations, and the horses of World War I figured prominently in several poems.[94][95] In 1982, Michael Morpurgo wrote the novel War Horse, about a cavalry horse in the war. The book was later adapted into a successful play of the same name, and also into a screenplay, with the movie, released on December 25, 2011, in the United States.[96]

WW1 on the Western front

The Western Front was one of the main theatres of war during the First World War. Following the outbreak of war in August 1914, the German Army opened the Western Front by invading Luxembourg and Belgium, then gaining military control of important industrial regions in France. The German advance was halted with the Battle of the Marne. Following the Race to the Sea, both sides dug in along a meandering line of fortified trenches, stretching from the North Sea to the Swiss frontier with France, the position of which changed little except during early 1917 and again in 1918.

Between 1915 and 1917 there were several offensives along this front. The attacks employed massive artillery bombardments and massed infantry advances. Entrenchments, machine gun emplacements, barbed wire, and artillery repeatedly inflicted severe casualties during attacks and counter-attacks and no significant advances were made. Among the most costly of these offensives were the Battle of Verdun, in 1916, with a combined 700,000 casualties, the Battle of the Somme, also in 1916, with more than a million casualties, and the Battle of Passchendaele, in 1917, with 487,000 casualties.

To break the deadlock of the trench warfare on the Western Front, both sides tried new military technology, including poison gas, aircraft, and tanks. The adoption of better tactics and the cumulative weakening of the armies in the west led to the return of mobility in 1918. The German spring offensive of 1918 was made possible by the Treaty of Brest-Litovsk that ended the war of the Central Powers against Russia and Romania on the Eastern Front. Using short, intense “hurricane” bombardments and infiltration tactics, the German armies moved nearly 100 kilometres (60 miles) to the west, the deepest advance by either side since 1914, but the result was indecisive.

The unstoppable advance of the Allied armies during the Hundred Days Offensive of 1918 caused a sudden collapse of the German armies and persuaded the German commanders that defeat was inevitable. The German government surrendered in the Armistice of 11 November 1918, and the terms of peace were settled by the Treaty of Versailles in 1919.

1914

War plans – Battle of the Frontiers

Map of the Western Front and the Race to the Sea, 1914

French bayonet charge (1913 photograph)

German infantry on the battlefield, 7 August 1914

The Western Front was the place where the most powerful military forces in Europe, the German and French armies, met and where the First World War was decided. At the outbreak of the war, the German Army, with seven field armies in the west and one in the east, executed a modified version of the Schlieffen Plan, bypassing French defenses along the common border by moving quickly through neutral Belgium, and then turning southwards to attack France and attempt to encircle the French Army and trap it on the German border. Belgian neutrality had been guaranteed by Britain under the Treaty of London, 1839; this caused Britain to join the war at the expiration of its ultimatum at midnight on 4 August. Armies under German generals Alexander von Kluck and Karl von Bülow attacked Belgium on 4 August 1914. Luxembourg had been occupied without opposition on 2 August. The first battle in Belgium was the Battle of Liège, a siege that lasted from 5–16 August. Liège was well fortified and surprised the German Army under Bülow with its level of resistance. German heavy artillery was able to demolish the main forts within a few days. Following the fall of Liège, most of the Belgian field army retreated to Antwerp, leaving the garrison of Namur isolated, with the Belgian capital, Brussels, falling to the Germans on 20 August. Although the German army bypassed Antwerp, it remained a threat to their flank. Another siege followed at Namur, lasting from about 20–23 August.

The French deployed five armies on the frontier. The French Plan XVII was intended to bring about the capture of Alsace–Lorraine. On 7 August, the VII Corps attacked Alsace to capture Mulhouse and Colmar. The main offensive was launched on 14 August with the First and Second Armies attacking toward Sarrebourg-Morhange in Lorraine. In keeping with the Schlieffen Plan, the Germans withdrew slowly while inflicting severe losses upon the French. The French Third and Fourth Armies advanced toward the Saar and attempted to capture Saarburg, attacking Briey and Neufchateau but were repulsed. The French VII Corps captured Mulhouse after a brief engagement first on 7 August, and then again on 23 August, but German reserve forces engaged them in the Battle of Mulhouse and forced the French to retreat twice.

The German Army swept through Belgium, executing civilians and razing villages. The application of “collective responsibility” against a civilian population further galvanised the allies. Newspapers condemned the German invasion, violence against civilians and destruction of property, which became known as the “Rape of Belgium.”After marching through Belgium, Luxembourg and the Ardennes, the Germans advanced into northern France in late August, where they met the French Army, under Joseph Joffre, and the divisions of the British Expeditionary Force under Field Marshal Sir John French. A series of engagements known as the Battle of the Frontiers ensued, which included the Battle of Charleroi and the Battle of Mons. In the former battle the French Fifth Army was almost destroyed by the German 2nd and 3rd Armies and the latter delayed the German advance by a day. A general Allied retreat followed, resulting in more clashes at the Battle of Le Cateau, the Siege of Maubeuge and the Battle of St. Quentin (also called the First Battle of Guise).

First Battle of the Marne

Main article: First Battle of the Marne

The German Army came within 70 km (43 mi) of Paris but at the First Battle of the Marne (6–12 September), French and British troops were able to force a German retreat by exploiting a gap which appeared between the 1st and 2nd Armies, ending the German advance into France. The German Army retreated north of the Aisne and dug in there, establishing the beginnings of a static western front that was to last for the next three years. Following this German retirement, the opposing forces made reciprocal outflanking manoeuvres, known as the Race to the Sea and quickly extended their trench systems from the Swiss frontier to the North Sea. The territory occupied by Germany held 64 percent of French pig-iron production, 24 percent of its steel manufacturing and 40 percent of the coal industry – dealing a serious blow to French industry.

On the Entente side (those countries opposing the German alliance), the final lines were occupied with the armies of each nation defending a part of the front. From the coast in the north, the primary forces were from Belgium, the British Empire and then France. Following the Battle of the Yser in October, the Belgian army controlled a 35 km (22 mi) length of West Flanders along the coast, known as the Yser Front, along the Yser and the Ieperlee from Nieuwpoort to Boezinge.Meanwhile, the British Expeditionary Force (BEF) occupied a position on the flank, having occupied a more central position.

First Battle of Ypres

Main article: First Battle of Ypres

From 19 October until 22 November, the German forces made their final breakthrough attempt of 1914 during the First Battle of Ypres, which ended in a mutually-costly stalemate. After the battle, Erich von Falkenhayn judged that it was no longer possible for Germany to win the war by purely military means and on 18 November 1914 he called for a diplomatic solution. The Chancellor, Theobald von Bethmann HollwegGeneralfeldmarschall Paul von Hindenburg, commanding Ober Ost (Eastern Front high command); and his deputy, Erich Ludendorff, continued to believe that victory was achievable through decisive battles. During the Lodz offensive in Poland (11–25 November), Falkenhayn hoped that the Russians would be made amenable to peace overtures. In his discussions with Bethmann Hollweg, Falkenhayn viewed Germany and Russia as having no insoluble conflict and that the real enemies of Germany were France and Britain. A peace with only a few annexations of territory also seemed possible with France and that with Russia and France out of the war by negotiated settlements, Germany could concentrate on Britain and fight a long war with the resources of Europe at its disposal. Hindenburg and Ludendorff continued to believe that Russia could be defeated by a series of battles which cumulatively would have a decisive effect, after which Germany could finish off France and Britain.

Trench warfare

Main article: Trench warfare

German trench on the Western Front, 1915.

Trench warfare in 1914, while not new, quickly improved and provided a very high degree of defense. According to two prominent historians:Trenches were longer, deeper, and better defended by steel, concrete, and barbed wire than ever before. They were far stronger and more effective than chains of forts, for they formed a continuous network, sometimes with four or five parallel lines linked by interfacings. They were dug far below the surface of the earth out of reach of the heaviest artillery…. Grand battles with the old maneuvers were out of the question. Only by bombardment, sapping, and assault could the enemy be shaken, and such operations had to be conducted on an immense scale to produce appreciable results. Indeed, it is questionable whether the German lines in France could ever have been broken if the Germans had not wasted their resources in unsuccessful assaults, and the blockade by sea had not gradually cut off their supplies. In such warfare no single general could strike a blow that would make him immortal; the “glory of fighting” sank down into the dirt and mire of trenches and dugouts.

1915

Map of the Western Front, 1915–16

Between the coast and the Vosges was a westward bulge in the trench line, named the Noyon salient after the French town at the maximum point of the German advance near Compiègne. Joffre’s plan for 1915 was to attack the salient on both flanks to cut it off. The Fourth Army had attacked in Champagne from 20 December 1914 – 17 March 1915 but the French were not able to attack in Artois at the same time. The Tenth Army formed the northern attack force and was to attack eastwards into the Douai plain on a 16 km (9.9 mi) front between Loos and Arras. On 10 March, as part of the larger offensive in the Artois region, the British Army fought the Battle of Neuve Chapelle to capture Aubers Ridge. The assault was made by four divisions on a 2 mi (3.2 km) front. Preceded by a hurricane bombardment lasting only 35 minutes, the village was captured within four hours. The advance then slowed because of supply and communication difficulties. The Germans brought up reserves and counterattacked, forestalling the attempt to capture the ridge. Since the British had used about a third of their artillery ammunition, General Sir John French blamed the failure on the Shell Crisis of 1915, despite the early success.

Gas warfare

Main article: Chemical weapons in World War I

All sides had signed the Hague Conventions of 1899 and 1907, which prohibited the use of chemical weapons in warfare. In 1914, there had been small-scale attempts by both the French and Germans to use various tear gases, which were not strictly prohibited by the early treaties but which were also ineffective.The first use of more lethal chemical weapons on the Western Front was against the French near the Belgian town of Ypres. The Germans had already deployed gas against the Russians in the east at the Battle of Humin-Bolimów

An artist’s rendition of Canadian troops at the Second Battle of Ypres

Despite the German plans to maintain the stalemate with the French and British, Albrecht, Duke of Württemberg, commander of the 4th Army planned an offensive at Ypres, site of the First Battle of Ypres in November 1914. The Second Battle of Ypres, April 1915, was intended to divert attention from offensives in the Eastern Front and disrupt Franco-British planning. After a two-day bombardment, the Germans released a lethal cloud of 168 long tons (171 t) of chlorine onto the battlefield. Though primarily a powerful irritant, it can asphyxiate in high concentrations or prolonged exposure. Being heavier than air, the gas crept across no man’s land and drifted into the French trenches. The green-yellow cloud started killing some defenders and those in the rear fled in panic, creating an undefended 3.7-mile (6 km) gap in the Allied line. The Germans were unprepared for the level of their success and lacked sufficient reserves to exploit the opening. Canadian troops on the right drew back their left flank and halted the German advance. The gas attack was repeated two days later and caused a 3.1 mi (5 km) withdrawal of the Franco-British line but the opportunity had been lost.

The success of this attack would not be repeated, as the Allies countered by introducing gas masks and other countermeasures. An example of the success of these measures came a year later, on 27 April in the Gas attacks at Hulluch 40 km (25 mi) to the south of Ypres, where the 16th (Irish) Division withstood several German gas attacks. The British retaliated, developing their own chlorine gas and using it at the Battle of Loos in September 1915. Fickle winds and inexperience led to more British casualties from the gas than German. French, British and German forces all escalated the use of gas attacks through the rest of the war, developing the more deadly phosgene gas in 1915, then the infamous mustard gas in 1917, which could linger for days and could kill slowly and painfully. Countermeasures also improved and the stalemate continued.

Air warfare

Main article: Aviation in World War I

Specialised aeroplanes for aerial combat were introduced in 1915. Aircraft were already in use for scouting and on 1 April, the French pilot Roland Garros became the first to shoot down an enemy aircraft by using a machine-gun that shot forward through the propeller blades. This was achieved by crudely reinforcing the blades to deflect bullets. Several weeks later Garros force-landed behind German lines. His aeroplane was captured and sent to Dutch engineer Anthony Fokker, who soon produced a significant improvement, the interrupter gear, in which the machine gun is synchronised with the propeller so it fires in the intervals when the blades of the propeller are out of the line of fire. This advance was quickly ushered into service, in the Fokker E.I (Eindecker, or monoplane, Mark 1), the first single seat fighter aircraft to combine a reasonable maximum speed with an effective armament. Max Immelmann scored the first confirmed kill in an Eindecker on 1 August. Both sides developed improved weapons, engines, airframes and materials, until the end of the war. It also inaugurated the cult of the ace, the most famous being Manfred von Richthofen (the Red Baron). Contrary to the myth, anti-aircraft fire claimed more kills than fighters.

Spring offensive

Ruins of Carency after it was recaptured by France

The final Entente offensive of the spring was the Second Battle of Artois, an offensive to capture Vimy Ridge and advance into the Douai plain. The French Tenth Army attacked on 9 May after a six-day bombardment and advanced 5 kilometres (3 mi) to capture Vimy Ridge. German reinforcements counter-attacked and pushed the French back towards their starting points because French reserves had been held back and the success of the attack had come as a surprise. By 15 May the advance had been stopped, although the fighting continued until 18 June. In May the German Army captured a French document at La Ville-aux-Bois describing a new system of defence. Rather than relying on a heavily fortified front line, the defence was to be arranged in a series of echelons. The front line would be a thinly manned series of outposts, reinforced by a series of strongpoints and a sheltered reserve. If a slope was available, troops were deployed along the rear side for protection. The defence became fully integrated with command of artillery at the divisional level. Members of the German high command viewed this new scheme with some favour and it later became the basis of an elastic defence in depth doctrine against Entente attacks.

During the autumn of 1915, the “Fokker Scourge” began to have an effect on the battlefront as Allied reconnaissance aircraft were nearly driven from the skies. These reconnaissance aircraft were used to direct gunnery and photograph enemy fortifications but now the Allies were nearly blinded by German fighters. However, the impact of German air superiority was diminished by their primarily defensive doctrine in which they tended to remain over their own lines, rather than fighting over Allied held territory.

Autumn offensive

In September 1915 the Entente allies launched another offensive, with the French Third Battle of ArtoisSecond Battle of Champagne and the British at Loos. The French had spent the summer preparing for this action, with the British assuming control of more of the front to release French troops for the attack. The bombardment, which had been carefully targeted by means of aerial photography began on 22 September. The main French assault was launched on 25 September and, at first, made good progress in spite of surviving wire entanglements and machine gun posts. Rather than retreating, the Germans adopted a new defence-in-depth scheme that consisted of a series of defensive zones and positions with a depth of up to 8.0 km (5 mi).

On 25 September, the British began the Battle of Loos, part of the Third Battle of Artois, which was meant to supplement the larger Champagne attack. The attack was preceded by a four-day artillery bombardment of 250,000 shells and a release of 5,100 cylinders of chlorine gas. The attack involved two corps in the main assault and two corps performing diversionary attacks at Ypres. The British suffered heavy losses, especially due to machine gun fire during the attack and made only limited gains before they ran out of shells. A renewal of the attack on 13 October fared little better. In December, French was replaced by General Douglas Haig as commander of the British forces.

1916

German soldier on the Western Front in 1916

Falkenhayn believed that a breakthrough might no longer be possible and instead focused on forcing a French defeat by inflicting massive casualties. His new goal was to “bleed France white.” As such, he adopted two new strategies. The first was the use of unrestricted submarine warfare to cut off Allied supplies arriving from overseas. The second would be attacks against the French army intended to inflict maximum casualties; Falkenhayn planned to attack a position from which the French could not retreat, for reasons of strategy and national pride and thus trap the French. The town of Verdun was chosen for this because it was an important stronghold, surrounded by a ring of forts, that lay near the German lines and because it guarded the direct route to Paris.

Falkenhayn limited the size of the front to 5–6 kilometres (3–4 mi) to concentrate artillery firepower and to prevent a breakthrough from a counter-offensive. He also kept tight control of the main reserve, feeding in just enough troops to keep the battle going. In preparation for their attack, the Germans had amassed a concentration of aircraft near the fortress. In the opening phase, they swept the air space of French aircraft, which allowed German artillery-observation aircraft and bombers to operate without interference. In May, the French countered by deploying escadrilles de chasse with superior Nieuport fighters and the air over Verdun turned into a battlefield as both sides fought for air superiority.

Battle of Verdun

Main article: Battle of Verdun

French soldiers observing enemy movements

The Battle of Verdun began on 21 February 1916 after a nine-day delay due to snow and blizzards. After a massive eight-hour artillery bombardment, the Germans did not expect much resistance as they slowly advanced on Verdun and its forts. Sporadic French resistance was encountered. The Germans took Fort Douaumont and then reinforcements halted the German advance by 28 February.

The Germans turned their focus to Le Mort Homme on the west bank of the Meuse which blocked the route to French artillery emplacements, from which the French fired across the river. After some of the most intense fighting of the campaign, the hill was taken by the Germans in late May. After a change in French command at Verdun from the defensive-minded Philippe Pétain to the offensive-minded Robert Nivelle, the French attempted to re-capture Fort Douaumont on 22 May but were easily repulsed. The Germans captured Fort Vaux on 7 June and with the aid of diphosgene gas, came within 1 kilometre (1,100 yd) of the last ridge before Verdun before being contained on 23 June.

Over the summer, the French slowly advanced. With the development of the rolling barrage, the French recaptured Fort Vaux in November and by December 1916 they had pushed the Germans back 2.1 kilometres (1.3 mi) from Fort Douaumont, in the process rotating 42 divisions through the battle. The Battle of Verdun—also known as the ‘Mincing Machine of Verdun’ or ‘Meuse Mill’—became a symbol of French determination and self-sacrifice.

Battle of the Somme

Main article: Battle of the Somme

British infantry advance near Ginchy. Photo by Ernest Brooks.

In the spring, Allied commanders had been concerned about the ability of the French Army to withstand the enormous losses at Verdun. The original plans for an attack around the River Somme were modified to let the British make the main effort. This would serve to relieve pressure on the French, as well as the Russians who had also suffered great losses. On 1 July, after a week of heavy rain, British divisions in Picardy began the Battle of the Somme with the Battle of Albert, supported by five French divisions on their right flank. The attack had been preceded by seven days of heavy artillery bombardment. The experienced French forces were successful in advancing but the British artillery cover had neither blasted away barbed wire, nor destroyed German trenches as effectively as was planned. They suffered the greatest number of casualties (killed, wounded and missing) in a single day in the history of the British Army, about 57,000.

The Verdun lesson learnt, the Allies’ tactical aim became the achievement of air superiority and until September, German aircraft were swept from the skies over the Somme. The success of the Allied air offensive caused a reorganisation of the German air arm and both sides began using large formations of aircraft rather than relying on individual combat. After regrouping, the battle continued throughout July and August, with some success for the British despite the reinforcement of the German lines. By August, General Haig had concluded that a breakthrough was unlikely and instead, switched tactics to a series of small unit actions. The effect was to straighten out the front line, which was thought necessary in preparation for a massive artillery bombardment with a major push.

The final phase of the battle of the Somme saw the first use of the tank on the battlefield. The Allies prepared an attack that would involve 13 British and Imperial divisions and four French corps. The attack made early progress, advancing 3,200–4,100 metres (3,500–4,500 yd) in places but the tanks had little effect due to their lack of numbers and mechanical unreliability. The final phase of the battle took place in October and early November, again producing limited gains with heavy loss of life. All told, the Somme battle had made penetrations of only 8 kilometres (5 mi) and failed to reach the original objectives. The British had suffered about 420,000 casualties and the French around 200,000. It is estimated that the Germans lost 465,000, although this figure is controversial.

The Somme led directly to major new developments in infantry organisation and tactics; despite the terrible losses of 1 July, some divisions had managed to achieve their objectives with minimal casualties. In examining the reasons behind losses and achievements, once the British war economy produced sufficient equipment and weapons, the army made the platoon the basic tactical unit, similar to the French and German armies. At the time of the Somme, British senior commanders insisted that the company (120 men) was the smallest unit of manoeuvre; less than a year later, the section of ten men would be so.

Hindenburg line

Main article: Hindenburg Line

The Hindenburg Line at Bullecourt seen from the air

In August 1916 the German leadership along the Western Front had changed as Falkenhayn resigned and was replaced by Hindenburg and Ludendorff. The new leaders soon recognised that the battles of Verdun and the Somme had depleted the offensive capabilities of the German Army. They decided that the German Army in the west would go over to the strategic defensive for most of 1917, while the Central powers would attack elsewhere.

During the Somme battle and through the winter months, the Germans created a fortification behind the Noyon Salient that would be called the Hindenburg Line, using the defensive principles elaborated since the defensive battles of 1915, including the use of Eingreif divisions. This was intended to shorten the German front, freeing 10 divisions for other duties. This line of fortifications ran from Arras south to St Quentin and shortened the front by about 50 kilometres (30 mi). British long-range reconnaissance aircraft first spotted the construction of the Hindenburg Line in November 1916.

1917

Main articles: Hindenburg Line and Western Front tactics, 1917

Map of the Western Front, 1917

The Hindenburg Line was built between 2 mi (3.2 km) and 30 mi (48 km) behind the German front line. On 25 February the German armies west of the line began Operation Alberich a withdrawal to the line and completed the retirement on 5 April, leaving a supply desert of scorched earth to be occupied by the Allies. This withdrawal negated the French strategy of attacking both flanks of the Noyon salient, as it no longer existed. The British continued offensive operations as the War Office claimed, with some justification, that this withdrawal resulted from the casualties the Germans received during the Battles of the Somme and Verdun, despite the Allies suffering greater losses.

On 6 April the United States declared war on Germany. In early 1915, following the sinking of the Lusitania, Germany had stopped unrestricted submarine warfare in the Atlantic because of concerns of drawing the United States into the conflict. With the growing discontent of the German public due to the food shortages, the government resumed unrestricted submarine warfare in February 1917. They calculated that a successful submarine and warship siege of Britain would force that country out of the war within six months, while American forces would take a year to become a serious factor on the Western Front. The submarine and surface ships had a long period of success before Britain resorted to the convoy system, bringing a large reduction in shipping losses.

British Army advancing on the Western Front (March 1917)

By 1917, the size of the British Army on the Western Front had grown to two-thirds of the size of the French force. In April 1917 the BEF began the Battle of Arras. The Canadian Corps and the 5th Division of the First Army, fought the Battle of Vimy Ridge, completing the capture of the ridge and the Third Army to the south achieved the deepest advance since trench warfare began. Later attacks were confronted by German reinforcements defending the area using the lessons learned on the Somme in 1916. British attacks were contained and, according to Gary Sheffield, a greater rate of daily loss was inflicted on the British than in “any other major battle”.

During the winter of 1916–1917, German air tactics had been improved, a fighter training school was opened at Valenciennes and better aircraft with twin guns were introduced. The result was higher losses of Allied aircraft, particularly for the British, Portuguese, Belgians and Australians who were struggling with outmoded aircraft, poor training and tactics. The Allied air successes over the Somme were not repeated. During their attack at Arras, the British lost 316 air crews and the Canadians lost 114 compared to 44 lost by the Germans. This became known to the Royal Flying Corps as Bloody April.

Nivelle Offensive

Main articles: Battle of Arras (1917)Nivelle Offensive, and 1917 French Army mutinies

Ruins of Arras in April 1917

The same month, the French Commander-in-chief, General Robert Nivelle, ordered a new offensive against the German trenches, promising that it would end the war within 48 hours. The 16 April attack, dubbed the Nivelle Offensive (also known as the Second Battle of the Aisne), would be 1.2 million men strong, preceded by a week-long artillery bombardment and accompanied by tanks. The offensive proceeded poorly as the French troops, with the help of two Russian brigades, had to negotiate rough, upward-sloping terrain in extremely bad weather. Planning had been dislocated by the voluntary German withdrawal to the Hindenburg Line. Secrecy had been compromised and German aircraft gained air superiority, making reconnaissance difficult and in places, the creeping barrage moved too fast for the French troops. Within a week the French suffered 120,000 casualties. Despite the casualties and his promise to halt the offensive if it did not produce a breakthrough, Nivelle ordered the attack to continue into May.

On 3 May the weary French 2nd Colonial Division, veterans of the Battle of Verdun, refused orders, arriving drunk and without their weapons. Lacking the means to punish an entire division, its officers did not immediately implement harsh measures against the mutineers. Mutinies occurred in 54 French divisions and 20,000 men deserted. Other Allied forces attacked but suffered massive casualties. Appeals to patriotism and duty followed, as did mass arrests and trials. The French soldiers returned to defend their trenches but refused to participate in further offensive action. On 15 May Nivelle was removed from command, replaced by Pétain who immediately stopped the offensive. The French would go on the defensive for the following months to avoid high casualties and to restore confidence in the French High Command, while the British assumed greater responsibility.

American Expeditionary Force

On 25 June the first US troops began to arrive in France, forming the American Expeditionary Force. However, the American units did not enter the trenches in divisional strength until October. The incoming troops required training and equipment before they could join in the effort, and for several months American units were relegated to support efforts. Despite this, however, their presence provided a much-needed boost to Allied morale, with the promise of further reinforcements that could tip the manpower balance towards the Allies.

Flanders offensive

Main articles: Battle of Messines (1917) and Third Battle of Ypres

Two United States soldiers run toward a bunker past the bodies of two German soldiers.

In June, the British launched an offensive in Flanders, in part to take the pressure off the French armies on the Aisne, after the French part of the Nivelle Offensive failed to achieve the strategic victory that had been planned and French troops began to mutiny. The offensive began on 7 June, with a British attack on Messines Ridge, south of Ypres, to retake the ground lost in the First and Second battles in 1914. Since 1915 specialist Royal Engineer tunnelling companies had been digging tunnels under the ridge, and about 500 t (490 long tons) of explosives had been planted in 21 mines under the German defences. Following several weeks of bombardment, the explosives in 19 of these mines were detonated, killing up to 7,000 German troops. The infantry advance that followed relied on three creeping barrages which the British infantry followed to capture the plateau and the east side of the ridge in one day. German counter-attacks were defeated and the southern flank of the Gheluvelt plateau was protected from German observation.

On 11 July 1917, during Unternehmen Strandfest (Operation Beachparty) at Nieuport on the coast, the Germans introduced a new weapon into the war when they fired a powerful blistering agent Sulfur mustard (Yellow Cross) gas. The artillery deployment allowed heavy concentrations of the gas to be used on selected targets. Mustard gas was persistent and could contaminate an area for days, denying it to the British, an additional demoralising factor. The Allies increased production of gas for chemical warfare but took until late 1918 to copy the Germans and begin using mustard gas.

From 31 July to 10 November the Third Battle of Ypres included the First Battle of Passchendaele and culminated in the Second Battle of Passchendaele. The battle had the original aim of capturing the ridges east of Ypres then advancing to Roulers and Thourout to close the main rail line supplying the German garrisons on the Western front north of Ypres. If successful the northern armies were then to capture the German submarine bases on the Belgian coast. It was later restricted to advancing the British Army onto the ridges around Ypres, as the unusually wet weather slowed British progress. The Canadian Corps relieved the II ANZAC Corps and took the village of Passchendaele on 6 November, despite rain, mud and many casualties. The offensive was costly in manpower for both sides for relatively little gain of ground against determined German resistance but the ground captured was of great tactical importance. In the drier periods, the British advance was inexorable and during the unusually wet August and in the Autumn rains that began in early October, the Germans achieved only costly defensive successes, which led the German commanders in early October to begin preparations for a general retreat. Both sides lost a combined total of over a half million men during this offensive.The battle has become a byword among some British revisionist historians for bloody and futile slaughter, whilst the Germans called Passchendaele “the greatest martyrdom of the war.”

Battle of Cambrai

Main article: Battle of Cambrai

On 20 November the British launched the first massed tank attack and the first attack using predicted artillery-fire (aiming artillery without firing the guns to obtain target data) at the Battle of Cambrai. The Allies attacked with 324 tanks (with one-third held in reserve) and twelve divisions, advancing behind a hurricane bombardment, against two German divisions. The machines carried fascines on their fronts to bridge trenches and the 13-foot-wide (4 m) German tank traps. Special “grapnel tanks” towed hooks to pull away the German barbed wire. The attack was a great success for the British, who penetrated further in six hours than at the Third Ypres in four months, at a cost of only 4,000 British casualties. The advance produced an awkward salient and a surprise German counter-offensive began on 30 November, which drove back the British in the south and failed in the north. Despite the reversal, the attack was seen as a success by the Allies, proving that tanks could overcome trench defences. The Germans realised that the use of tanks by the Allies posed a new threat to any defensive strategy they might mount. The battle had also seen the first mass use of German Stosstruppen on the Western front in the attack, who used infantry infiltration tactics to penetrate British defences, bypassing resistance and quickly advancing into the British rear.

1918

Map of the final German offensives, 1918

Following the successful Allied attack and penetration of the German defences at Cambrai, Ludendorff and Hindenburg determined that the only opportunity for German victory lay in a decisive attack along the Western front during the spring, before American manpower became overwhelming. On 3 March 1918, the Treaty of Brest-Litovsk was signed and Russia withdrew from the war. This would now have a dramatic effect on the conflict as 33 divisions were released from the Eastern Front for deployment to the west. The Germans occupied almost as much Russian territory under the provisions of the Treaty of Brest-Litovsk as they did in the Second World War but this considerably restricted their troop redeployment. The Germans achieved an advantage of 192 divisions in the west to the 178 Allied divisions, which allowed Germany to pull veteran units from the line and retrain them as Stosstruppen (40 infantry and 3 cavalry divisions were retained for German occupation duties in the east).

The Allies lacked unity of command and suffered from morale and manpower problems, the British and French armies were severely depleted and not in a position to attack in the first half of the year, while the majority of the newly arrived American troops were still training, with just six complete divisions in the line. Ludendorff decided on an offensive strategy beginning with a big attack against the British on the Somme, to separate them from the French and drive them back to the channel ports. The attack would combine the new storm troop tactics with over 700 aircraft, tanks and a carefully planned artillery barrage that would include gas attacks.

German spring offensives

Main article: German spring offensive

German tank in Roye, 21 March 1918

Operation Michael, the first of the German spring offensives, very nearly succeeded in driving the Allied armies apart, advancing to within shelling distance of Paris for the first time since 1914.As a result of the battle, the Allies agreed on unity of command. General Ferdinand Foch was appointed commander of all Allied forces in France. The unified Allies were better able to respond to each of the German drives and the offensive turned into a battle of attrition. In May, the American divisions also began to play an increasing role, winning their first victory in the Battle of Cantigny. By summer, between 250,000 and 300,000 American soldiers were arriving every month. A total of 2.1 million American troops would be deployed on this front before the war came to an end. The rapidly increasing American presence served as a counter for the large numbers of redeployed German forces.

Allied counter-offensives

Main articles: Second Battle of the MarneHundred Days Offensive, and Armistice of 11 November 1918

Italian regiments in 1918

In July, Foch began the Second Battle of the Marne, a counter-offensive against the Marne salient which was eliminated by August. The Battle of Amiens began two days later, with Franco-British forces spearheaded by Australian and Canadian troops, along with 600 tanks and 800 aircraft. Hindenburg named 8 August as the “Black Day of the German army.” The Italian 2nd Corps, commanded by General Alberico Albricci, also participated in the operations around Reims. German manpower had been severely depleted after four years of war and its economy and society were under great internal strain. The Allies fielded 216 divisions against 197 German divisions. The Hundred Days Offensive beginning in August proved the final straw and following this string of military defeats, German troops began to surrender in large numbers.As the Allied forces advanced, Prince Maximilian of Baden was appointed as Chancellor of Germany in October to negotiate an armistice. Ludendorff was forced out and fled to Sweden. The German retreat continued and the German Revolution put a new government in power. The Armistice of Compiègne was quickly signed, stopping hostilities on the Western Front on 11 November 1918, later known as Armistice Day. The German Imperial Monarchy collapsed when General Groener, the successor to Ludendorff, backed the moderate Social Democratic Government under Friedrich Ebert, to forestall a revolution like those in Russia the previous year.

Aftermath

Main article: Aftermath of World War I

NationalityKilledWoundedPOW
France1,395,000c. 6,000,000508,000
United Kingdom700,600c. 3,000,500223,600
Canada56,400259,700
United States117,000330,1004,430
Australia48,900175,900
Belgium80,200144,70010,200
New Zealand12,90034,800
India6,67015,7501,090
Pakistan6,67015,7501,090
Russia7,542[f]20,000
Italy4,500[g]10,500
South Africa3,2508,7202,220
Portugal1,29013,7506,680
Siam19
Allies2,440,941c. 10,029,670c. 757,310
Germany1,593,0005,116,000774,000
Austro-Hungary77913,1135,403
Central Powers1,593,779c. 5,129,113c. 779,403
Grand Totalc. 4.034,720c. 15,158,783c. 1,536,710

The war along the Western Front led the German government and its allies to sue for peace in spite of German success elsewhere. As a result, the terms of the peace were dictated by France, Britain and the United States, during the 1919 Paris Peace Conference. The result was the Treaty of Versailles, signed in June 1919 by a delegation of the new German government. The terms of the treaty constrained Germany as an economic and military power. The Versailles treaty returned the border provinces of Alsace-Lorraine to France, thus limiting the quantity of coal available to German industry. The Saar, which formed the west bank of the Rhine, would be demilitarized and controlled by Britain and France, while the Kiel Canal opened to international traffic. The treaty also drastically reshaped Eastern Europe. It severely limited the German armed forces by restricting the size of the army to 100,000 and prohibiting a navy or air force. The navy was sailed to Scapa Flow under the terms of surrender but was later scuttled as a reaction to the treaty.

Casualties

Main article: Casualties of World War I

The war in the trenches of the Western Front left tens of thousands of maimed soldiers and war widows. The unprecedented loss of life had a lasting effect on popular attitudes toward war, resulting later in an Allied reluctance to pursue an aggressive policy toward Adolf Hitler. Belgium suffered 30,000 civilian dead and France 40,000 (including 3,000 merchant sailors). The British lost 16,829 civilian dead; 1,260 civilians were killed in air and naval attacks, 908 civilians were killed at sea and there were 14,661 merchant marine deaths. Another 62,000 Belgian, 107,000 British and 300,000 French civilians died due to war-related causes.

Economic costs

See also: French war planning 1920–1940

Germany in 1919 was bankrupt, the people living in a state of semi-starvation and having no commerce with the remainder of the world. The Allies occupied the Rhine cities of Cologne, Koblenz and Mainz, with restoration dependent on payment of reparations. In Germany a Stab-in-the-back myth (Dolchstoßlegende) was propagated by Hindenburg, Ludendorff and other defeated generals, that the defeat was not the fault of the ‘good core’ of the army but due to certain left-wing groups within Germany who signed a disastrous armistice; this would later be exploited by nationalists and the Nazi party propaganda to excuse the overthrow of the Weimar Republic in 1930 and the imposition of the Nazi dictatorship after March 1933.

France suffered more casualties relative to its population than any other great power and the industrial north-east of the country was devastated by the war. The provinces overrun by Germany had produced 40 percent of French coal and 58 percent of its steel output. Once it was clear that Germany was going to be defeated, Ludendorff had ordered the destruction of the mines in France and Belgium. His goal was to cripple the industries of Germany’s main European rival. To prevent similar German attacks in the future, France later built a massive series of fortifications along the German border known as the Maginot Line.

WW1 Transportation and logistics getting supplies to the troups

One factor that was crucial in shaping the outcome of World War I was the transport system. As the troops were mobilised to the horrors of trench warfare on the Western Front in 1914, the problem of getting supplies to them, in the thick of the conflict, was a massive challenge for the War Office.

The railway system provided the necessary logistical capacity to transport supplies from Britain to massive armies in the field, including artillery shells, but once the supplies reached their destination in Europe, the new objective of getting them to the heart of the combat began.

Up to two million British soldiers were serving on the Western Front, split into divisions of around 12,000 men each. They required around 1,000 tons of supplies daily, including food, bullets, blankets, bandages and artillery batteries. This equated to two supply trains of 50 wagons each.

Even larger quantities of supplies were needed when a new offensive was being planned, as the War Office had to allow for the possibility of the troops being in one place for months while the operation proceeded.

Model B Truck

©Public Domain

Logistics challenges

The British troops had their own unique challenges, with the transportation system complicated by the English Channel. War supplies were taken by special ferry across the water in wagons, arriving at a Channel port in France. They would be loaded on to the French trains and taken to the main supply areas behind the British lines.

Once the items had arrived by rail, the next major task of taking them to the frontline began. The problem was that the goods had to be taken across around seven miles of rough terrain to the front. Anyone completing the transport run was in danger of being hit by long distance artillery shelling.

Horse-drawn vehicles were used for some of the transportation, but the daily round trip of around 14 miles was too much for them. Similarly, dogs (specially trained at the War Dog School of Instruction in Hampshire) were utilised in and around the trenches for carrying small amounts of supplies. Pack mules were also used in areas of difficult and muddy terrain.

When it came to transporting bulk shipments from the main railway storage areas to the frontline, large and reliable vehicles were needed. The war effort wouldn’t have been possible without the use of motorised transport, the mechanics who kept the vehicles in good repair and the drivers who risked their lives to complete the missions.
 

Motorised vehicles

More than 1,000 civilian lorries (and more than 300 buses) were requisitioned at the start of the war as military vehicles. They were shipped across the Channel by ferry.

The War Office had launched a scheme whereby the vehicles’ owners had been offered a subsidy to buy trucks and lorries that met the War Office’s specifications, on the grounds that the vehicles could be used temporarily in Europe to transport supplies.

London buses were among those requisitioned and these remained in service until the end of the war in 1918. The War Office also ordered thousands more heavy goods vehicles from British manufacturers, and later, from American companies.

Although there was still a reliance on horse-drawn transport, the war effort increasingly depended on motorised transport. The problem of using horses was that horse feed took up more space than the supplies being sent for the troops.

Beginning, in July 2016, the conditions during the Somme campaign caused fresh problems for the lorries and buses, since a combination of torrential rain, inadequate roads and the weight of the supply-laden lorries on narrow, solid rubber tyres, led to many of the vehicles becoming bogged down in the mud.

It was a major feat for the drivers and mechanics to keep them going to supply the British artillery with the 28 million shells needed for the Somme conflict. The lorries were transporting 20,000 tonnes of supplies every day, along a front of around 12 miles. It was an ongoing massive challenge to distribute them adequately.
 

FWD Model B truck

Among the heavy goods vehicles commonly used to transport supplies was the FWD Model B truck, constructed in the United States. It was used by the US, Britain and Russia during World War I and was so well-built that it saw further service in World War II.

It had first been manufactured in 1912, before the war, by the Four-Wheel Drive Auto Company (FWD), although it had been built to military specifications. More than 17,500 of the trucks were built and many of them were taken into military service.

Based on an earlier model, the 1908 “Battleship” lorry, which had first been built in Clintonville, Wisconsin, the design was revolutionary in that it had a four-wheel drive set-up that was more practical.

More than 14,000 of the trucks were used by the American services, 3,000 were used by the British and around 82 were used by the Imperial Russian forces.

In late 1916, the British began to construct further lengths of light railway tracks to ease the strain on the supply chain. Although they helped to bridge part of the gap, they were also vulnerable to enemy fire.

In 1917, a newly created Allied Labour Corps, including thousands of recruits from Egypt, China, India and other Empire countries, was set up to help keep the supply chain moving and support the defensive lines for the duration of the war, until it finally ended on 11th November 1918.

WW1 Douglas Haig Commander

Douglas Haig, 1st Earl HaigKTGCBOMGCVOKCIE (/heɪɡ/; 19 June 1861 – 29 January 1928) was a senior officer of the British Army. During the First World War he commanded the British Expeditionary Force (BEF) on the Western Front from late 1915 until the end of the war.[1][2][3]

His military career included service in the War Office, where he was instrumental in the creation of the Territorial Force in 1908. In January 1917 he was promoted to the rank of Field Marshal, subsequently leading the BEF during the final Hundred Days Offensive. This campaign, in combination with the Kiel mutiny, the Wilhelmshaven mutiny, the proclamation of a republic on 9 November 1918 and civil unrest across Germany, led to the armistice of 11 November 1918. It is considered by some historians to be one of the greatest victories ever achieved by a British-led army.

He gained a favourable reputation during the immediate post-war years, with his funeral a day of national mourning. However he also had some prominent contemporary detractors and, beginning in the 1960s, has been widely criticised for his wartime leadership. He was nicknamed “Butcher Haig” for the two million British casualties under his command. The Canadian War Museum comments: “His epic but costly offensives at the Somme (1916) and Passchendaele (1917) have become nearly synonymous with the carnage and futility of First World War battles.” Since the 1980s many historians have argued that the public hatred of Haig failed to recognise the adoption of new tactics and technologies by forces under his command, the important role played by British forces in the allied victory of 1918, and that high casualties were a consequence of the tactical and strategic realities of the time.

Early life

Age 23 in 1885, in his hussar’s uniform

Haig was born in a house on Charlotte Square, Edinburgh.His father, John Richard Haig, an alcoholic, was head of the family’s successful Haig & Haig whisky distillery; he had an income of £10,000 per year (£1,160,000 in 2018), an enormous amount at the time. His mother, Rachel (daughter of Hugh Veitch of Stewartfield), was from an impoverished gentry family. The family home was Haig House in Windygates, Fife.

Haig’s education began in 1869 as a boarder at Mr Bateson’s School in St Andrews. Later in 1869, he switched to Edinburgh Collegiate School, and then in 1871 to Orwell House, a preparatory school in Warwickshire. He then attended Clifton College.Both of Haig’s parents had died by the time he was eighteen.[18]

After a tour of the United States with his brother, Haig studied Political Economy, Ancient History and French Literature at Brasenose College, Oxford, 1880–1883. He devoted much of his time to socialising – he was a member of the Bullingdon Club – and equestrian sports. He was one of the best young horsemen at Oxford and part of the University polo team. While an undergraduate he was initiated as a Freemason in Elgin’s Lodge at Leven, Fife, taking the first and second degrees of Freemasonry. In 1920 the Earl of Eglinton encouraged Haig to complete his Masonic progression, and he returned to his lodge to take the third degree, serving as Worshipful Master of the lodge from 1925 to 1926.[21] He became an officer of the Grand Lodge of Scotland.

Although he passed his final exam at Oxford (a requirement for university applicants to Sandhurst), he was not eligible for a degree as he had missed a term’s residence owing to illness, and if he had stayed for longer he would have been above the age limit (23) to begin officer training at the Royal Military College at Sandhurst, which he entered in January 1884. Because he had been to university, Haig was considerably older than most of his class at Sandhurst. He was Senior Under-Officer, was awarded the Anson Sword and passed out first in the order of merit. He was commissioned as a lieutenant into the 7th (Queen’s Own) Hussars on 7 February 1885.

Plaque marking Earl Haig’s birthplace, Charlotte Square, Edinburgh

Career

Junior officer

Early in his military career, Haig played polo for England on a tour of the United States (August 1886). He would remain a polo enthusiast all his life, serving as Chairman of the Hurlingham Polo Committee from 1914 until 1922, President of the Army Polo Committee, and founder of the Indian Polo Association.

Haig saw overseas service in India (sent out November 1886), where he was appointed the regiment’s adjutant in 1888. He was something of a disciplinarian, but impressed his superiors by his administrative skill and analysis of training exercises. He was promoted to captain on 23 January 1891.

Haig left India in November 1892 to prepare for the entrance exam for the Staff College, Camberley, which he sat in June 1893. Although he was placed in the top 28 (the number of places awarded by exam) he was not awarded a place as he had narrowly failed the compulsory mathematics paper. He concealed this failure for the rest of his life and in 1910 recommended dropping the mathematics paper as a requirement. Adjutant-General Sir Redvers Buller refused to award Haig one of the four nominated places, citing his colour blindness, despite Haig having his eyesight rechecked by a German oculist and despite glowing testimonials. It has been postulated that Buller was looking for a rationale to give a place to an infantry officer.

Haig returned briefly to India as second-in-command of the squadron which he had himself commanded in 1892, then returned to the UK as Aide-de-camp to Sir Keith Fraser, Inspector General of Cavalry. Fraser was one of those who had lobbied for Haig to enter the Staff College, and he was finally nominated in late 1894, a common practice in the day for promising candidates. While waiting to take up his place, he travelled to Germany to report on cavalry manoeuvres there, and served as staff officer to Colonel John French on manoeuvres. The careers of French and Haig were to be entwined for the next twenty-five years, and Haig helped French write the cavalry drillbook, published 1896.

Haig entered Staff College, Camberley in 1896, where he was apparently not popular with his peers. For example, they chose Allenby as Master of the Drag Hunt, despite Haig being the better rider.[33] Haig impressed the Chief Instructor, Lt-Col G. F. R. Henderson, and completed the course, leaving in 1897. Camberley’s old-fashioned curriculum[34] especially influenced Haig, as he was an absorber of doctrine rather than an original thinker. Haig was taught that victory must come from defeating the main enemy army in battle, and that attrition (the “wearing out fight”) was merely a prelude to the commitment of reserves for a decisive battlefield victory; traces of this thought can be seen at Loos and the Somme. Great emphasis was placed on morale and mobility, and on Murat‘s cavalry pursuit after Napoleon‘s Jena campaign of 1806.

Mahdist War, 1898

In early January Haig was picked by Evelyn Wood (by then Adjutant-General) as one of three recent staff college graduates requested by Kitchener for a campaign in the Mahdist War in the Sudan. He may have been picked to keep an eye on Kitchener, as Wood invited him to write to him in confidence. Haig needed little encouragement to (privately) criticise his superiors – he was especially critical of Kitchener’s dictatorial habits. Kitchener’s force was Anglo-Egyptian, and Haig was required to formally join the Egyptian Army, most of whose officers were British. The plan had been for him to train and take command of an Egyptian cavalry squadron, but Kitchener did not want a command reshuffle with combat imminent. Unlike many British officers, Haig believed that the Egyptians could make good soldiers if properly trained and led. Still without a formal position but accompanying the cavalry, Haig saw his first action in a skirmish south of Atbara (21 March). In his report to Wood about the skirmish, Haig commented on the lack of British machine guns. While later criticized for his failure to optimize the use of machine guns, Haig made a special trip to Enfield to study the Maxim Gun, and throughout the campaign commented on its worth.

Four days later he was made staff officer of Broadwood‘s cavalry brigade. Haig distinguished himself at his second action, the Battle of Nukheila (6 April), where he supervised the redeployment of squadrons to protect the rear and then launch a flank attack. He was present at the Battle of Atbara (8 April), after which he criticised Kitchener for launching a frontal attack without taking the Dervishes in flank. During the latter action Haig risked his life rescuing a wounded Egyptian soldier under enemy fire, an act which moved several officers present to believe Haig should receive the Victoria Cross. After Atbara, Kitchener was given reinforcements and Haig received a squadron of his own, which he commanded at Omdurman (in reserve during the battle, then on a flank march into the town afterwards). He was promoted to brevet major on 15 November 1898.

Second Boer War, 1899–1902

Haig returned to the United Kingdom hoping for a position at the War Office, but was instead appointed (May 1899) brigade major to the 1st Cavalry Brigade at Aldershot.

Haig had recently lent £2,500 (in a formal contract with interest, worth £400,000 in 2024) to the brigade commander, John French, to cover his losses from South African mining speculations. The loan allowed French to maintain his commission. Haig was promoted to the substantive rank of major on 26 June 1899.

Haig was soon appointed Deputy Assistant Adjutant-General (September 1899)[47] and then Assistant Adjutant General (i.e. chief staff officer) of French’s brigade-sized force as it was sent to the Boer War.He took part in French’s first battle, Elandslaagte (21 October). French and Haig were ordered to leave Ladysmith as the four-month siege began, to take charge of the new Cavalry Division arriving from the UK. The two men escaped on the last train to leave Ladysmith (2 November 1899), lying down as it passed through enemy fire.

Haig continued to be sceptical of the importance of artillery, basing his opinions on interviews with enemy prisoners.After French’s Colesberg Operations to protect Cape Colony, Frederick Roberts, newly arrived as Commander-in-Chief, appointed his protégé Colonel the Earl of Erroll, over French’s protests, to the job of Assistant Adjutant General of the Cavalry Division, with Haig, who had been promised the job (and the local rank of lieutenant-colonel), as his deputy. Cavalry played a leading role in this stage of the war, including the relief of Kimberley (15 February 1900), which featured a spectacular British cavalry charge at Klip Drift. Haig was briefly (21 February 1900) given command of the 3rd Cavalry Brigade, then made AAG to the Cavalry Division after Erroll was moved to a different job. French’s Division took part in the capture of Bloemfontein (13 March 1900) and Pretoria (5 June 1900). Haig privately criticised Roberts and thought him a “silly old man”.

After Roberts had won the conventional war, Kitchener was left in charge of fighting the Boers, who had taken to guerrilla warfare. The Cavalry Division was disbanded (November 1900) and French, with Haig still his chief of staff, was put in charge of an all-arms force policing the Johannesburg area, later trying to capture the Boer leader de Wet around Bloemfontein. In January 1901 Haig was given a column of 2,500 men with the local rank of brigadier-general, patrolling Cape Colony, and chasing Commandant Kritzinger. As was standard policy at that time, Haig’s actions included burning farmsteads as part of the scorched earth policies ordered by Lord Kitchener as well as rounding up Boer women and children to be placed in concentration camps.

Throughout the war Haig’s sister, Henrietta, had been lobbying Evelyn Wood for her brother to have command of a cavalry regiment when the war was over. French, probably not wanting to part with a valuable assistant, recommended Herbert Lawrence for the vacant command of the 17th Lancers, but Roberts, now Commander-in-Chief back in Britain, overruled him and gave it to Haig (May 1901). As the 17th Lancers were in South Africa at the time Haig was able to combine that command with that of his own column.

As the war drew to a close Haig had to locate and escort the Boer leader Jan Christiaan Smuts to the peace negotiations at Vereeninging. Haig was mentioned in despatches four times for his service in South Africa (including by Lord Roberts on 31 March 1900,and by Lord Kitchener on 23 June 1902), and appointed a Companion of the Order of the Bath (CB) in November 1900. He was promoted to the substantive rank of lieutenant colonel on 17 July 1901.

Following the war, Haig left Cape Town with 540 officers and men of the 17th Lancers on the SS German in late September 1902.The regiment was supposed to stay in South Africa but in the end returned home sooner than planned, and arrived at Southampton in late October, when they were posted to Edinburgh. Haig was appointed an aide-de-camp to King Edward VII in the October 1902 South Africa Honours list, with the brevet rank of colonel.

Inspector-General of Cavalry, India

Haig continued as the commanding officer of the 17th Lancers until 1903, stationed in Edinburgh. He was then appointed Inspector-General of Cavalry in British India. He would have preferred command of the cavalry brigade at Aldershot, where French was now General Officer Commanding, but had first to spend a year on garrison duty at Edinburgh until the previous incumbent completed his term.

Haig’s war service had earned him belated but rapid promotion: having been a captain until the relatively advanced age of thirty-seven, by 1904 he had become the youngest major-general in the British Army at that time. He was present at the Rawalpindi Parade 1905 to honour the Prince and Princess of Wales’ visit to India. At this time a great deal of the energies of the most senior British generals were taken up with the question of whether cavalry should still be trained to charge with sword and lance (the view of French and Haig). Lord Roberts, now Commander-in-Chief of the British Army, warned Kitchener (now Commander-in-Chief, India) to be “very firm with Haig” on this issue, and wrote that Haig was a “clever, able fellow” who had great influence over Sir John French.

Marriage and children

On leave from India, Haig married Dorothy Maud Vivian on 11 July 1905 after a whirlwind courtship (she had spotted him for the first time when he was playing polo at Hurlingham two years earlier). She was a daughter of Hussey Vivian, 3rd Baron Vivian and Louisa Duff.[62]: 562 

The couple had four children:

Haig had used his leave in 1905 to lobby for a job at the War Office, but the proposal was rejected by H. O. Arnold-Forster the Secretary of State for War as too blatantly relying on royal influence.

War Office

The Boer War had exposed Britain’s lack of a general staff and modern reserve army. In August 1906 Haig was appointed Director of Military Training at the War Office. Haldane later wrote that Haig had “a first rate general staff mind” and “gave invaluable advice”. Although both men later claimed that the reforms had been to prepare Britain for continental war, they created a small professional army within a budget, with conscription politically impossible.

The reforms reorganised the militia, yeomanry and volunteers into the new Territorial Force. Haig was intolerant of what he regarded as old-fashioned opinions and not good at negotiating with strangers. Haig had wanted a reserve of 900,000 men, but Haldane settled for a more realistic 300,000. Haig’s skills at administration and organising training and inspections were better employed in setting up an Expeditionary Force of 120,000 men in 1907. As an intimate of Haldane Haig was able to ensure high priority for cavalry, less for artillery, contrary to the advice of Lord Roberts (now retired). Haig’s records of his time supervising artillery exercises show little interest in technical matters.

In November 1907 Haig was moved sideways to Director of Staff Duties. He required commanders to take the staff officers assigned to them (rather than choose their own by patronage) and assigned staff officers to the new Territorial Army. He supervised publication of “Field Service Regulations”, which was later very useful in expanding the BEF, although it still stressed the importance of cavalry charging with sword and lance. At this time he was completing a separate work, “Cavalry Studies”, and devoting much time to cavalry exercises.

Chief of Staff, India

By 1909 it seemed likely that an Anglo-German War loomed and Haig was reluctant to accept appointment as Chief of the General Staff in India. He passed the Director of Staff Duties job to his loyal follower Brigadier-General Kiggell, to whom he wrote with “advice” every fortnight. Haig, who had been knighted for his work at the War Office, was promoted to lieutenant-general in November 1910. In India he had hoped to develop the Indian General Staff and to organise despatch of the British Indian Army to a future European war. The latter was vetoed by Viceroy Lord Hardinge. An Indian Corps would serve on the Western Front early in the conflict, and Indian troops were used in comparatively small formations in the Middle East.

Aldershot

Haig left India in December 1911, and took up an appointment as General Officer Commanding Aldershot Command (1st & 2nd Divisions and 1st Cavalry Brigade) in March 1912.

In the Army Manoeuvres of 1912 he was decisively beaten by Sir James Grierson despite having the odds in his favour, because of Grierson’s superior use of air reconnaissance. At dinner afterwards Haig abandoned his prepared text, and although he wrote that his remarks were “well received”, John Charteris recorded that they were “unintelligible and unbearably dull” and that the visiting dignitaries fell asleep. Haig’s poor public speaking skills aside, the manoeuvres were thought to have shown the reformed army efficient.

First World War

1914

Outbreak of war

Map of the Western Front in 1914.

During the Curragh Mutiny (March 1914) Haig urged caution on his chief of staff John Gough, whose brother Hubert Gough was threatening to resign rather than coerce Ulstermen into a semi-independent Ireland. Haig stressed that the army’s duty was to keep the peace. Sir John French was forced to resign as CIGS, after putting in writing a promise that officers would not be required to coerce Ulster; Haig respected Hubert Gough’s principled stand but felt French had allowed himself to be used as a political tool by H. H. Asquith.

Upon the outbreak of war in August 1914, Haig helped organize the British Expeditionary Force (BEF), commanded by Field Marshal Sir John French. As planned, Haig’s Aldershot command was formed into I Corps. In a letter to Haldane (4 August), Haig predicted that the war would last for months if not years; Haig wanted Haldane to delay sending the BEF to France until the Territorial Army had been mobilised and incorporated. Haig attended the War Council (5 August), at which it was decided that it was too dangerous to mobilise forward in France at Maubeuge near the Belgian border, as British mobilisation was running three days behind that of France and Germany. There were no other contingency plans – Haig and Kitchener proposed that the BEF would be better positioned to counter-attack in Amiens. Sir John French suggested landing at Antwerp, which was vetoed by Winston Churchill as the Royal Navy could not guarantee safe passage. A critical biographer writes that Haig was “more clear-sighted than many of his colleagues”.

In his much-criticised memoirs 1914, French claimed that Haig had wanted to postpone sending the BEF, which may be partly true given what Haig had written to Haldane. Haig was so angry at this claim that he asked Cabinet Secretary Maurice Hankey to correct French’s “inaccuracies”. However Haig also rewrote his diary from this period, possibly to show himself in a better light and French in a poor one. The original manuscript diary does not survive but there is no positive evidence that it was destroyed, and it is just as likely that the extant typed version was prepared from dictation or notes now lost. Hankey’s notes of the meeting record that Haig suggested delaying or sending smaller forces, but was willing to send forces if France was in danger of defeat or if France wanted them (which it did). Haig predicted that the war would last several years and that an army of a million men, trained by officers and NCOs withdrawn from the BEF, would be needed.

Haig had been appointed aide-de-camp to King George V in February 1914.[83] During a royal inspection of Aldershot (11 August), Haig told the King that he had “grave doubts” about French’s temper and military knowledge. He later claimed that these doubts had gone back to the Boer War but there appears to have been an element of later embellishment about this; Haig had in fact praised French during the Boer War and had welcomed his appointment as CIGS in 1911.

Mons to the Marne

Haig with Major-General C. C. Monro (commanding 2nd Division), Brigadier-General J. E. Gough (Haig’s Chief of Staff), and Major General Sir Edward Perceval (commander of 2nd Division’s artillery) in a street in France, 1914.

Haig crossed over to Le Havre. The BEF landed in France on 14 August and advanced into Belgium. Haig was irritated by Sir John French, who ignored intelligence reports of German forces streaming westwards from Brussels, threatening an encirclement from the British left. Although II Corps fought off the German attack at Mons on 23 August the BEF was forced to withdraw.

The retreats of I and II Corps had to be conducted separately because of the Mormal Forest. The two corps were supposed to meet at Le Cateau but I Corps under Haig were stopped at Landrecies, leaving a large gap between the two. Haig’s reactions to his corps’ skirmish with German forces at Landrecies (during which Haig led his staff into the street, revolvers drawn, promising to “sell our lives dearly”) caused him to send an exaggerated report to French, which caused French to panic. The following day 26 August, Horace Smith-Dorrien‘s II Corps engaged the enemy in the Battle of Le Cateau, which was unsupported by Haig. This battle slowed the German advance. However, a critical biographer writes that too much has been made of the “moment of panic” at Landrecies, and that the 200-mile (320 km) retreat, over a period of 13 days, is a tribute to the “steady and competent leadership” of Haig and Smith-Dorrien.

On 25 August the French commander Joseph Joffre ordered his forces to retreat to the Marne, which compelled the BEF to further withdraw. Haig was irritated by the high-handed behaviour of the French, seizing roads which they had promised for British use and refusing to promise to cover the British right flank. He complained privately of French unreliability and lack of fighting competence, a complaint which he would keep up for the next four years. He wrote to his wife that he wished the British were operating independently from Antwerp, a proposal which he had rejected as “reckless” when Sir John French had made it at the War Council on 4 August.

The retreat caused Sir John French to question the competence of his Allies and led to his decision to withdraw the BEF south of the Seine. On 1 September, Lord Kitchener intervened by visiting French and ordering him to re-enter the battle and coordinate with Joffre’s forces. The battle to defend Paris began on 5 September and became known as the first Battle of the Marne. Haig had wanted to rest his corps but was happy to resume the offensive when ordered. He drove on his subordinates when he thought them lacking in “fighting spirit”. Although Sir John French praised Haig’s leadership of his corps, Haig was privately contemptuous of French’s overconfidence prior to Mons and excessive caution thereafter.

First Battle of Ypres

On 15 October, after two weeks of friction between British and French generals, Haig’s I Corps was moved to Ypres in Flanders as part of the “Race to the Sea“. In the belief that the German northern flank was weak, Haig was ordered to march on GhentBruges and Courtrai in western Belgium but the new German Chief of Staff Falkenhayn was trying to do the opposite and roll up the Allied northern flank. I Corps marched headlong into a thrust westward by fresh German forces, resulting in the First Battle of Ypres. German forces, equipped with 250 heavy guns (a large number for this stage in the war), outnumbered I Corps by two to one and came close to success. At one point Haig mounted his horse to encourage his men, who were retreating around Gheluvelt, although the town had just been recaptured by a battalion of the Worcesters. Haig cemented his reputation at this battle and Ypres remained a symbolic location in later years. Haig was also influenced by the fact that the Germans had called off their offensive when they were on the verge of success, concluding that attacks needed to be kept up so long as there was any chance of success

After a fortnight of intense fighting I Corps had been reduced from 18,000 men to just under 3,000 effectives by 12 November. After six days of bickering between British and French generals, I Corps was relieved by French troops; Haig was very suspicious of the pro-French sympathies of Henry Wilson. French, who had been ordered by his doctor to relieve the strain on his heart, recommended Haig for immediate promotion to general. Haig travelled to London on French’s behalf to consult Kitchener about the plan to expand the BEF and reorganise it into two armies.

At this point it was thought that the war would end once the Germans were defeated by the Russians at Lodz and the difficulties of attacking on the Western Front were not yet appreciated. A failed attack by Smith-Dorrien’s II Corps on Messines–Wytschaete (14–15 December) was blamed on poor GHQ staff work, and on 18 December, Haig met French, who said he wanted to sack the BEF chief of staff Murray, whose performance had been unsatisfactory throughout the campaign and promote his deputy Henry Wilson. Haig thought that Wilson had “no military knowledge” and recommended Quarter-Master General “Wully” Robertson. This was also the view of Lord Kitchener, so Robertson received the promotion. Haig received promotion to general on 16 November 1914.

1915

Spring offensives

French, Joffre and Haig (left to right) visit the front line during 1915. Henry Wilson is second from the right.

Like French, Haig wanted to push along the North Sea Coast to Ostend and Zeebrugge but Joffre did not want the British acting so independently. Germany had recently sent eight infantry divisions to the Eastern Front, so French and Joffre agreed that a French offensive in Artois and Champagne, should be accompanied by a British offensive at Neuve-Chapelle to be conducted by Haig. At Neuve Chapelle, Haig wanted a quick bombardment and his subordinate Henry Rawlinson a longer and more methodical one. Shortage of shells meant that only a thirty-five-minute bombardment was possible but the small front of the attack gave it the concentration to succeed.

Haig was greatly interested in the potential of aircraft and met Major Trenchard of the Royal Flying Corps to organise photographic air reconnaissance and a map of German lines was obtained; aircraft were also used for artillery spotting. Four divisions attacked at the Battle of Neuve Chapelle on 10 March and penetrated 1,600 yards (1,500 m) but no progress was made on subsequent days, as the Germans brought in reinforcements. Casualties were around 12,000 on each side. Rawlinson had wanted to end the offensive after the first day and Haig felt that reserves should have been committed quicker. On Rawlinson’s suggestion Haig came close to sacking Major-General Joey Davies until it was found that Davies had followed Rawlinson’s orders; Haig reprimanded Rawlinson but thought him too valuable to sack. This may have made Rawlinson reluctant to stand up to Haig thereafter.

Whilst the Germans attacked Smith-Dorrien at the Second Battle of Ypres (April), new Allied offensives were planned by the French at Vimy and by Haig at Aubers Ridge (9 May). It was believed on the British side that the lessons of Neuve Chapelle had been learned – reserves were ready to exploit and mortars were ready to support attackers who had advanced beyond artillery cover – and that this time success would be complete not partial. The attack was less successful than Neuve Chapelle as the bombardment was over a wider front and against stronger defences; Haig was still focussed on winning a decisive victory by capturing key ground, rather than amassing firepower to inflict maximum damage. Attacks (at Festubert, 15–25 May) as a diversion, gained 1,100 yards (1,000 m) over a front of 4,400 yards (4,000 m), with 16,000 British casualties to around 6,600 German losses. Sir John French was satisfied that the attacks had taken pressure off the French at their request but Haig felt that German reserves were being exhausted, bringing victory nearer.

Lack of shells at these offensives was, along with Admiral Fisher‘s resignation over the failed Dardanelles Campaign, a cause of the fall of the Liberal Government (19 May). Haig did not approve of the Northcliffe press attacks on Kitchener, whom he thought a powerful military voice against the folly of civilians like Churchill (despite the fact that Kitchener was an opponent of the strong General Staff which Haig wanted to see). French had been leaking information about the shell shortage to Charles à Court Repington of The Times, whom Haig detested and which he likened to “carrying on with a whore”. French also communicated with Conservative leaders and to David Lloyd George who became Minister of Munitions in the new coalition government.

Haig was asked by Clive Wigram (one of the King’s press staff) to smooth relations between French and Kitchener. At Robertson’s suggestion, Haig received Kitchener at his HQ (despite French’s attempt to block the meeting), where they shared their concerns about French. The two men met again in London (14 July), whilst Haig was receiving his GCB (awarded on French’s recommendation after Neuve Chapelle) from the King, who also complained to him about French. Over lunch with the King and Kitchener, Haig remarked that the best time to sack French would have been after the retreat to the Marne; it was agreed that the men would correspond in confidence.

Haig had long thought French petty, jealous, unbalanced, overly quick to meddle in party politics and easily manipulated by Henry Wilson. Haig was increasingly irritated by French’s changes of orders and mercurial changes of mood as to the length of the war, which French now expected to last into 1916. Haig still thought Germany might collapse by November, although at the same time he was sending a memo to the War Office recommending that the BEF, now numbering 25 divisions, be equipped with the maximum number of heavy guns, ready for a huge decisive battle, 36 divisions strong in 1916.

Loos

Further information: Battle of Loos

The war was not going well – besides the failure at Cape Helles (landing 25 April), Bulgaria had joined the Central Powers (Serbia was soon overrun). Allied attacks in the west were needed to take pressure off the Russians, who were being flung out of Poland. The original plan was to attack in July. At Joffre’s insistence the offensive was planned next to the French Tenth Army at Loos.

Haig inspected the Loos area (24 June) and expressed dissatisfaction with the ground. French and Haig would have preferred to renew the attack at Aubers Ridge. French was dissuaded by Foch, who felt that only a British attack at Loos would pull in enough German reserves to allow the French to take Vimy Ridge. French wrote to Joffre saying he was willing to go along with these plans for the sake of Anglo-French cooperation, but then wrote to Joffre again suggesting an artillery bombardment with only limited British infantry attacks. Kitchener listened sympathetically to Joffre’s suggestion that in future Joffre should set the size, dates and objectives of British offensives, although he only agreed for the Loos attack for the moment. It is unclear exactly why Kitchener and then Haig agreed to go along with Joffre’s wishes – possibly the disastrous plight of the Russians, but it may be that a promise that poison gas could be used may have persuaded Haig. The French then postponed the attack as they picked new attacking ground in Champagne and arranged for extra shelling at Vimy, in both cases because of the very reasons – German-held villages and other obstructions – to which the British generals had objected.

Only 850 guns were available, too few for concentrated bombardment over a frontage far wider than at Neuve Chapelle. There was also argument over the placement of the reserve (including inexperienced New Army divisions), which Haig wanted close to the front. Haig had persuaded himself that decisive victory was possible, and it may be that French wanted to keep control of the reserve to stop them being thrown into battle needlessly. French tried in vain to forbid Haig to discuss his plans with Kitchener (on the grounds that Kitchener might leak them to politicians). Battle began (25 September) after Haig ordered the release of chlorine gas.

The attack failed in the north against the Hohenzollern Redoubt but broke through the German first line in the centre. The reserves were tired after night marches to reach the front in secrecy and were not available until 2 pm, but were thrown into battle without success on the second day.

Haig replaces French

Haig wrote a detailed letter to Kitchener claiming “complete” success on the first day and complaining that the reserves had not been placed as close to the front as agreed and that French had not released control of them when requested. Haig strengthened his case by reports that captured enemy officers had been astonished at the British failure to exploit the attack and by complaining about the government’s foot-dragging at introducing conscription and the commitment of troops to sideshows like Salonika and Suvla Bay.

The failure of Loos was debated in the British press. Kitchener demanded a report and Lord Haldane was sent to France to interview French and Haig. French in turn demanded a report from Haig, in particular his claim to have penetrated the German lines. Lord Stamfordham, the King’s Secretary, telephoned Robertson to ask his opinion of French and Robertson conferred with Haig – who was pushing for Robertson to be appointed Chief of the Imperial General Staff – before giving his opinion. The King also discussed the matter with Haig over dinner on a visit to the front (24 October). Haig again told him that French should have been sacked in August 1914. Four days later the King, whilst inspecting troops, was injured when thrown by one of Haig’s horses and had to be evacuated to England on a stretcher, which embarrassed Haig. French had his orders releasing the reserves published in The Times (2 November), with an article by Repington blaming Haig. Haig demanded a correction of French’s “inaccuracies”, whereupon French ordered Haig to cease all correspondence on this matter,. Haig met with the Prime Minister, H. H. Asquith on 23 November and Bonar Law (Conservative Leader) the next day. Rumours were rife that French was to be sacked. Matters had been delayed as Kitchener was away on an inspection tour of the Mediterranean and French was sick in bed. Kitchener returned to London (3 Dec) and at a meeting with Haig that day, told him that he was to recommend to Asquith that Haig replace French.

Haig’s appointment as Commander-in-Chief BEF was announced on 10 December and almost simultaneously Robertson became Chief of the Imperial General Staff in London. Haig and Robertson hoped that this would be the start of a new and more professional management of the war. Monro was promoted to GOC First Army in Haig’s place, not Rawlinson whom Haig would have preferred, and for reasons of seniority Haig was forced to accept the weak-willed Launcelot Kiggell, not Butler as chief of staff BEF in succession to Robertson. Haig and French, who seemed ill, had a final handover meeting (18 December, the day before the formal change of command), at which Haig agreed that Churchill – recently resigned from the Cabinet and vetoed from command of a brigade – should be given command of a battalion.

1916

Prelude to the Somme

Haig, King George V and General Henry Rawlinson at Querrieu, 1916

For the first time (2 January) Haig attended church service with George Duncan, who was to have great influence over him. Haig saw himself as God’s servant and was keen to have clergymen sent out whose sermons would remind the men that the war dead were martyrs in a just cause.

Robertson and Kitchener wanted to concentrate on the Western Front, unlike many in the Cabinet who preferred Salonika or Mesopotamia. Haig and Robertson were aware that Britain would have to take on more of the offensive burden, as France was beginning to run out of men, but thought that the Germans might retreat in the west so they could concentrate on beating the Russians. Haig thought that the Germans had already had plenty of “wearing out”, that a decisive victory was possible in 1916 and urged Robertson to recruit more cavalry. Haig’s preference was to regain control of the Belgian coast by attacking in Flanders, to bring the coast and the naval bases at Bruges, Zeebrugge and Ostend into Allied hands and where the Germans would suffer great loss if they were reluctant to retreat.

Lloyd George visited Haig at GHQ and afterwards wrote to Haig, to say that he had been impressed by his “grip” and by the “trained thought of a great soldier”. Subsequent relations between the two men were not to be so cordial. Haig thought Lloyd George “shifty and unreliable”.Haig had thought that the German troops reported near Verdun were a feint prior to an attack on the British but the Verdun Offensive began on 21 February. In March 1916 GHQ was moved from Saint-Omer to Montreuil, Pas-de-Calais. For his residence Haig commandeered Beaurepaire House a few kilometres away.

The statue of Field Marshal Haig, standing outside the theatre in Montreuil-sur-Mer

Haig decided that Verdun had “worn down” the Germans enough and that a decisive victory was possible at once. The Cabinet were less optimistic; Kitchener would have preferred smaller, purely attritional attacks but sided with Robertson in telling the Cabinet that the Somme offensive should go ahead. Haig attended a Cabinet meeting in London (15 April) where the politicians were more concerned with the political crisis over the introduction of conscription.

Memorandum from Haig to the Adjutant General, Lieutenant General Sir Nevil Macready, asking his opinion on possible dates for launching the Somme offensive, 22 May 1916

The French had already insisted on an Anglo-French attack at the Somme, where British and French troops were adjacent, to relieve the pressure on the French Army at Verdun, although the French component of the attack was gradually reduced as reinforcements went to Verdun. Haig wanted to delay until 15 August, to allow for more training and more artillery to be available. When told of this Joffre shouted at Haig that “the French Army would cease to exist” and had to be calmed with “liberal doses of 1840 brandy”. The British refused to agree to French demands for a joint Anglo-French offensive from the Salonika bridgehead. Eventually, perhaps influenced by reports of French troop disturbances at Verdun, Haig agreed to attack on 29 June (later put back until 1 July). It later turned out that Pétain at Verdun was warning the French government that the “game was up” unless the British attacked.

The government was concerned at the volume of shipping space being used for fodder and wanted to cut the number of cavalry divisions. Haig opposed this, believing that cavalry would still be needed to exploit the imminent victory. Most of the fodder was for the horses, donkeys and mules which the BEF used to move supplies and heavy equipment. Discussing this matter with the King, Haig told him that Germany would collapse by the end of 1916.This round of planning ended with a sharp exchange of letters with the Cabinet, Haig rebuked them for interfering in military matters and declared that “I am responsible for the efficiency of the Armies in France”. Lloyd George thought Haig’s letter “perfectly insolent” and that the government “had the right to investigate any matter connected with the war that they pleased”.

Stretcher bearers recovering wounded during the Battle of Thiepval Ridge, September 1916. Photo by Ernest Brooks.

From 1 July to 18 November 1916, Haig directed the British portion of the Battle of the Somme. Although too much shrapnel was used in the initial bombardment for 1 July, Haig was not entirely to blame for this – as early as January 1915 Haig had been impressed by evidence of the effectiveness of high explosive shells and had demanded as many of them as possible from van Donop (Head of Ordnance in Britain).

1917

Portrait of Haig at General Headquarters, France, by Sir William Orpen, May 1917

On 1 January 1917, Haig was made a field marshal. King George V wrote him a handwritten note ending: “I hope you will look upon this as a New Year’s gift from myself and the country”. Lloyd George, who had become Prime Minister in December 1916, infuriated Haig and Robertson by placing the BEF under the command of the new French Commander-in-Chief Robert Nivelle. The failure of the Nivelle Offensive in April 1917 (which Haig had been required to support with a British offensive at Arras) and the subsequent French mutiny and political crisis, discredited Lloyd George’s plans for Anglo-French co-operation. During the second half of 1917, Haig conducted an offensive at Passchendaele (the Third Battle of Ypres). Haig hoped to liberate the North Sea coast of Belgium from which German U-boats were operating, provided that there was assistance from the French, support from Britain and that Russia stayed in the war.

The Admiralty, led by John Jellicoe, believed that the U-boat threat could jeopardise Britain’s ability to continue fighting. Another objective was to commit German resources to Belgian Flanders, away from the Aisne sector in France, where the French mutiny had been worst, to give the French Army time to recover.Haig was worried that the Russian Revolution would result in Russia and Germany making peace and forming an alliance. If this happened the German troops located on the Eastern Front would be transferred to the west by late 1917 or early 1918, making a decisive victory much more difficult.

The Third Battle of Ypres caused the British far fewer casualties than the Battle of the Somme and the substantial success of the occupation of the ridges around Ypres, the first stage of the offensive strategy and inflicted comparable losses on the Germans, who were far less capable of replacing losses and which contributed to their defeat in 1918.

Cambrai

By the end of 1917, Lloyd George felt able to assert authority over the generals and at the end of the year was able to sack the First Sea Lord Admiral Jellicoe. Over the objections of Haig and Robertson, an inter-Allied Supreme War Council was set up. When the council was inaugurated (11 November), Lloyd George attributed the success of the Central Powers to unity and scoffed at recent Allied “victories”, saying he wished “it had not been necessary to win so many of them”. His speech angered several leading politicians and Derby assured Haig of his backing.[141] Haig and Pétain objected to a common command, arguing that coalitions work better when one power is dominant, which was no longer the case now that British military power had increased relative to that of France. Lloyd George got his wish to send British forces to Italy, after the Italian defeat at Caporetto in November. Haig knew that manpower was scarce in the BEF and at home and wrote to Robertson that an offensive at Cambrai would stem the flow of reinforcements to Italy; Robertson delayed the despatch of two divisions.

Plans for a III Corps attack at Cambrai had been proposed as far back as May. Haig had informed the War Office (5 June) that “events have proved the utility of Tanks”. The plan was to trap German troops between the River Sensee and Canal du Nord, with the cavalry to seize the St Quentin Canal crossings, then exploit north-east. The first day objective was the high ground around Bourlon Wood and Haig was to review progress after 48 hours.

The Third Army attacked at Cambrai early on 20 November with 1,000 guns (using a surprise predicted barrage rather than a preliminary bombardment) and nine tank battalions. On the first day the British penetrated 5 miles (8.0 km) on a 6 miles (9.7 km) front with only 4,000 casualties, limited by blown bridges and the shortness of the November day. The 51st (Highland) Division was held up at Flesquieres village, which fell the following day. Haig’s intelligence chief Brigadier-General Charteris told him that the Germans would not be able to reinforce for 48 hours and James Marshall-Cornwall, then a junior intelligence officer, later an admiring biographer of Haig, alleged that Charteris refused to have reported fresh German divisions shown on the situation map as he did not want to weaken Haig’s resolution.

Haig visited the battlefield (21 November), inspecting the fighting at Bourlon Wood through his binoculars. He thought the attacks “feeble and uncoordinated” and was disappointed at the lack of grip by corps and division commanders and encountering 1st Cavalry Division, which had been ordered to fall back, resisted the temptation to countermand the order. At around 9 pm he decided to continue the attack on Bourlon Wood, a decision which has been much criticised but which made good military sense at the time and was supported by Byng, although the political need for a clear victory may have been a factor. The offensive continued but with diminishing returns. Bourlon Wood fell on 23 November but German counter-attacks had begun. Haig arrived at a Third Army planning meeting (26 November) and ordered further attacks the following day but then had to bow to Byng deciding to go onto the defensive. Haig complained that the lack of extra divisions had prevented a breakthrough, a view described by one biographer as “self-deception, pure and simple”.

Some of the gains were retaken after 30 November, when the Germans made their first counter-offensive against the British since 1914, using new Sturmtruppen tactics. GHQ intelligence had failed to piece together warnings. British casualties had mounted to over 40,000 by 3 December, with German losses somewhat less. One biographer argues that the initial success at Cambrai helped to save Haig’s job but another view is that the ultimate disappointment did more damage to Haig’s political credibility than Passchendaele. Lloyd George was particularly angry at the embarrassing Cambrai reverse, but Haig’s support amongst the Army, the public and many politicians made sacking him impossible; a plan that Haig be “promoted” to a sinecure, as generalissimo of British forces, was scotched when Lord Derby threatened resignation.

Asked to provide a statement to the House of Commons, Haig attributed the German success to “one cause and one alone … lack of training on the part of junior officers and NCOs and men”, a verdict supported by the court of enquiry which, at Derby’s instigation, Haig ordered, although the enquiry also criticised “higher commanders” for failing to enforce defensive doctrine. In a later report to Robertson Haig accepted the blame, stating that the troops had been tired as a result of the attack on Bourlon Wood. Although Haig defended Charteris, he was required to dismiss him. Robertson had arrived at Haig’s Headquarters with orders (signed by Derby) for his dismissal, in case Haig refused to do as he was asked. A common criticism is that Haig only accepted intelligence from Charteris (who told him what he wanted to hear) and did not cross-check it with other intelligence.

1918

Further information: Role of Douglas Haig in 1918

Political manoeuvres

Over lunch at 10 Downing Street with Derby and Lloyd George in January, Haig predicted that the war would end within a year because of the “internal state of Germany”. Haig left the War Cabinet with the impression that he thought the Germans would launch small attacks on the scale of Cambrai. Haig recommended that the British draw in German reserves by renewing the offensive around Ypres, which did not meet with political approval. By now Haig’s 1917 offensives were being criticised in the press and in Parliament, where J.C. Wedgwood openly demanded a change of command.The purge of Haig’s staff continued, with the removal of Maxwell (Quartermaster-General) and Lt-Gen Launcelot Kiggell as BEF Chief of Staff.

In January the Cabinet Minister Jan Christiaan Smuts and the Cabinet Secretary Maurice Hankey were sent to France to discreetly see whether any of the Army Commanders were willing to replace Haig – none were. At the Supreme War Council at Versailles Haig and Pétain complained of shortage of troops, but Haig’s political credibility was so low that Hankey wrote that they “made asses of themselves”. It was agreed that an Allied General Reserve be set up, under Foch with Henry Wilson as his deputy; Haig was reluctant to hand over divisions and argued against a common command, claiming that it would be “unconstitutional” for him to take orders from a foreign general, and that he did not have the reserves to spare. Milner thought Haig’s stance “desperately stupid”.

Lloyd George proposed that the CIGS be reduced to his pre-1915 powers (i.e. reporting to the Secretary of State for War, not direct to the Cabinet) and that the British military representative at the Supreme War Council in Versailles be Deputy CIGS and a member of the Army Council (i.e. empowered to issue orders to Haig). He offered Robertson a choice of remaining as CIGS with reduced powers or else accepting demotion to Deputy CIGS at Versailles. Derby summoned Haig to London, expecting him to support him in backing Robertson. In a private meeting with Lloyd George, Haig agreed with Robertson’s position that the CIGS should himself be the delegate to Versailles, or else that the Versailles delegate be clearly subordinate to the CIGS to preserve unity of command. However, he accepted that the War Cabinet must ultimately make the decision, and according to Lloyd George “put up no fight for Robertson” and persuaded Derby not to resign. Haig thought Robertson egotistical, coarse, power-crazed and not “a gentleman” and was unhappy at the way Robertson had allowed divisions to be diverted. Henry Wilson now became CIGS, with Rawlinson as British military representative at Versailles.Although Haig had been suspicious of Wilson, they gradually established a warily respectful relationship.

German Michael offensive

By March 1918 Germany’s Western Front armies had been reinforced by the release of troops from the Eastern Front. At this point British troops were tired and weakened, and British divisions had been cut in size from 12 battalions to 9. Allied intelligence did not fall for German deceptions that they might attack in Italy or the Balkans, but thought that the main attack might fall in the Cambrai-St Quentin sector. Haig inspected the Fifth Army (7–9 March) and noted widespread concerns, which he shared, at lack of reserves. As late as 17 March, Cox, who had replaced Charteris as Intelligence Chief, predicted that the German Offensive was not yet immediately imminent. By 20 March deployment of German trench mortars had been reported by deserters, and British artillery began some spoiling fire.

Germany launched an attack, “Michael” (21 March 1918), with a force larger than the entire BEF and enjoying superiority of 5:1 over Hubert Gough’s Fifth Army, which were spread thinly over line recently taken over from the French.Haig was initially calm on 21 March, as owing to the communications of the time GHQ was “an information vacuum” where news often took over a day to reach him, and spent much of the day entertaining foreign dignitaries including the US War Secretary. The Third Army retreated as planned from the Flesquieres Salient. With three-quarters of the 50-mile front under attack, the British troops fought hard and the Germans failed to reach their first-day objectives. However, lacking reserves Gough had to retreat behind the Crozat Canal. 22 March saw the Fifth Army retreat to the Somme; Haig still anticipated further German attacks in Champagne or Arras. The Germans did not initially realise the importance of Amiens as an objective.

Haig did not speak to or visit Gough until 23 March. That day Haig arranged for reserves to be sent down from Flanders. Formal orders were issued to the Fifth Army to maintain contact with the Third Army to their north and the French to their south.After initial optimism, Tim Travers has written of “panic” setting in amongst senior officers at GHQ on 23 March,and there is evidence that a retreat towards the Channel Ports may have been considered.

Doullens

Haig had a GHQ Reserve which was massed in the north, 72 hours’ march away, to protect the Channel Ports. The French Commander-in-Chief, Pétain, agreed to place two French armies under Fayolle as a reserve in the Somme valley, but could not agree to Haig’s request to send 20 French divisions to Amiens.

24 March was “probably the most traumatic day (Haig) had endured since” First Ypres in 1914. Half of BEF supplies came into Le Havre, Rouen and Dieppe and passed by train through Amiens, making it a major choke point. Planning that winter had left open the question of whether the BEF would retreat southwest or form “an island” around the Channel Ports through which Haig’s armies drew the other half of their supplies. A retreat on the ports does not seem to have been decided until some days after 21 March.

This is one of the occasions where doubt has been cast on the authenticity of Haig’s diary. For example, Haig’s typed diary – probably based on notes prepared in April – describes Pétain as “almost unbalanced and most anxious”, claiming that after attending a Cabinet meeting in Paris, where he had been ordered to “cover Paris at all costs”, he threatened to retreat on Paris, leaving the British right flank uncovered. Tim Travers argues that Pétain said at the meeting that he would only retreat on Paris if Haig retreated on the Channel Ports, and that Pétain had come away satisfied that Haig would not break contact. In a postwar exchange of letters with Haig Pétain denied that he had ordered a retreat on Paris or had threatened Haig that he might, a recollection which Herbert Lawrence appears to have supported. It has been suggested that Haig and Lawrence may simply have misunderstood his intentions, and that any factual errors in Haig’s diary were honest if mistaken recollections.

Haig’s letter of 25 March, sent via Weygand, asked for 20 French divisions to cover the southern British flank as the BEF fought its way back “covering the Channel Ports”. The letter is ambiguous and does not specifically mention a retreat “to” the ports. Sheffield argues that orders to Third Army were not a precursor to retreat but “a means to an end”, pointing to orders for, if needs be, a counterattack onto the northern flank of the German attackers, and also argues that although GHQ had a duty to consider contingency plans, unlike in 1940, evacuation was never actually likely. Wilson claimed that Haig suggested Pétain be appointed Allied generalissimo (which is not consistent with Haig’s later claim that Pétain was unwilling to help the British) and that he proposed Foch over Haig’s objections.

At the Doullens Conference (26 March), Haig accepted the appointment of Foch to coordinate reserves of all nationalities wherever he saw fit. In his typed diary Haig claimed much of the credit for Foch’s appointment and to have insisted that he have wider powers over Pétain than Clemenceau had wanted to grant him. Milner, who represented the British government at Doullens, recorded that Clemenceau was unhappy with Pétain’s recent efforts, but claimed that he himself had persuaded Haig to accept the appointment of Foch; Haig’s official biographer Duff Cooper gave Haig the credit but commented that the idea had probably occurred to several participants simultaneously.

After a German offensive near Arras (“Mars”, 28 March) was beaten back, between 29 and 31 March the Germans pushed on Amiens. A Canadian brigade took part in an action at Moreuil Wood. Attacks on 4 April (Villers-Bretonneux, east of Amiens) and 5 April on the Third Army front were beaten back by British and Australian forces, although contingency plans were still being prepared to cover Rouen and Le Havre in case Amiens fell.

German Georgette offensive

To ALL RANKS OF THE BRITISH ARMY IN FRANCE AND FLANDERS Three weeks ago to-day the enemy began his terrific attacks against us on a fifty-mile front. His objects are to separate us from the French, to take the Channel Ports and destroy the British Army. In spite of throwing already 106 Divisions into the battle and enduring the most reckless sacrifice of human life, he has as yet made little progress towards his goals. We owe this to the determined fighting and self-sacrifice of our troops. Words fail me to express the admiration which I feel for the splendid resistance offered by all ranks of our Army under the most trying circumstances. Many amongst us now are tired. To those I would say that Victory will belong to the side which holds out the longest. The French Army is moving rapidly and in great force to our support. There is no other course open to us but to fight it out. Every position must be held to the last man: there must be no retirement. With our backs to the wall and believing in the justice of our cause each one of us must fight on to the end. The safety of our homes and the Freedom of mankind alike depend upon the conduct of each one of us at this critical moment. (Signed) D. Haig F.M. Commander-in-Chief British Armies in France, 11 April.

Lloyd George demanded Haig sack Gough, and when Haig was reluctant he was given a direct order to do so by Derby. Haig offered to resign; Lloyd George wanted to accept, but the other ministers, and Henry Wilson, thought there was no obvious successor.

During the second major German offensive, “Georgette” in Flanders (9 April), Haig issued his famous order that his men must carry on fighting “With Our Backs to the Wall and believing in the Justice of our Cause” to protect “the safety of our homes and the Freedom of mankind”. Just as “Michael” had swept over the Cambrai and the Somme battlefields, won at such cost by Haig’s own offensives in previous years, this one swept over Passchendaele although not Ypres itself. The offensive threatened Hazebrouck, “the Amiens of the north”, a key railhead through which supplies were brought from the Channel Ports.

Foch had earlier refused to send four French divisions to Flanders but now redeployed Maistre’s Tenth French Army to the Somme sector, freeing up British forces. During a renewed attack (17 April) Foch drew attention to the valour of the British at First Ypres and refused to send further French reinforcements so as to keep a strategic reserve. 24 April saw a further unsuccessful German attack at Villers-Bretonneux near Amiens, featuring the first tank-to-tank combat. Haig was suspicious of Foch’s request to move British divisions to the French sector to free up French reserves, worrying that this might lead to “a permanent Amalgam” of French and British forces. At a meeting on 27 April meeting the dispute was smoothed over, and British IX Corps moved to the French sector. On 30 April Ludendorff called a halt to the Flanders offensive.

Although some American divisions were now serving with the British forces, Haig thought Pershing “very obstinate and stupid” for refusing to integrate US troops with Allied units.At Abbeville (2 May) it was agreed that in the event of renewed attack British forces would retreat south if necessary and abandon the Channel Ports rather than lose touch with the French.

The near-debacle of March 1918 was an object of political controversy. Repington wrote that it was “the worst defeat in the history of the Army”. Bonar Law claimed in a House of Commons debate (23 April) that Haig and Pétain had agreed the extension of the British line, which was not wholly true as in January 1918 the Supreme War Council had ordered a longer extension than Haig and Pétain had agreed between themselves in December 1917. Lloyd George was accused (in the Maurice Debate of 9 May 1918 in the House of Commons) of having hoarded troops in the UK to make it harder for Haig to launch offensives. Lloyd George misled the House of Commons in claiming that Haig’s forces were stronger (1.75 million men) at the start of 1918 than they had been a year earlier (1.5 million men) – in fact the increase was caused by an increase of 335,000 in the number of labourers, and Haig had fewer combat infantry holding a longer stretch of front. Haig had opposed Maurice in taking his concerns into public, but was disappointed at how Lloyd George was able to get off the hook with a “claptrap speech”. Maurice believed he had saved Haig from dismissal.

German Bluecher offensive

By late spring the BEF had taken just over 300,000 casualties. Battalions had had to be brought in from the Middle East. Haig spent time touring his forces in May. Haig’s wife reported rumours that he was to be brought home as Commander-in-Chief, Home Forces; when Wilson denied the rumours to Haig, Haig recorded that “no one has been chosen yet!” to replace him.

A third major German offensive against the French on the Aisne (“Bluecher”), starting on 27 May, overwhelmed Hamilton-Gordon’s IX British Corps which had been sent there to refit after being involved in “Michael” and “Georgette”. At a conference at Versailles (1 June) there was friction between Haig, who was worried that the Germans would attack his sector again, and Foch, who demanded that the US divisions trained by the British be moved to his sector to release French divisions. Foch moved French forces down from Flanders, but there was further friction at a meeting in Paris about Foch’s request to move British reserves south. Haig threatened to appeal to the British government if he felt Foch was demanding too many British troops, so it was agreed that Haig and Foch should meet more frequently, and in time they developed a good working relationship.

Cooperation improved when the Germans launched their “Gneisenau” Offensive on 9 June. Lloyd George and Milner gave their full support to Foch on moving four British divisions. They told Haig that he should consider himself subordinate to Foch for the time being.

With another German attack imminent, Herbert Lawrence was asked (Haig was on leave in England) to send d Divisions – he sent only two. Haig thought this was breaching an agreement of 1 July that covering Paris and the Somme was to take priority. Wilson consulted the War Cabinet then told Haig to “exercise his judgement” about holding the British line. Haig felt that they would take credit for Foch’s victory but might dismiss him if disaster befell the British forces. The German “Peace Offensive” began against the French at Rheims on the same day. Haig eventually agreed that the French could use XXII Corps if necessary “for exploitation”.

Turn of the Tide and the Hundred Days

King George V, French President Raymond Poincare and Haig at GHQ at Montreuil, 7 August 1918

In July and August the Germans were defeated at the Second Battle of the Marne and Amiens. The latter victory was described by General Erich Ludendorff as “The Black Day of the German Army” after mass surrenders of German troops. On 11 August Haig, contrary to the wishes of Marshal Foch, insisted on a halt to the Amiens offensive and launched a new attack on 21 August between the Scarpe and the Ancre. As with his previous offensives in 1916 and 1917, Haig encouraged his subordinates to aim for ambitious objectives, in this case a thrust from Albert to Bapaume, and this time with more success than in previous years. On 10 September Haig, on a brief visit to London, insisted that the war could end that year and asked Lord Milner (Secretary of State for War) to send all available men and transportation. Milner afterwards shared with Wilson his concerns that Haig would embark on “another Passchendaele”.

Haig’s forces continued to enjoy much success, but when they began to advance towards the Hindenburg Line Haig received a supposedly “personal” telegram from the CIGS Henry Wilson (31 August), warning him that he was not to take unnecessary losses in storming these fortifications. Haig, surmising that the War Cabinet were not forbidding him to attack but might dismiss him if the assault failed, telegraphed Wilson back that they were a “wretched lot” and wrote that attacking the Germans now would be less costly than allowing them time to regroup.]

Haig and Ferdinand Foch inspecting the Gordon Highlanders, 1918

There is some dispute over how much direct operational control Haig maintained at this time, Tim Travers in particular arguing that he allowed his Army Commanders a very free hand, whilst Ferdinand Foch was exerting ever-greater influence over strategy. Haig was irritated that Foch insisted that Plumer’s Second Army remain part of an Army Group commanded by the King of the Belgians, so that the French and Belgians could take credit for liberating Brussels.

Sir Douglas Haig with his army commanders and their chiefs of staff, November 1918. Front row, left to right: Sir Herbert Plumer, Sir Douglas Haig, Sir Henry Rawlinson. Middle row, left to right: Sir Julian ByngSir William BirdwoodSir Henry Horne. Back row, left to right: Sir Herbert LawrenceSir Charles KavanaghBrudenell White, Percy, Louis VaughanArchibald Montgomery-MassingberdHastings Anderson.

Germany first requested an Armistice after the penetration of the Hindenburg Line at its strongest point, St Quentin/Cambrai, on 28 September, and the almost simultaneous capitulation of Bulgaria, and discussions continued until the ceasefire on 11 November. Haig urged moderation, suggesting that Germany only be asked to give up Belgium and Alsace-Lorraine, and warning that humiliating terms might lead to a militarist backlash. Haig suspected Wilson, a staunch Unionist, of wanting to prolong the war as an excuse to subdue southern Ireland by bringing in conscription there. The collapse of Austria-Hungary encouraged the politicians to demand stricter terms (although less strict than Foch or Pershing would have liked) and Germany was required to evacuate the Rhineland as well.However, once Germany had accepted the strict armistice terms, Haig suggested Germany be split into independent states at the peace treaty.

The forces under Haig’s command achieved impressive results: whereas the French, American and Belgian armies combined captured 196,700 prisoners-of-war between 18 July and the end of the war, Haig’s forces, with a smaller army than the French, engaged the main mass of the German Army and captured 188,700 prisoners. British daily casualty rates (3,645 per day) were heavier during this period than at the Somme (2,950) or Passchendaele (2,121),because British forces were attacking across the line, instead of being rotated through a single offensive. The military historian, Gary Sheffield, called this, the so-called Hundred Days Offensive, “by far the greatest military victory in British history”.

Executions during the First World War

Further information: British Army during World War I § Discipline

As commander-in-chief, one of Haig’s responsibilities was to give the final signature to the death warrants of British and Commonwealth soldiers (but not Australian – these went to the Governor-General of Australia) who had been first sentenced to death by Field General Court Martial. Although the book Shot at Dawn (1983), which began the campaign for pardons, says that it is “quite incorrect” to hold Haig solely responsible as he was part of a legal process, by the late 1990s Haig was perhaps best known to the general public because of publicity which implied him to be a brutal disciplinarian – this was not the view of contemporaries. Of the 3,080 men sentenced to death in all theatres, 346 were executed, 266 (77%) were for desertion, 37 for murder and 18 for cowardice. Just over 250 of the executions took place during Haig’s time as Commander-in-Chief, but only executed men’s records survive, so it is hard to comment on the reasons why men were reprieved.

Promotion of army dentistry during the First World War

During the war, Haig suffered from toothache and sent for a Parisian dentist. Consequently, within months the British Army had hired a dozen dentists and, by the end of the war, there were 831. This led to the formation of the Royal Army Dental Corps in 1921.

Later life

Field Marshal Haig unveiling the National War Memorial in St. John’s, Newfoundland. (Memorial Day 1 July 1924)

Lloyd George arranged a ceremonial reception for Marshal Foch on 1 December; Haig was asked to travel in the fifth carriage with Henry Wilson but not invited to the reception. Feeling that this was a snub and an attempt to win votes for the imminent election, Haig declined to attend at all. In November 1918 Haig refused Lloyd George’s offer of a viscountcy, partly as he felt it was another snub, as his predecessor Sir John French had been awarded the same rank on being removed from command of the BEF, and partly to use his refusal to bargain for better state financial aid for demobilised soldiers. Haig held out despite being lobbied by the King, until Lloyd George backed down in March 1919, blaming a recently sacked pensions minister. Haig was created Earl Haig, Viscount Dawick and Baron Haig, of Bemersyde in the County of Berwick, received the thanks of both Houses of Parliament and a grant of £100,000.

In January 1919, disturbances broke out among troops at Calais, as men returning from leave were expected to return to full army discipline and key workers with jobs to go to (who had often been the last to enlist) were – contrary to Haig’s advice – given priority for demobilisation. Haig accepted the advice of Winston Churchill that exercising his right to shoot the ringleaders was not sensible. For much of 1919, Haig served as Commander-in-Chief Home Forces, a key position as a General Strike seemed likely. Haig kept a low profile in this job and insisted the Army be kept in reserve, not used for normal policing. His military career ended in January 1920. Lord Haig arranged for his Dispatches to be published in 1922 as the General Election loomed, although in the end his nemesis Lloyd George was ousted for unrelated reasons.

Haig in Newfoundland

After retiring from the service, Lord Haig devoted the rest of his life to the welfare of ex-servicemen.[224] Haig pushed for the amalgamation of organisations, quashing a suggestion of a separate organisation for officers, into The British Legion which was founded in June 1921. He visited South Africa in 1921, Newfoundland in 1924, and Canada in 1925 (visits to Australia and New Zealand were being planned when he died) to promote ex-servicemen’s interests. He was instrumental in setting up the Haig Fund for the financial assistance of ex-servicemen and the Haig Homes charity to ensure they were properly housed.

An avid golf enthusiast, Haig was captain of The Royal and Ancient Golf Club of St Andrews, from 1920 to 1921. He was president of The British Legion until his death and was chairman of the United Services Fund from 1921 until his death.

Haig maintained ties with the British Army after his retirement; he was honorary colonel of the 17th/21st Lancers (having been honorary colonel of the 17th Lancers from 1912), The London Scottish, the King’s Own Scottish Borderers, and Royal Horse Guards. He was Lord Rector and later Chancellor of the University of St Andrews.

Death

Haig’s grave (right) next to his wife, with the standard military headstone used in the First World War

Haig died in London from a heart attack on 29 January 1928, and was given an elaborate funeral on 3 February. “Great crowds lined the streets … come to do honour to the chief who had sent thousands to the last sacrifice when duty called for it, but whom his war-worn soldiers loved as their truest advocate and friend.” The gun-carriage that had carried the Unknown Warrior to his grave in 1920 took Haig’s body from St Columba’s Church, where it had been lying in state, to Westminster Abbey. Three royal princes followed the gun-carriage and the pall-bearers included two Marshals of France (Foch and Pétain). The cortege was accompanied by five guards of honour, representing the Royal Navy, the Irish Guards, the Royal Air Force, the 1st French Army Corps, and the Belgian Regiment of Grenadiers. After the service at the Abbey, the procession re-formed to escort the body to Waterloo station for the journey to Edinburgh, where it lay in state for three days at St Giles’s Cathedral.

Haig was buried at Dryburgh Abbey in the Scottish borders, the grave being marked with a plain stone tablet in the style of the standard headstones of the Imperial War Graves Commission issued to British military casualties in the First World War.

The Earl Haig Memorial, an equestrian statue in Whitehall commissioned by Parliament and sculpted by Alfred Frank Hardiman, aroused some controversy and was not unveiled until just before Armistice Day in 1937.

Reputation

Main article: Reputation of Douglas Haig

Post-war opinion

Earl Haig statue, Edinburgh Castle. The statue was commissioned by Sir Dhunjibhoy Bomanji of Bombay.[234] It was in full view near the Castle entrance, but now relatively hidden in a back courtyard at the entrance to the National War Museum.[235]

After the war Haig was praised by the American General John J. Pershing, who remarked that Haig was “the man who won the war”.[236] His funeral in 1928 was a huge state occasion. However, after his death he was increasingly criticised for issuing orders which led to excessive casualties of British troops under his command on the Western Front, earning him the nickname “Butcher of the Somme”.

Winston Churchill, whose World Crisis was written during Haig’s lifetime, suggested that greater use of tanks, as at Cambrai, could have been an alternative to blocking enemy machine-gun fire with “the breasts of brave men”. Churchill also wrote that although the Allied offensives up until August 1918 had been “as hopeless as they were disastrous”, “Haig and Foch were vindicated in the end”.Churchill admitted to Lord Beaverbrook that “subsequent study of the war has led me to think a good deal better of Haig than I did at the time. It is absolutely certain there was no one who could have taken his place.” Churchill’s essay on Haig in Great Contemporaries, written after Haig’s death, was slightly more critical, noting the government’s refusal to offer Haig employment after 1920, his emphasis on the Western Front and his lack of the “sinister genius” possessed by the truly great generals of history.

Haig’s death mask, Edinburgh Castle

Lloyd George was more critical in his War Memoirs, published in 1936. He described Haig as “intellectually and temperamentally unequal to his task”, although “above the average for his profession—perhaps more in industry than intelligence”. Lloyd George’s biographer John Grigg (2002) attributed his vitriol to a guilty conscience, that he had not intervened to stop the Passchendaele Offensive. John Terraine, writing of the “shrill venom” with which Lloyd George sought to “exculpate himself”, called the memoirs “a document as shabby as his behaviour at Calais”

B. H. Liddell Hart, a military historian who had been wounded during the First World War, went from admirer to sceptic to unremitting critic. He wrote in his diary:

[Haig] was a man of supreme egoism and utter lack of scruple – who, to his overweening ambition, sacrificed hundreds of thousands of men. A man who betrayed even his most devoted assistants as well as the Government which he served. A man who gained his ends by trickery of a kind that was not merely immoral but criminal.

John Laffin, an Australian military historian who had served in the Second World War, commented unfavourably on Haig:

Haig and other British generals must be indicted not for incomprehension but for wilful blunders and wicked butchery. However stupid they might have been, however much they were the product of a system which obstructed enterprise, they knew what they were doing. There can never be forgiveness.

Other historians

One of Haig’s defenders was the military historian John Terraine, who published a biography of Haig (The Educated Soldier) in 1963, in which Haig was portrayed as a “Great Captain” of the calibre of the Duke of Marlborough or the Duke of Wellington. Terraine, taking his cue from Haig’s “Final Despatch” of 1918, argued that Haig pursued the only strategy possible given the situation. Gary Sheffield stated that although Terraine’s arguments about Haig have been much attacked over forty years, Terraine’s thesis “has yet to be demolished”.

Australian historian Les Carlyon wrote that while Haig was slow to adapt to the correct use of artillery in sufficient quantities to support infantry attacks and was generally sceptical that such doctrine had much place in military theory, he was fully supportive of excellent corps and field commanders such as Herbert PlumerArthur Currie and John Monash, who seem to best grasp and exercise these concepts, especially later in the war. Carlyon also wrote that there was a case to answer, for his support of more dubious commanders such as Ian HamiltonAylmer Hunter-Weston and Hubert Gough.

Tactical developments

Critics, including Alan Clark and Gerard De Groot, argue that Haig failed to appreciate the critical science of artillery and that he was “unimaginative”, although de Groot added that he has had the misfortune to be judged by the standards of a later age.Paul Fussell, a literary historian, wrote in The Great War and Modern Memory:

Earl Haig Memorial, Whitehall, London

although one doesn’t want to be too hard on Haig … who has been well calumniated already … it must be said that it now appears that one thing the war was testing was the usefulness of the earnest Scottish character in a situation demanding the military equivalent of wit and invention. Haig had none. He was stubborn, self-righteous, inflexible, intolerant—especially of the French—and quite humourless … Indeed, one powerful legacy of Haig’s performance is the conviction among the imaginative and intelligent today of the unredeemable defectiveness of all civil and military leaders. Haig could be said to have established the paradigm.[248]

Military historian John Bourne wrote that Haig, although not familiar with technological advances, encouraged their use. He also rejected claims that Haig was a traditionalist and focused only on cavalry tactics.[249] Cavalry represented less than three per cent of the BEF in France by September 1916, whilst the British were the most mechanised force in the world by 1918, supported by the world’s largest air force. The Tank Corps was the world’s first such force and some 22,000 men served in it during the war. The Royal Artillery grew by 520 per cent and the engineers who implemented combined arms tactics grew by 2,212 per cent. Bourne wrote that this hardly demonstrates a lack of imagination.[250] Other historians, notably John Keegan, refused to accept that the British Army underwent a “learning curve”; despite this example, Bourne wrote that there “is little disagreement among scholars about the nature of the military transformation”.[251] Popular “media opinion” had failed to grasp that under Haig, the British Army adopted a modern style of war in 1918.[252]

There is no consensus on the speed of a learning curve. Tim Travers blamed the management of early campaigns on the ethos of the pre-war officer corps, which was based on privilege, with a hierarchy intent on self-preservation and maintaining individual reputations. As a consequence the army was poorly positioned to adapt quickly. Travers wrote that initiative was discouraged and that the ethos of the army was pro-human and anti-technological. The offensive spirit of the infantry, quality of the soldier, rapid rifle-fire and the idea of the soldier being the most important aspect of the battlefield prevailed. The lessons of the Russo-Japanese War and the power of artillery were ignored, which caused costly tactical mistakes in the first half of the war. The tactics that Haig pursued were beyond the mobility and range of artillery, which contributed to operational failures and heavy losses. Travers also criticised Haig and enemy commanders for seeing battle as perfectly organised and something that could be planned perfectly, ignoring the concept of fog of war. Travers wrote that top-down command became impossible in the chaos of battle. The lack of attention to lower levels of command in the early years of the war created a command vacuum.[253]

Bourne considered this to be too harsh, arguing that Haig progressed along with other commanders of the Edwardian era in implementing advances in operational methods, technology and tactical doctrine. Bourne also wrote that it was difficult to reconcile the commanders of 1918 with the dogma-ridden, unprofessional, unreflecting institution depicted by Tim Travers.[254][255]

Biographers Robin Prior and Trevor Wilson in the Oxford Dictionary of National Biography (2004) state:

As a result of his determination to accomplish great victories Haig too often disregarded key factors such as weather, and the condition of the battlefield, placed his objectives beyond the range which his artillery could cover and incorporated in his schemes a role for cavalry which this arm was helpless to accomplish. These shortcomings, it needs to be stressed, were not at all peculiar to Haig. … But the outcome, too often, was British operations directed towards unrealizable objectives and persisted in long after they had ceased to serve any worthwhile purpose. The consequence was excessive loss of British lives, insubstantial accomplishment, and waning morale.[256]

Casualties

[edit]

Haig has been criticised for the high casualties in British offensives, but historians like John Terraine argue that this was largely a function of the size of the battles, as British forces engaged the main body of the German Army on the Western Front after 1916.[257] Although total deaths in the Second World War were far higher than in the First, British deaths were lower, because Britain fought mainly peripheral campaigns in the Mediterranean for much of the Second World War, involving relatively few British troops, while most of the land fighting took place between Germany and the USSR.[210][258] When British forces engaged in Normandy in 1944, total losses were fewer than on the Somme in 1916, as Normandy was around half the length and less than half the size but casualties per unit per week were broadly similar.[259] David French wrote that British daily loss rates at Normandy, in which divisions lost up to three quarters of their infantry, were similar to those of Passchendaele in 1917, while average battalion casualty rates in 1944–45 (100 men per week) were similar to those of the First World War.[260]

John Terraine wrote:

It is important, when we feel our emotions rightly swelling over the losses of 1914–18, to remember that in 1939–45 the world losses were probably over four times as many … the British task was entirely different, which is why the (British) loss of life was so different: about 350,000 in 1939–45 and about 750,000 (British deaths, 1 million including the Empire) in 1914–18 … – … The casualty statistics of the Great War … tell us … virtually nothing about the quality of … British generals. The statistics show that … the British losses in great battles were generally about the same as anyone else’s.

He also wrote that British perceptions were coloured by the terrible losses of 1 July 1916, during which the British Army sustained 57,000 casualties, but that it should also be remembered that the British never suffered anything like the losses of June 1916, when the Austro-Hungarian Army experienced 280,000 casualties in a week, or of August 1914, when the French Army lost 211,000 men in 16 days, or of March and April 1918, when the Germans lost nearly 350,000 men in six weeks, or 1915, when Russia suffered 2 million casualties in a year.[261]

Total British First World War deaths seemed especially severe as they fell among certain groups such as Pals Battalions (volunteers who enlisted together and were allowed to serve together) or the alleged “Lost Generation” of public school and university-educated junior officers. British deaths, although heavy compared to other British wars, were only around half those of France or Germany relative to population.[262]

Alleged falsification of records

11 Interesting facts about World War One

  1. The shot that was heard around the world. On June 28, 1914, Archduke Franz Ferdinand, the heir to the Austro-Hungarian Empire, and his wife, Sophie, were shot dead by a nineteen-year-old Serbian nationalist, Gavrilo Princip, as they rode in a procession through the streets of Sarajevo. Austria-Hungary blamed the Serbian government for the assassination and sought military support from Germany’s Kaiser Wilhelm II in preparation for war. Serbia was backed by Russia. By the time the Austro-Hungarian Empire declared war on July 28, 1914, both sides had officially gained powerful allies.
  2. Many actors were involved. The Triple Entente (France, Russia, Britain) and the Triple Alliance (Germany, Austria-Hungary, Italy) both acquired additional forces following the outbreak of war. The Allies gained Belgium, Greece, Italy, Montenegro, Portugal, Romania, Serbia, and the United States. Italy’s allegiance to the Central Powers was inconsistent, but the Ottoman Empire and Bulgaria were added into the mix.
  3. The United States eventually joined the war. At the start of the war, US President Woodrow Wilson pledged neutrality—a position supported by a majority of Americans. On April 6, 1917, however, the United States, now galvanized for war by the “Zimmerman Telegram,” declared war on Germany after German U-boats sank US merchant ships.
  4. A deadly day. The heaviest loss of life in a single day occurred on July 1, 1916, when the British army suffered 57,470 casualties, including 19,240 fatalities, in the Battle of the Somme.
  5. One battle lasted 300 days. The Battle of Verdun lasted from February to December 1916. The Germans managed to surprise the French, and the heavy use of artillery accounted for 70 percent of the estimated 800,000 casualties. Nine French towns were completely destroyed, and while they were never rebuilt, still appear on maps to this day.
  6. Women fought, too. The Russian forces called upon women to join female shock battalions in order to boost morale in the later years of the war. June 1917 saw the 1st Women’s Battalion of Death marching out to the front. Though the practice was discontinued following a substantial loss in one unit, many women continued to apply and fight for the regular units.
  7.  Explosions in Ypres were heard in London. British forces dug tunnels and laid approximately one million pounds worth of explosives underneath German lines outside Messines. British soldiers on the scene were reportedly knocked off their feet, and those in France mistook the vibrations for an earthquake. The Messines detonations are considered to be one of the largest human caused pre-nuclear era explosions.
  8. An elephant made an appearance. With a majority of horses being used on the front, Britain utilized the circus animals they had to cart around much-needed munitions. The most famous of these animals was Lizzie, an Indian elephant who wore boots as she carted around food and necessities in the town of Sheffield.
  9. Vengeance at Versailles. French Prime Minister Georges Clémenceau pointedly picked the Hall of Mirrors in Versailles for peace negotiations, as it was there the Germans had declared the German Empire. The Treaty of Versailles was signed on June 28, 1919. It came into effect on January 10, 1920. Germany was forced to accept full responsibility for the war, give up vast amounts of territory, and pay $31.4 billion in reparations. The result, as France wanted, crippled Germany. On October 3, 2010, Germany paid off the last of its debt set by the Treaty of Versailles. The global economic crisis in 1931 as well as Adolf Hitler’s rise to power had cut off its trend of paying annually.
  10. Nine new countries. Lithuania, Latvia, Finland, Poland, Austria, Hungary, Czechoslovakia, Yugoslavia, and Estonia were able to exist independently following the collapse of the Austria-Hungarian Empire. Two of these countries (Czechoslovakia and Yugoslavia) were brand new.
  11. Laying the foundations for the United Nations. At the end of the war, the League of Nations was created to “promote international cooperation and to achieve peace and security.” It disbanded following Hitler’s rise to power, but made way for the United Nations that now comprises 193 nations.

Treatment for soldiers in WW1 for being gassed

When the United States entered the World War in April 1917, American forces were ill-prepared to confront the horrors of chemical warfare. Mustard “gas,” particularly, was difficult to manage because of its characteristics and long life cycle. While true gases such as chlorine and phosgene dissipated over several hours, this agent (actually a liquid, dispersed in droplet or aerosol form) remains active for up to 25 to 30 years1 and causes rapid injury in contact with skin, even through clothing. Thus, after battles were concluded, even when the soldiers rested, ate food or slept, mustard gas remained dangerous. It is not surprising that mustard caused the largest number of chemical casualties in the war, and earned the sad title of the “King of Battle Gasses.”2Once combatants were exposed to the agent, they needed immediate decontamination or within 30 minutes of exposure, huge blisters would spot their entire bodies.3 The decontamination process required that soldiers were stripped of their uniforms, bathed and given new clothing to wear before they were brought to the hospital for treatment. Miss Julia Stimson (later to become Chief of the Army Nurse Corps) described the phenomenon: “We have been receiving patients that have been gassed and burned in a most mysterious way … they had burns on their bodies, on parts that are covered with clothing.”4

Irrigating a patient's eyesSeveral treatments were devised. Acute conjunctivitis required alkaline eye irrigations over and over again until the symptoms lessened and abated. With the large numbers of patients admitted to hospital units, this meant the nurses started at one end of the ward and by the time they had reached the other end of the unit, it was time to begin a new round of treatments.5 For those who had breathed in the mustard gas, nurses at Base Hospital 32 helped devise a mixture of “guiacol, camphor, menthol, oil of thyme and eucalyptus [that forced the patients to expectorate the inflammatory material]. Patients received immediate relief, [respirations were less labored so] … healing was begun.”6

Chemically burned soldiers took longer to heal than thermally burned combatants.7 Simple burns were mostly treated with sodium hypochlorite on the wounds.8 More extensive burns were treated with Vaseline gauze.9 Nurses first excised blisters then wrapped the affected area. Chief Nurse Lily B. Craighton of Red Cross Military Hospital # 6 described how chemical burn treatment was performed in their hospital:

“The men would come in with hideous blisters, extending from their shoulder down [the length of their bodies]. The nurses would clip away all this blistered skin, clean the … raw surface with antiseptic solution, dry it with an electric blower and spray on the “amberine.” Burns treated in this way healed in an incredibly short time.”10

At the war’s end, more than 30% of the casualties were related to chemical warfare and 80% of the casualties were directly related to mustard gas.11 In creative and compassionate ways, Army nurses, as members of the busy healthcare team, rose to the challenge of caring for combatants who were injured by this hideous type of warfare weapon. Without their ingenuity, and dedicated service the majority of the gas cases would not have been successfully treated.12

Gas in the Great War

James Patton, BS
Military Historian, U.S. Army Veteran, and WW-I Feature Writer

Every war brings to the fore a new way of maiming and killing soldiers. Gun powder in the 16th and 17th centuries meant that – finally, sadly – one could eliminate many of his enemies with one agent of offensive effort, an artillery round. While the efficiency of maiming and killing steadily advanced from the 17th to the 20th centuries it accelerated by an order of magnitude in WWI with the use of inhaled poison gasses.

One of the enduring hallmarks of WWI was the large-scale use of chemical weapons, commonly called, simply, ‘gas’. Although chemical warfare caused less than 1% of the total deaths in this war, the ‘psy-war’ or fear factor was formidable. Thus, chemical warfare with gases was subsequently absolutely prohibited by the Geneva Protocol of 1925. It has occasionally been used since then but never in WWI quantities. Production of some of these dangerous chemicals continues to this day as they have peaceful uses – for example, phosgene (carbonyl dichloride) is an industrial reagent, a precursor of pharmaceuticals and other important organic compounds.

Masked Soldiers Charge
Masked soldiers charge through a cloud of gas.

Several chemicals were weaponized in WWI and France actually was the first to use gas – they deployed tear gas in August 1914. The agent used was either xylyl bromide, which is described as smelling ‘pleasant and aromatic’, or ethyl bromoacetate, described as ‘fruity and pungent.’ Both are colorless liquids and have to be atomized to be dispersed as weapons. As lachrymatory agents, they irritate the eyes and cause uncontrolled tearing. Large doses can cause temporary blindness. If inhaled they also make breathing difficult. Symptoms usually resolve by 30 minutes after contact. Thus, tear gas was never very effective as a weapon against groups of enemy soldiers.

The German gas warfare program was headed by Fritz Haber (1868 – 1934) whose first try for a weapon was chlorine, which he debuted at Ypres in April 1915. Chlorine is a diatomic gas, about two and a half times denser than air, pale green in color and with an odor which was described as a ‘mix of pineapple and pepper’. It can react with water in the lungs to form hydrochloric acid, which is destructive of tissue and can quickly lead to death, or, at least, permanent lung tissue damage and disability. At lower concentrations, if it does not reach the lungs, per se, it can cause coughing, vomiting, and eye irritation. Chlorine was deadly against unprotected soldiers. It is estimated over 1,100 were killed in its first use at Ypres. Ironically, the Germans weren’t prepared for how effective it would be and were unable to exploit their advantage, gaining little ground.

Chlorine’s usefulness was short-lived. Its color and odor made it easy to spot, and since chlorine is water-soluble even soldiers without gas masks could minimize its effect by placing water-soaked – even urine-soaked – rags over their mouths and noses. Additionally, releasing the gas in a cloud posed problems, as the British learnt to their detriment when they attempted to use chlorine at Loos. The wind shifted, carrying the gas back onto their own men.

Phosgene (carbonyl dichloride) was Haber’s next choice, probably used first at Ypres by the Germans in December 1915. Phosgene is a colorless gas, with an odor likened to that of ‘musty hay’, but for the odor to be detectable, the concentration had to be at 0.4 parts per million, or several times the level at which harmful effects occur. Phosgene is highly toxic, due to its ability to react with proteins in the alveoli of the lungs, disrupting the blood-air barrier, leading to suffocation.

Soldiers Pose With Masks
Allied soldiers pose for a picture while wearing their gas masks.

Phosgene was much more effective and more deadly than chlorine, though one drawback was that the symptoms could sometimes take up to 48 hours to be manifest. The minimal immediate effects are lachrymatory. However, subsequently, it causes build-up of fluid in the lungs (pulmonary edema), leading to death. It is estimated that as many as 85% of the 91,000 gas deaths in WWI were a result of phosgene or the related agent, diphosgene (trichloromethane chloroformate).

The most commonly used gas in WWI was ‘mustard gas’ [bis(2-chloroethyl) sulfide]. In pure liquid form this is colorless, but in WWI impure forms were used, which had a mustard color with an odor reminiscent of garlic or horseradish. An irritant and a strong vesicant (blister-forming agent), it causes chemical burns on contact, with blisters oozing yellow fluid. Initial exposure is symptomless, and by the time skin irritation begins, it is too late to take preventative measures. The mortality rate from mustard gas was only 2-3%, but those who suffered chemical burns and respiratory problems had long hospitalizations and if they recovered were thought to be at higher risk of developing cancers during later life.

Gas Spreads Across A Battlefield
Windswept gas spreads across a battlefield in Europe.

Chloropicrin, diphenylchlorarsine, American-developed Adamsite (diphenylaminechlorarsine), and others were irritants that could bypass gas masks and make soldiers remove their masks, thus, exposing them to phosgene or chlorine.

Gases often were used in combinations. Most gas was delivered by artillery shells. The agent(s) were in liquid form in glass bottles inside the warhead, which would break on contact and the liquid would evaporate. Shells were color coded in a system started by the Germans. Green Cross shells contained the pulmonary agents: chlorine, phosgene and diphosgene. White Cross had the tear gases. Blue Cross had the ‘mask breakers’ like chloropicrin. Gold (or Yellow) Cross had mustard gas.

John Singer Sargent's Gassed
John Singer Sargent’s ‘Gassed’ depicts the aftermath of a mustard gas attack on British troops.

In retrospect it is sad to know that warfare by poisoning soldiers – so brutal, highly personal, and used with such little restraint by both sides in WWI – had been previously outlawed by the Hague Convention in 1899. The ironies of gas warfare are vividly focused in the life of Fritz Haber, the German chemist who invented phosgene and also the ‘Haber Process’ which allowed fixation of atmospheric nitrogen into ammonia-based fertilizer. A German Jew who converted to Christianity, he received the Nobel Prize for Chemistry in 1919 for the Haber Process. Though long dead before The Holocaust, he was one of the chemists who perfected the hydrocyanide-based insecticides Zyklon A and Zyklon B, the latter gas used to kill millions of Jews and others, including some of his relatives.

The Imperial War Museum in London is the source of some of the images, particularly the John Singer Sargent painting, ‘Gassed.’