WW1 The use of horses in the Great War

The use of horses in World War I marked a transitional period in the evolution of armed conflict. Cavalry units were initially considered essential offensive elements of a military force, but over the course of the war, the vulnerability of horses to modern machine gunmortar, and artillery fire reduced their utility on the battlefield. This paralleled the development of tanks, which ultimately replaced cavalry in shock tactics. While the perceived value of the horse in war changed dramatically, horses still played a significant role throughout the war.

All of the major combatants in World War I (1914–1918) began the conflict with cavalry forces. Imperial Germany stopped using them on the Western Front soon after the war began, but continued with limited use on the Eastern Front, well into the war. The Ottoman Empire used cavalry extensively during the war. On the Allied side, the United Kingdom used mounted infantry and cavalry charges throughout the war, but the United States used cavalry only briefly. Although not particularly successful on the Western Front, Allied cavalry had some success in the Middle Eastern theatre due to the open nature of the front, allowing a more traditional war of movement, in addition to the lower concentration of artillery and machine guns. Russia used cavalry forces on the Eastern Front but with limited success.

The military used horses mainly for logistical support; they were better than mechanized vehicles at traveling through deep mud and over rough terrain. Horses were used for reconnaissance and for carrying messengers as well as for pulling artillery, ambulances, and supply wagons. The presence of horses often increased morale among the soldiers at the front, but the animals contributed to disease and poor sanitation in camps, caused by their manure and carcasses. The value of horses and the increasing difficulty of replacing them were such that by 1917, some troops were told that the loss of a horse was of greater tactical concern than the loss of a human soldier. Ultimately, the blockade of Germany prevented the Central Powers from importing horses to replace those lost, which contributed to Germany’s defeat. By the end of the war, even the well-supplied US Army was short of horses.

Conditions were severe for horses at the front; they were killed by rifle and artillery fire, suffered from skin disorders among other diseases, and were injured by poison gas. Hundreds of thousands of horses died, and many more were treated at veterinary hospitals and sent back to the front. Procuring fodder was a major issue, and Germany lost many horses to starvation. Several memorials have been erected to commemorate the horses that died. Artists, including Alfred Munnings, extensively documented the work of horses in the war, and horses were featured in war poetry. Novels, plays and documentaries have also featured the horses of World War I.

Cavalry
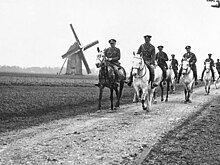
Members of the Royal Scots Greys near Brimeux, France, in 1918

Many British tacticians outside of the cavalry units realized before the war that advances in technology meant that the era of mounted warfare was coming to an end. However, many senior cavalry officers disagreed, and despite limited usefulness, maintained cavalry regiments at the ready throughout the war. Scarce wartime resources were used to train and maintain cavalry regiments that were rarely used. The continued tactical use of the cavalry charge resulted in the loss of many troops and horses in fruitless attacks against machine guns. Early in the war, cavalry skirmishes occurred on several fronts, and horse-mounted troops were widely used for reconnaissance. Britain’s cavalry were trained to fight both on foot and mounted, but most other European cavalry solely relied on the shock tactic of mounted charges. There were isolated instances of successful shock combat on the Western Front, where cavalry divisions also provided important mobile firepower. Beginning before the war, cavalry was deployed alongside armoured cars and aircraft, this was later extended to working in co-operation with tanks, notably at the Battle of Cambrai, where cavalry was expected to exploit breakthroughs in the lines that the slower tanks could not. This plan never came to fruition due to missed opportunities by command. At Cambrai, troops from Great Britain, Canada, India and Germany participated in mounted actions Cavalry was still deployed late in the war, with Allied cavalry troops harassing retreating German forces in 1918 during the Hundred Days Offensive, when horses and tanks continued to be used in the same battles “Cavalry was literally indispensable” on the Eastern front and in the Middle East.

The Cavalry Manual, written in 1912, was unchanged throughout the war as the tactics within were still effective, more so than many authors and commentators have given credit for. The ambitions of senior officers however, Haig in particular, was that the cavalry arm could also be effective strategically. This was proven to be wrong and the blame is laid with the higher echelons who were unable to establish a Command, Control and Communications structure which could effectively involve the use of cavalry divisions or corps. Cavalry was also used with good effect in Palestine, at the Third Battle of Gaza and Battle of Megiddo British cavalry officers, far more than their continental European counterparts, persisted in using and maintaining cavalry, believing that mounted troops would be useful for exploiting infantry breakthroughs, and under the right circumstances would be able to face machine guns.

British Empire

United Kingdom

Further information: British cavalry during the First World War
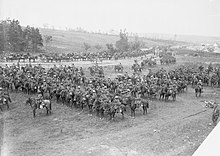
A large group of men and horses drawn up into lines in a field and on the adjoining road. A hill with trees and tents can be seen in the background.
The 20th Deccan Horse drawn up in ranks during the Battle of Bazentin Ridge, 1916

Britain had increased its cavalry reserves after seeing the effectiveness of mounted Boers during the Second Boer War (1899–1902). Horse-mounted units were used from the earliest days of World War I: on August 22, 1914, the first British shot of the war in France was fired by a cavalryman, Corporal Edward Thomas of the 4th Royal Irish Dragoon Guards, near Casteau, during a patrol in the buildup to the Battle of Mons. Within 19 days of Britain beginning mobilization for war, on August 24, 1914, the 9th Lancers, a cavalry regiment led by David Campbell, engaged German troops with a squadron of 4th Dragoon Guards against German infantry and guns. Campbell obeyed his orders to charge, although he believed the more prudent course of action would have been to fight dismounted. The charge resulted in a British loss of 250 men and 300 horses. On September 7, Campbell’s troops charged again, this time towards the German 1st Guard Dragoons, another lancer cavalry regiment.

The Cavalry Training Manual of 1912 continued to be used by junior commanders to great effect (significantly Douglas Haig was a contributor) and wasn’t changed significantly during the war years. What did change however, to the advantage of small cavalry formations, was how the German army changed tactics (to deep defence) allowing the cavalry more freedom on the battlefield. The last British fatality from enemy action before the armistice went into effect was a cavalryman, George Edwin Ellison, from C Troop 5th Royal Irish Lancers. Ellison was shot by a sniper as the regiment moved into Mons on November 11, 1918.

Horses proved indispensable to the British war effort in Palestine, particularly under Field Marshal Edmund Allenby, for whom cavalry made up a large percentage of his forces. Most of his mounted troops were not British regular cavalry, but the Desert Mounted Corps, consisting of a combination of Australian, New Zealand, Indian units and English Yeomanry regiments from the Territorial Force, largely equipped as mounted infantry rather than cavalry. By mid-1918, Ottoman intelligence estimated that Allenby commanded around 11,000 cavalry. Allenby’s forces routed the Ottoman armies in a running series of battles that included the extensive use of cavalry by both sides. Some cavalry tacticians view this action as a vindication of cavalry’s usefulness, but others point out that the Ottoman were outnumbered two to one by late 1918, and were not first-class troops. Horses were also ridden by the British officers of the Egyptian Camel Transport Corps in Egypt and the Levant during the Sinai and Palestine Campaigns.

It is clear that between 1914 and 1918 the cavalry were effective in combat at a tactical level, in spite of the prevailing conditions of the battlefield (or as effective as their infantry counterparts, at any rate).The premise that cavalry were incapable of moving around on the battlefields of the Western Front is simply false. Advance planning was required but this was the case for all arms in the advance.

The origin of much of the discriminatory comments about cavalry on the Western Front is attributed to General Sir James Edmonds, an engineer officer who was responsible for writing much of the official history of the war. The main and recurring statements attributable to him are:

♦ The “cavalry generals” myth – that the British Army on the Western Front was dominated by general officers from the cavalry arm.

♦ The “Last Machine Gun Myth” which incorrectly stated that cavalry couldn’t operate until the last machine gun was destroyed.

♦ The “Fodder” myth which stated that cavalry resources would have been better spent in the supply of other arms.

Additionally writers such as J. F. C. Fuller and B. H. Liddell Hart were enthusiastic exponents of tank warfare and used similar statements to discredit cavalry as “traditional and outdated” 

The curious aspect of these allegations is that, despite being proven wrong on many occasions over the decades since WW1, these myths persist in the psyche of some authors and indeed with the general public.

India

Indian cavalry participated in actions on both the Western and Palestinian fronts throughout the war. Members of the 1st and 2nd Indian Cavalry Divisions were active on the Western Front, including in the German retreat to the Hindenburg Line and at the Battle of Cambrai.During the battle of the Somme, the 20th Deccan Horse made a successful, mounted charge, assaulting a German position on Bazentin Ridge. The charge overran the German position. A charge by the 5th (Mhow) Cavalry Brigade of the 1st Division ended successfully at the Battle of Cambrai despite being against a position fortified by barbed wire and machine guns. Such successful endings were unusual occurrences during the war. Several Indian cavalry divisions joined Allenby’s troops in the spring of 1918 after being transferred from the Western Front.

Canada

Further information: Canadian Cavalry Brigade

Members of the Canadian Cavalry Brigade perform a cavalry charge during the Battle of Moreuil Wood.

When the war began, Lord Strathcona’s Horse, a Canadian cavalry regiment, was mobilized and sent to England for training. The regiment served as infantry in French trenches during 1915, and were not returned to their mounted status until February 16, 1916. In the defense of the Somme front in March 1917, mounted troops saw action, and Lieutenant Frederick Harvey was awarded the Victoria Cross for his actions. Canadian cavalry generally had the same difficulties as other nations in breaking trench warfare deadlocks and were of little use on the front lines. However, in the spring of 1918, Canadian cavalry was essential in halting the last major German offensive of the war.On March 30, 1918, Canadian cavalry charged German positions in the Battle of Moreuil Wood, defeating a superior German force supported by machine gun fire. The charge was made by Lord Strathcona’s Horse, led by Gordon Flowerdew, later posthumously awarded the Victoria Cross for his actions during the charge. Although the German forces surrendered, three-quarters of the 100 cavalry participating in the attack were killed or wounded in the attack against 300 German soldiers.

Australia and New Zealand

The Australian and New Zealand Mounted Division (known as the ANZAC Mounted Division) was formed in Egypt in 1916, after the Australian and New Zealand Army Corps (ANZAC) was disbanded. Comprising four brigades, the 1st, 2nd and 3rd Australian Light Horse and the New Zealand Mounted Rifles Brigade. All had fought at Gallipoli dismounted. In August the division’s dynamic capabilities were effectively combined with the static 52nd (Lowland) Infantry Division at the Battle of Romani, where they repelled an attempted Ottoman attack on the Suez Canal. This victory stopped the advance of Kress von Kressenstein‘s Expeditionary Force (3rd Infantry Division and Pasha I formation) towards the Suez Canal and forced his withdrawal under pressure. An Ottoman garrison at Magdhaba was defeated in December 1916 by the division with the Imperial Camel Corps Brigade attached and the other major Ottoman fortification at Rafah was captured in January 1917. They participated mounted in the First Battle of Gaza in March, and the Third Battle of Gaza (including the Battle of Beersheba) in October 1917. They attacked dismounted in the Second Battle of Gaza in April 1917. In 1918, the ANZAC and Australian Mounted Divisions, along with the Yeomanry Mounted Division in the Desert Mounted Corps, conducted two attacks across the Jordan River to Amman in March, then moved on to Es Salt in April. The Australian Mounted Division were armed with swords mid year, and as part of the Battle of Megiddo captured Amman (capturing 10,300 prisoners), NazarethJenin and Samakh in nine days. After the Armistice they participated in the reoccupation of Gallipoli in December.
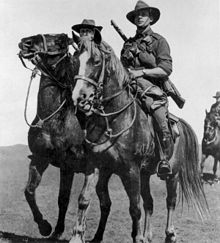
Two men carrying rifles on horseback; another horse and rider are partially visible in the background.
Australian Imperial Force light horsemen, 1914

The ANZAC and Australian Mounted Divisions carried rifles, bayonets and machine guns, generally using horses as swift transport and dismounting to fight. Troops of four men were organised, so that three were fighting while the fourth held the horses. Sometimes they fought as mounted troops: at the Battle of Beersheba during the Sinai and Palestine Campaign in 1917, the Australian Mounted Division’s 4th Light Horse Brigade made what is sometimes called “the last successful cavalry charge in history”, when two regiments successfully overran Ottoman trenches. They formed up over a wide area, to avoid offering a target for enemy artillery, and galloped 3 kilometres (1.9 mi) into machine gun fire, equipped only with rifles and bayonets. Some of the front ranks fell, but most of the brigade broke through, their horses jumping the trenches into the enemy camp. Some soldiers dismounted to fight in the trenches, while others raced on to Beersheba, to capture the town and its vital water supplies. The charge was “instrumental in securing Allenby’s victory [in Palestine]”.

The Australians primarily rode Waler horses. The English cavalry officer, Lieutenant Colonel RMP Preston DSO, summed up the animals’ performance in his book, The Desert Mounted Corps:

… (November 16th, 1917) The operations had now continued for 17 days practically without cessation, and a rest was absolutely necessary especially for the horses. Cavalry Division had covered nearly 170 miles … and their horses had been watered on an average of once in every 36 hours … The heat, too, had been intense and the short rations, 9+12 lb of grain per day without bulk food, had weakened them greatly. Indeed, the hardship endured by some horses was almost incredible. One of the batteries of the Australian Mounted Division had only been able to water its horses three times in the last nine days—the actual intervals being 68, 72 and 76 hours respectively. Yet this battery on its arrival had lost only eight horses from exhaustion, not counting those killed in action or evacuated wounded … The majority of horses in the Corps were Walers and there is no doubt that these hardy Australian horses make the finest cavalry mounts in the world …

Continental Europe

You can’t make a cavalry charge until you have captured the enemy’s last machine gun.

—An American observer of French cavalry tactics, 1917

French horsemen crossing a river on their way to Verdun.
Italian veterinary technicians perform surgery on horse.

Further information: German cavalry in World War I

Before the war began, many continental European armies still considered the cavalry to hold a vital place in their order of battle. France and Russia expanded their mounted military units before 1914. Of the Central Powers, Germany added thirteen regiments of mounted riflemen, Austria–Hungary expanded their forces,and the Bulgarian army also readied the cavalry in their army. When the Germans invaded in August 1914, the Belgians had one division of cavalry.

French cavalry had similar problems with horses on the Western Front as the British, although the treatment of their horses created additional difficulties. Opinion generally was that the French were poor horsemen: “The French cavalryman of 1914 sat on his horse beautifully, but was no horsemaster. It did not occur to him to get off his horse’s back whenever he could, so there were thousands of animals with sore backs …”. One French general, Jean-François Sordet, was accused of not letting horses have access to water in hot weather. By late August 1914, a sixth of the horses in the French cavalry were unusable. The French continued to eschew mounted warfare when in a June 1918 charge by French lancers the horses were left behind and the men charged on foot.

Russia possessed thirty-six cavalry divisions when it entered the war in 1914, and the Russian government claimed that its horsemen would thrust deep into the heart of Germany. Although Russian mounted troops entered Germany, they were soon met by German forces. In the August 1914 Battle of Tannenberg, troops led by German Field Marshal Paul von Hindenburg and Lieutenant-General Erich Ludendorff surrounded the Russian Second Army and destroyed the mounted force of Don Cossacks that served as the special guard of Russian General Alexander Samsonov. Other Russian cavalry units successfully harassed retreating Austro-Hungarian troops in September 1914, with the running battle eventually resulting in the loss of 40,000 of the 50,000 men in the Austro-Hungarian XIV Tyrolean Corps, which included the 6th Mounted Rifle Regiment. Transporting cavalry created a hardship for the already strained Russian infrastructure, as the great distances they needed to be moved meant that they had to be transported by train. Approximately the same number of trains (about 40) were required to transport a cavalry division of 4,000 as to transport an infantry division of 16,000.

The cavalries of the Central Powers, Germany and Austria–Hungary, faced the same problems with transport and the failure of tactics as the Russians. Germany initially made extensive use of cavalry, including a lance-against-lance battle with the British in late 1914, and an engagement between the British 1st Cavalry Brigade and the German 4th Cavalry Division in the lead-up to the First Battle of the Marne in September 1914. That battle ended “decidedly to the disadvantages of the German cavalry”, partially due to the use of artillery by the accompanying British L Battery of horse artillery. The Germans stopped using cavalry on the Western Front not long after the beginning of the war, in response to the Allied Forces’ changing battle tactics, including more advanced weaponry. They continued to use cavalry to some extent on the Eastern Front, including probes into Russian territory in early 1915. The Austrians were forced to stop using cavalry because of large-scale equipment failures; Austrian military saddles were so poorly designed as to rub the skin off the back of any horse not already hardened to the equipment from parade ground practice; only a few weeks into the war half of all Austrian cavalry mounts were disabled, and the rest nearly so.

Ottoman Empire

Ottoman cavalry south of Jerusalem in April 1917

In 1914, the Ottoman Empire began the war with one cavalry regiment in their armed forces and four reserve regiments (originally formed in 1912) under the control of the Third Army. These reserve regiments were composed of Kurds, rural Turks and a few Armenians. The performance of the reserve divisions was poor, and in March 1915 the forces that survived were turned into two divisions totalling only two thousand men and seventy officers. Later that month, the best regiments were consolidated into one division and the rest disbanded. Nonetheless, cavalry was used by Ottoman forces throughout 1915 in engagements with the Russians,and one cavalry unit even exchanged small arms fire with a submarine crew in the Dardanelles in early 1915. Ottoman cavalry was used in engagements with the Allies, including the Third Battle of Gaza in late 1917. In this battle, both sides used cavalry forces as strategic parts of their armies. Cavalry continued to be involved in engagements well into 1918, including in conflicts near the Jordan River in April and May that year, which the Ottomans called the First and Second Battles of Jordan, part of the lead-up to the Battle of Megiddo. By September 1918, regular army cavalry forces were stationed throughout the Middle Eastern front, and the only remaining operationally ready reserve forces in the Ottoman military were two cavalry divisions, one formed after the initial problems in 1915.

United States

A man wearing a gas mask and helmet stands next to a tacked up horse wearing a gas mask.
An American soldier demonstrating a gas mask for his horse

By 1916, the United States Cavalry consisted of 15,424 members organized into 15 regiments, including headquarters, supply, machine-gun and rifle troops. Just before formally joining the war effort, the US had gained significant experience in 1916 and 1917 during the Pancho Villa Expedition in Mexico, which helped to prepare the US Cavalry for entry into World War I. In May 1917, a month after the US declaration of war, the National Defense Act went into effect, creating the 18th through the 25th US Cavalry regiments, and later that month, twenty more cavalry regiments were created. However, British experiences during the first years of the war showed that trench warfare and weapons that included machine guns and artillery made cavalry warfare impractical. Thus, on October 1, eight of the new cavalry regiments were converted to field artillery regiments by order of Congress, and by August 1918, twenty National Army horse units were converted to thirty-nine trench mortar and artillery batteries. Some horse units of the 2nd3rd6th and 15th Cavalry regiments accompanied the US forces in Europe. The soldiers worked mainly as grooms and farriers, attending to remounts for the artillery, medical corps and transport services. It was not until late August 1918 that US cavalry entered combat. A provisional squadron of 418 officers and enlisted men, representing the 2nd Cavalry Regiment, and mounted on convalescent horses, was created to serve as scouts and couriers during the St. Mihiel Offensive. On September 11, 1918, these troops rode at night through no man’s land and penetrated five miles behind German lines. Once there, the cavalry was routed and had to return to Allied territory. Despite serving through the Meuse-Argonne Offensive, by mid-October the squadron was removed from the front with only 150 of its men remaining.

Logistical support
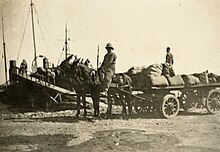
Two mules pulling a wagon loaded by supplies. A man rides one of the mules, while another man stands on the wagon.
Mules hauling supplies at Gallipoli, 1915

Horses were used extensively for military trains. They were used to pull ambulances, carry supplies and ordnance. At the beginning of the war, the German army depended upon horses to pull its field kitchens, as well as the ammunition wagons for artillery brigades. The Royal Corps of Signals used horses to pull cable wagons, and the promptness of messengers and dispatch riders depended on their mounts. Horses often drew artillery and steady animals were crucial to artillery effectiveness. The deep mud common in some parts of the front, caused by damaged drainage systems flooding nearby areas, made horses and mules vital, as they were the only means of getting supplies to the front and guns moved from place to place. After the April 1917 Battle of Vimy Ridge, one Canadian soldier recalled, “the horses were up to their bellies in mud. We’d put them on a picket line between the wagon wheels at night and they’d be sunk in over their fetlocks the next day. We had to shoot quite a number.”

Thousands of horses were employed to pull field guns; six to twelve horses were required to pull each gun. During the Battle of Cambrai, horses were used to recover guns captured by the British from no man’s land. In one instance, two teams of sixteen horses each had their hooves, tack and pulling chains wrapped to reduce noise. The teams and their handlers then successfully pulled out two guns and returned them to British lines, the horses jumping a trench in the process and waiting out an artillery barrage by German troops on the road they needed to take.

Dummy horses were sometimes used to deceive the enemy into misreading the location of troops. They were effectively used by Allenby during his campaigns in the east, especially late in the war. Evidence exists that the Germans used horses in their experimentations with chemical and biological warfare. German agents in the US are suspected of infecting cattle and horses bound for France with glanders, a disease which can fatally spread to humans; similar tactics were used by the Germans against the Russians, causing breakdowns in their ability to move artillery on the Eastern Front.

In 1917 at the Battle of Passchendaele, men at the front understood that “at this stage to lose a horse was worse than losing a man because after all, men were replaceable while horses weren’t.”

Procurement

Allied forces
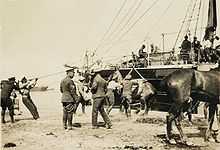
A group of men unloading a horse from a ship thorough the use of a sling. Another horse is partially visible, while other men watch from the ground and the deck of the ship.
Unloading horses from a ship at Gallipoli, 1915

To meet its need for horses, Britain imported them from Australia, Canada, the US, and Argentina, and requisitioned them from British civilians. Lord Kitchener ordered that no horses under 15 hands (60 inches, 152 cm) should be confiscated, at the request of many British children, who were concerned for the welfare of their ponies. The British Army Remount Service, in an effort to improve the supply of horses for potential military use, provided the services of high quality stallions to British farmers for breeding their broodmares. The already rare Cleveland Bay was almost wiped out by the war; smaller members of the breed were used to carry British troopers, while larger horses were used to pull artillery. New Zealand found that horses over 15.2 hands (62 inches, 157 cm) fared worse than those under that height. Well-built Thoroughbreds of 15 hands and under worked well, as did compact horses of other breeds that stood 14.2 to 14.3 hands (58 to 59 inches, 147 to 150 cm). Larger crossbred horses were acceptable for regular work with plentiful rations, but proved less able to withstand short rations and long journeys. Riflemen with tall horses suffered more from fatigue, due to the number of times they were required to mount and dismount the animals. Animals used for draught work, including pulling artillery, were also found to be more efficient when they were of medium size with good endurance than when they were tall, heavy and long-legged.

The continued resupply of horses was a major issue of the war. One estimate puts the number of horses that served in World War I at around six million, with a large percentage of them dying due to war-related causes. In 1914, the year the war began, the British Army owned only about 25,000 horses. This shortfall required the US to help with remount efforts, even before it had formally entered the war.Between 1914 and 1918, the US sent almost one million horses overseas, and another 182,000 were taken overseas with American troops. This deployment seriously depleted the country’s equine population. Only 200 returned to the US, and 60,000 were killed outright. By the middle of 1917, Britain had procured 591,000 horses and 213,000 mules, as well as almost 60,000 camels and oxen. Britain’s Remount Department spent £67.5 million on purchasing, training and delivering horses and mules to the front. The British Remount Department became a major multinational business and a leading player in the international horse trade, through supplying horses to not only the British Army but also to Canada, Belgium, Australia, New Zealand, Portugal, and even a few to the US. Shipping horses between the US and Europe was both costly and dangerous; American Expeditionary Force officials calculated that almost seven times as much room was needed per ton for animals than for average wartime cargo, and over 6,500 horses and mules were drowned or killed by shell fire on Allied ships attacked by the Germans. In turn, New Zealand lost around 3 percent of the nearly 10,000 horses shipped to the front during the war.

Due to the high casualty rates, even the well-supplied American army was facing a deficit of horses by the final year of the war. After the American First Army, led by General John J. Pershing, pushed the Germans out of the Argonne Forest in late 1918, they were faced with a shortage of around 100,000 horses, effectively immobilizing the artillery. When Pershing asked Ferdinand FochMarshal of France, for 25,000 horses, he was refused. It was impossible to obtain more from the US, as shipping space was limited, and Pershing’s senior supply officer stated that “the animal situation will soon become desperate.” The Americans, however, fought on with what they had until the end of the war, unable to obtain sufficient supplies of new animals.

Central Powers
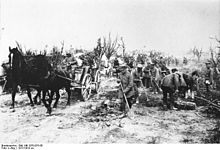
A horse-drawn German supply wagon in France in 1917

Before World War I, Germany had increased its reserves of horses through state-sponsored stud farms (GermanRemonteamt) and annuities paid to individual horse breeders. These breeding programs were designed specifically to provide high-quality horses and mules for the German military. These efforts, and the horse-intensive nature of warfare in the early 20th century, caused Germany to increase the ratio of horses to men in the army, from one to four in 1870 to one to three in 1914. The breeding programs allowed the Germans to provide all of their own horses at the beginning of the war. Horses were considered army reservists; owners had to register them regularly, and the army kept detailed records on the locations of all horses. In the first weeks of the war, the German army mobilized 715,000 horses and the Austrians 600,000. Overall, the ratio of horses to men in Central Powers nations was estimated at one to three.

The only way Germany could acquire large numbers of horses after the war began was by conquest. More than 375,000 horses were taken from German-occupied French territory for use by the German military. Captured Ukrainian territory provided another 140,000. Ardennes were used to pull artillery for the French and Belgian armies. Their calm, tolerant disposition, combined with their active and flexible nature, made them an ideal artillery horse. The breed was considered so useful and valuable that when the Germans established the Commission for the Purchase of Horses in October 1914 to capture Belgian horses, the Ardennes was one of two breeds specified as important, the other being the Brabant. The Germans were not able to capture the horses belonging to the Belgian royal family, as they were successfully evacuated, although they captured enough horses to disrupt Belgian agriculture and breeding programs. Horses used for the transport of goods were also taken, resulting in a fuel crisis in Belgium the next winter as there were no horses to pull coal wagons. The Germans sold some of their captured horses at auction.Prevented by the Allies from importing remounts, the Germans ultimately ran out of horses, making it difficult for them to move supplies and artillery, a factor contributing to their defeat.

Casualties and upkeep

[edit]
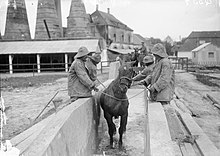
A horse undergoes treatment for a skin disease at a British veterinary hospital in 1916

Battle losses of horses were approximately 25 percent of all war-related equine deaths between 1914 and 1916. Disease and exhaustion accounted for the remainder. The highest death rates were in East Africa, where in 1916 alone deaths of the original mounts and remounts accounted for 290% of the initial stock numbers, mainly due to infection from the tsetse fly. On average, Britain lost about 15 percent (of the initial military stock) of its animals each year of the war (killed, missing, died or abandoned), with losses at 17 percent in the French theatre. This compared to 80 percent in the Crimean War, 120 percent in the Boer War and 10 percent in peacetime. During some periods of the war, 1,000 horses per day were arriving in Europe as remounts for British troops, to replace horses lost. Equine casualties were especially high during battles of attrition, such as the 1916 Battle of Verdun between French and German forces. In one day in March, 7,000 horses were killed by long-range shelling on both sides, including 97 killed by a single shot from a French naval gun. By 1917, Britain had over a million horses and mules in service, but harsh conditions, especially during winter, resulted in heavy losses, particularly amongst the Clydesdale horses, the main breed used to haul the guns. Over the course of the war, Britain lost over 484,000 horses, one horse for every two men.A small number of these, 210, were killed by poison gas.

Feeding horses was a major issue, and horse fodder was the single largest commodity shipped to the front by some countries, including Britain. Horses ate around ten times as much food by weight as a human, and hay and oats further burdened already overloaded transport services. In 1917, Allied operations were threatened when horse feed rations were reduced after German submarine activity restricted supplies of oats from North America, combined with poor Italian harvests. The British rationed hay and oats, although their horses were still issued more than those from France or Italy. The Germans faced an even worse fodder crisis, as they had underestimated the amount of food they needed to import and stockpile before the beginning of the war. Sawdust was mixed with food during times of shortage to ease animals’ sense of hunger, and many animals died of starvation. Some feed was taken from captured territories on the Eastern Front, and more from the British during the advances of the 1918 spring offensive.

Animals bolstered morale at the front, due to the soldiers’ affection for them. Some recruitment posters from World War I showcased the partnership between horse and man in attempts to gain more recruits. Despite the boost in morale, horses could also be a health hazard for the soldiers, mainly because of the difficulty of maintaining high levels of hygiene around horses, which was especially noted in camps in Egypt. Horse manure was commonplace in the battle and staging areas on several fronts, creating breeding grounds for disease-carrying insects. Manure was supposed to be buried, but fast-moving battle conditions often made this impossible. Sanitation officers were responsible for the burial of horse carcasses, among other duties.

A horse undergoing an operation at a US Army veterinary hospital
A mule stuck in a shell hole on the Western Front.

Many horses died as a result of the conditions at the front—of exhaustion, drowning, becoming mired in mud and falling in shell holes. Other horses were captured after their riders were killed. Horses also endured poor feeding and care, poison gas attacks that injured their respiratory systems and skin, and skin conditions such as mange. When gas warfare began in 1915, nose plugs were improvised for the horses to allow them to breathe during attacks. Later, several types of gas masks were developed by both the Central and Allied nations, although horses often confused them with feedbags and destroyed them. Soldiers found that better-bred horses were more likely to suffer from shell shock and act up when exposed to the sights and sounds of war than less-well-bred animals, who often learned to lie down and take cover at the sound of artillery fire. Veterinary hospitals were established to assist horses in recovering from shell shock and battle wounds, but thousands of equine corpses still lined the roads of the Western Front. In one year, 120,000 horses were treated for wounds or disease by British veterinary hospitals alone. Ambulances and field veterinary hospitals were required to care for the horses, and horse trailers were first developed for use on the Western Front as equine ambulances. Disease was also a major issue for horses at the front, with equine influenzaringwormsand colic, sores from fly bites, and anthrax among the illnesses that affected them. British Army Veterinary Corps hospitals treated 725,216 horses over the course of the war, successfully healing 529,064. Horses were moved from the front to veterinary hospitals by several methods of transportation, including on foot, by rail and by barge. During the last months of the war, barges were considered ideal transportation for horses suffering wounds from shells and bombs.[78]

When the war ended, many horses were killed due to age or illness, while younger ones were sold to slaughterhouses or to locals, often upsetting the soldiers who had to give up their beloved mounts. There was a trade in fresh meat from, amongst other equines, old war horses and army mules from Britain to abattoirs on the continent despite the Exportation of Horses Act passed in 1914. Because of the brutal way this trade was carried out, efforts were made by Ada Cole to stop it. There were 13,000 Australian horses remaining at the end of World War I, but due to quarantine restrictions, they could not be shipped back to Australia. Two thousand were designated to be killed, and the remaining 11,000 were sold, most going to India as remounts for the British Army Of the 136,000 horses shipped from Australia to fighting fronts in the war, only one, Sandy, was returned to Australia. New Zealand horses were also left behind; those not required by the British or Egyptian armies were shot to prevent maltreatment by other purchasers. The horses left behind did not always have good lives—the Brooke Trust was established in 1930 when a young British woman arrived in Cairo, only to find hundreds of previously Allied-owned horses living in poor conditions, having been sold to Egyptians after the cessation of the war. In 1934, the Old War Horse Memorial Hospital was opened by the trust, and is estimated to have helped over 5,000 horses that had served in World War I; as of 2011, the hospital continues to serve equines in the Cairo area.

Legacy

[edit]
photograph
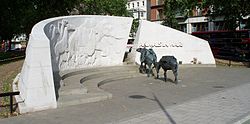
The Animals in War Memorial exists as a memorial to the countless animals that have served and died under British military command throughout history

The horse is the animal most associated with the war, and memorials have been erected to its service, including that at St. Jude on the HillHampstead, which bears the inscription “Most obediently and often most painfully they died – faithful unto death.” The Animals in War Memorial in London commemorates animals, including horses, that served with the British and their allies in all wars. The inscription reads: “Animals In War. This monument is dedicated to all the animals that served and died alongside British and allied forces in wars and campaigns throughout time. They had no choice.” In Minneapolis, a monument by Lake of the Isles is dedicated to the horses of the Minnesota 151st Field Artillery killed in battle during World War I.

The men of the Australian Light Horse Brigade and New Zealand Mounted Rifles who died between 1916 and 1918 in Egypt, Palestine and Syria are commemorated by the Desert Mounted Corps Memorial, or Light Horse Memorial, on Anzac Parade, in Canberra, Australia. The original version of this monument was in Port Said in Egypt, and was mostly destroyed during the 1956 Suez War. A piece from the original memorial, a shattered horse’s head, was brought back to Australia and used as part of a new statue in the A is for Animals exhibition honoring animals who have served with the Australian military. The exhibition also contains the preserved head of Sandy, the only horse to return to Australia after the war.

A statue of two men and two horses stands atop a pedestal in a paved courtyard. Large trees provide a background.
Desert Mounted Corps Memorial, an Australian memorial to ANZAC troops in World War I, located on Anzac Parade, Canberra

War artist Alfred Munnings was sent to France in early 1918 as an official war artist with the Canadian Cavalry Brigade. The Canadian Forestry Corps invited Munnings to tour their work camps in France after seeing some of his work at the headquarters of General Simms, the Canadian representative. He produced drawings, watercolors, and paintings of their work, including Draft Horses, Lumber Mill in the Forest of Dreux in 1918. Forty-five of his paintings were displayed at the Canadian War Records Exhibition at the Royal Academy, many of which featured horses in war. Numerous other artists created works that featured the horses of World War I, including Umberto Boccioni with Charge of the Lancersand Terence Cuneo with his celebrated postwar painting of the saving of the guns at Le Cateau during the Retreat from Mons.[91] During World War I, artist Fortunino Matania created the iconic image Goodbye Old Man that would be used by both British and American organizations to raise awareness of the suffering of animals affected by war. The painting was accompanied by a poem, The Soldiers Kiss, that also emphasized the plight of the horse in war.

Writing poetry was a means of passing the time for soldiers of many nations, and the horses of World War I figured prominently in several poems.[94][95] In 1982, Michael Morpurgo wrote the novel War Horse, about a cavalry horse in the war. The book was later adapted into a successful play of the same name, and also into a screenplay, with the movie, released on December 25, 2011, in the United States.[96]

WW1 on the Western front

The Western Front was one of the main theatres of war during the First World War. Following the outbreak of war in August 1914, the German Army opened the Western Front by invading Luxembourg and Belgium, then gaining military control of important industrial regions in France. The German advance was halted with the Battle of the Marne. Following the Race to the Sea, both sides dug in along a meandering line of fortified trenches, stretching from the North Sea to the Swiss frontier with France, the position of which changed little except during early 1917 and again in 1918.

Between 1915 and 1917 there were several offensives along this front. The attacks employed massive artillery bombardments and massed infantry advances. Entrenchments, machine gun emplacements, barbed wire, and artillery repeatedly inflicted severe casualties during attacks and counter-attacks and no significant advances were made. Among the most costly of these offensives were the Battle of Verdun, in 1916, with a combined 700,000 casualties, the Battle of the Somme, also in 1916, with more than a million casualties, and the Battle of Passchendaele, in 1917, with 487,000 casualties.

To break the deadlock of the trench warfare on the Western Front, both sides tried new military technology, including poison gas, aircraft, and tanks. The adoption of better tactics and the cumulative weakening of the armies in the west led to the return of mobility in 1918. The German spring offensive of 1918 was made possible by the Treaty of Brest-Litovsk that ended the war of the Central Powers against Russia and Romania on the Eastern Front. Using short, intense “hurricane” bombardments and infiltration tactics, the German armies moved nearly 100 kilometres (60 miles) to the west, the deepest advance by either side since 1914, but the result was indecisive.

The unstoppable advance of the Allied armies during the Hundred Days Offensive of 1918 caused a sudden collapse of the German armies and persuaded the German commanders that defeat was inevitable. The German government surrendered in the Armistice of 11 November 1918, and the terms of peace were settled by the Treaty of Versailles in 1919.

1914

War plans – Battle of the Frontiers

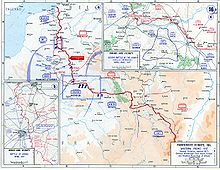
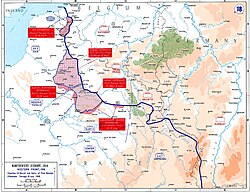
Map of the Western Front and the Race to the Sea, 1914

French bayonet charge (1913 photograph)

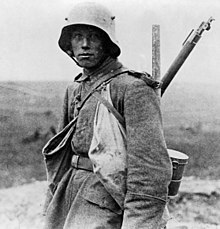
German infantry on the battlefield, 7 August 1914

The Western Front was the place where the most powerful military forces in Europe, the German and French armies, met and where the First World War was decided. At the outbreak of the war, the German Army, with seven field armies in the west and one in the east, executed a modified version of the Schlieffen Plan, bypassing French defenses along the common border by moving quickly through neutral Belgium, and then turning southwards to attack France and attempt to encircle the French Army and trap it on the German border. Belgian neutrality had been guaranteed by Britain under the Treaty of London, 1839; this caused Britain to join the war at the expiration of its ultimatum at midnight on 4 August. Armies under German generals Alexander von Kluck and Karl von Bülow attacked Belgium on 4 August 1914. Luxembourg had been occupied without opposition on 2 August. The first battle in Belgium was the Battle of Liège, a siege that lasted from 5–16 August. Liège was well fortified and surprised the German Army under Bülow with its level of resistance. German heavy artillery was able to demolish the main forts within a few days. Following the fall of Liège, most of the Belgian field army retreated to Antwerp, leaving the garrison of Namur isolated, with the Belgian capital, Brussels, falling to the Germans on 20 August. Although the German army bypassed Antwerp, it remained a threat to their flank. Another siege followed at Namur, lasting from about 20–23 August.

The French deployed five armies on the frontier. The French Plan XVII was intended to bring about the capture of Alsace–Lorraine. On 7 August, the VII Corps attacked Alsace to capture Mulhouse and Colmar. The main offensive was launched on 14 August with the First and Second Armies attacking toward Sarrebourg-Morhange in Lorraine. In keeping with the Schlieffen Plan, the Germans withdrew slowly while inflicting severe losses upon the French. The French Third and Fourth Armies advanced toward the Saar and attempted to capture Saarburg, attacking Briey and Neufchateau but were repulsed. The French VII Corps captured Mulhouse after a brief engagement first on 7 August, and then again on 23 August, but German reserve forces engaged them in the Battle of Mulhouse and forced the French to retreat twice.

The German Army swept through Belgium, executing civilians and razing villages. The application of “collective responsibility” against a civilian population further galvanised the allies. Newspapers condemned the German invasion, violence against civilians and destruction of property, which became known as the “Rape of Belgium.”After marching through Belgium, Luxembourg and the Ardennes, the Germans advanced into northern France in late August, where they met the French Army, under Joseph Joffre, and the divisions of the British Expeditionary Force under Field Marshal Sir John French. A series of engagements known as the Battle of the Frontiers ensued, which included the Battle of Charleroi and the Battle of Mons. In the former battle the French Fifth Army was almost destroyed by the German 2nd and 3rd Armies and the latter delayed the German advance by a day. A general Allied retreat followed, resulting in more clashes at the Battle of Le Cateau, the Siege of Maubeuge and the Battle of St. Quentin (also called the First Battle of Guise).

First Battle of the Marne

Main article: First Battle of the Marne

The German Army came within 70 km (43 mi) of Paris but at the First Battle of the Marne (6–12 September), French and British troops were able to force a German retreat by exploiting a gap which appeared between the 1st and 2nd Armies, ending the German advance into France. The German Army retreated north of the Aisne and dug in there, establishing the beginnings of a static western front that was to last for the next three years. Following this German retirement, the opposing forces made reciprocal outflanking manoeuvres, known as the Race to the Sea and quickly extended their trench systems from the Swiss frontier to the North Sea. The territory occupied by Germany held 64 percent of French pig-iron production, 24 percent of its steel manufacturing and 40 percent of the coal industry – dealing a serious blow to French industry.

On the Entente side (those countries opposing the German alliance), the final lines were occupied with the armies of each nation defending a part of the front. From the coast in the north, the primary forces were from Belgium, the British Empire and then France. Following the Battle of the Yser in October, the Belgian army controlled a 35 km (22 mi) length of West Flanders along the coast, known as the Yser Front, along the Yser and the Ieperlee from Nieuwpoort to Boezinge.Meanwhile, the British Expeditionary Force (BEF) occupied a position on the flank, having occupied a more central position.

First Battle of Ypres

Main article: First Battle of Ypres

From 19 October until 22 November, the German forces made their final breakthrough attempt of 1914 during the First Battle of Ypres, which ended in a mutually-costly stalemate. After the battle, Erich von Falkenhayn judged that it was no longer possible for Germany to win the war by purely military means and on 18 November 1914 he called for a diplomatic solution. The Chancellor, Theobald von Bethmann HollwegGeneralfeldmarschall Paul von Hindenburg, commanding Ober Ost (Eastern Front high command); and his deputy, Erich Ludendorff, continued to believe that victory was achievable through decisive battles. During the Lodz offensive in Poland (11–25 November), Falkenhayn hoped that the Russians would be made amenable to peace overtures. In his discussions with Bethmann Hollweg, Falkenhayn viewed Germany and Russia as having no insoluble conflict and that the real enemies of Germany were France and Britain. A peace with only a few annexations of territory also seemed possible with France and that with Russia and France out of the war by negotiated settlements, Germany could concentrate on Britain and fight a long war with the resources of Europe at its disposal. Hindenburg and Ludendorff continued to believe that Russia could be defeated by a series of battles which cumulatively would have a decisive effect, after which Germany could finish off France and Britain.

Trench warfare

Main article: Trench warfare

German trench on the Western Front, 1915.

Trench warfare in 1914, while not new, quickly improved and provided a very high degree of defense. According to two prominent historians:Trenches were longer, deeper, and better defended by steel, concrete, and barbed wire than ever before. They were far stronger and more effective than chains of forts, for they formed a continuous network, sometimes with four or five parallel lines linked by interfacings. They were dug far below the surface of the earth out of reach of the heaviest artillery…. Grand battles with the old maneuvers were out of the question. Only by bombardment, sapping, and assault could the enemy be shaken, and such operations had to be conducted on an immense scale to produce appreciable results. Indeed, it is questionable whether the German lines in France could ever have been broken if the Germans had not wasted their resources in unsuccessful assaults, and the blockade by sea had not gradually cut off their supplies. In such warfare no single general could strike a blow that would make him immortal; the “glory of fighting” sank down into the dirt and mire of trenches and dugouts.

1915

Map of the Western Front, 1915–16

Between the coast and the Vosges was a westward bulge in the trench line, named the Noyon salient after the French town at the maximum point of the German advance near Compiègne. Joffre’s plan for 1915 was to attack the salient on both flanks to cut it off. The Fourth Army had attacked in Champagne from 20 December 1914 – 17 March 1915 but the French were not able to attack in Artois at the same time. The Tenth Army formed the northern attack force and was to attack eastwards into the Douai plain on a 16 km (9.9 mi) front between Loos and Arras. On 10 March, as part of the larger offensive in the Artois region, the British Army fought the Battle of Neuve Chapelle to capture Aubers Ridge. The assault was made by four divisions on a 2 mi (3.2 km) front. Preceded by a hurricane bombardment lasting only 35 minutes, the village was captured within four hours. The advance then slowed because of supply and communication difficulties. The Germans brought up reserves and counterattacked, forestalling the attempt to capture the ridge. Since the British had used about a third of their artillery ammunition, General Sir John French blamed the failure on the Shell Crisis of 1915, despite the early success.

Gas warfare

Main article: Chemical weapons in World War I

All sides had signed the Hague Conventions of 1899 and 1907, which prohibited the use of chemical weapons in warfare. In 1914, there had been small-scale attempts by both the French and Germans to use various tear gases, which were not strictly prohibited by the early treaties but which were also ineffective.The first use of more lethal chemical weapons on the Western Front was against the French near the Belgian town of Ypres. The Germans had already deployed gas against the Russians in the east at the Battle of Humin-Bolimów

An artist’s rendition of Canadian troops at the Second Battle of Ypres

Despite the German plans to maintain the stalemate with the French and British, Albrecht, Duke of Württemberg, commander of the 4th Army planned an offensive at Ypres, site of the First Battle of Ypres in November 1914. The Second Battle of Ypres, April 1915, was intended to divert attention from offensives in the Eastern Front and disrupt Franco-British planning. After a two-day bombardment, the Germans released a lethal cloud of 168 long tons (171 t) of chlorine onto the battlefield. Though primarily a powerful irritant, it can asphyxiate in high concentrations or prolonged exposure. Being heavier than air, the gas crept across no man’s land and drifted into the French trenches. The green-yellow cloud started killing some defenders and those in the rear fled in panic, creating an undefended 3.7-mile (6 km) gap in the Allied line. The Germans were unprepared for the level of their success and lacked sufficient reserves to exploit the opening. Canadian troops on the right drew back their left flank and halted the German advance. The gas attack was repeated two days later and caused a 3.1 mi (5 km) withdrawal of the Franco-British line but the opportunity had been lost.

The success of this attack would not be repeated, as the Allies countered by introducing gas masks and other countermeasures. An example of the success of these measures came a year later, on 27 April in the Gas attacks at Hulluch 40 km (25 mi) to the south of Ypres, where the 16th (Irish) Division withstood several German gas attacks. The British retaliated, developing their own chlorine gas and using it at the Battle of Loos in September 1915. Fickle winds and inexperience led to more British casualties from the gas than German. French, British and German forces all escalated the use of gas attacks through the rest of the war, developing the more deadly phosgene gas in 1915, then the infamous mustard gas in 1917, which could linger for days and could kill slowly and painfully. Countermeasures also improved and the stalemate continued.

Air warfare

Main article: Aviation in World War I

Specialised aeroplanes for aerial combat were introduced in 1915. Aircraft were already in use for scouting and on 1 April, the French pilot Roland Garros became the first to shoot down an enemy aircraft by using a machine-gun that shot forward through the propeller blades. This was achieved by crudely reinforcing the blades to deflect bullets. Several weeks later Garros force-landed behind German lines. His aeroplane was captured and sent to Dutch engineer Anthony Fokker, who soon produced a significant improvement, the interrupter gear, in which the machine gun is synchronised with the propeller so it fires in the intervals when the blades of the propeller are out of the line of fire. This advance was quickly ushered into service, in the Fokker E.I (Eindecker, or monoplane, Mark 1), the first single seat fighter aircraft to combine a reasonable maximum speed with an effective armament. Max Immelmann scored the first confirmed kill in an Eindecker on 1 August. Both sides developed improved weapons, engines, airframes and materials, until the end of the war. It also inaugurated the cult of the ace, the most famous being Manfred von Richthofen (the Red Baron). Contrary to the myth, anti-aircraft fire claimed more kills than fighters.

Spring offensive

Ruins of Carency after it was recaptured by France

The final Entente offensive of the spring was the Second Battle of Artois, an offensive to capture Vimy Ridge and advance into the Douai plain. The French Tenth Army attacked on 9 May after a six-day bombardment and advanced 5 kilometres (3 mi) to capture Vimy Ridge. German reinforcements counter-attacked and pushed the French back towards their starting points because French reserves had been held back and the success of the attack had come as a surprise. By 15 May the advance had been stopped, although the fighting continued until 18 June. In May the German Army captured a French document at La Ville-aux-Bois describing a new system of defence. Rather than relying on a heavily fortified front line, the defence was to be arranged in a series of echelons. The front line would be a thinly manned series of outposts, reinforced by a series of strongpoints and a sheltered reserve. If a slope was available, troops were deployed along the rear side for protection. The defence became fully integrated with command of artillery at the divisional level. Members of the German high command viewed this new scheme with some favour and it later became the basis of an elastic defence in depth doctrine against Entente attacks.

During the autumn of 1915, the “Fokker Scourge” began to have an effect on the battlefront as Allied reconnaissance aircraft were nearly driven from the skies. These reconnaissance aircraft were used to direct gunnery and photograph enemy fortifications but now the Allies were nearly blinded by German fighters. However, the impact of German air superiority was diminished by their primarily defensive doctrine in which they tended to remain over their own lines, rather than fighting over Allied held territory.

Autumn offensive

In September 1915 the Entente allies launched another offensive, with the French Third Battle of ArtoisSecond Battle of Champagne and the British at Loos. The French had spent the summer preparing for this action, with the British assuming control of more of the front to release French troops for the attack. The bombardment, which had been carefully targeted by means of aerial photography began on 22 September. The main French assault was launched on 25 September and, at first, made good progress in spite of surviving wire entanglements and machine gun posts. Rather than retreating, the Germans adopted a new defence-in-depth scheme that consisted of a series of defensive zones and positions with a depth of up to 8.0 km (5 mi).

On 25 September, the British began the Battle of Loos, part of the Third Battle of Artois, which was meant to supplement the larger Champagne attack. The attack was preceded by a four-day artillery bombardment of 250,000 shells and a release of 5,100 cylinders of chlorine gas. The attack involved two corps in the main assault and two corps performing diversionary attacks at Ypres. The British suffered heavy losses, especially due to machine gun fire during the attack and made only limited gains before they ran out of shells. A renewal of the attack on 13 October fared little better. In December, French was replaced by General Douglas Haig as commander of the British forces.

1916

German soldier on the Western Front in 1916

Falkenhayn believed that a breakthrough might no longer be possible and instead focused on forcing a French defeat by inflicting massive casualties. His new goal was to “bleed France white.” As such, he adopted two new strategies. The first was the use of unrestricted submarine warfare to cut off Allied supplies arriving from overseas. The second would be attacks against the French army intended to inflict maximum casualties; Falkenhayn planned to attack a position from which the French could not retreat, for reasons of strategy and national pride and thus trap the French. The town of Verdun was chosen for this because it was an important stronghold, surrounded by a ring of forts, that lay near the German lines and because it guarded the direct route to Paris.

Falkenhayn limited the size of the front to 5–6 kilometres (3–4 mi) to concentrate artillery firepower and to prevent a breakthrough from a counter-offensive. He also kept tight control of the main reserve, feeding in just enough troops to keep the battle going. In preparation for their attack, the Germans had amassed a concentration of aircraft near the fortress. In the opening phase, they swept the air space of French aircraft, which allowed German artillery-observation aircraft and bombers to operate without interference. In May, the French countered by deploying escadrilles de chasse with superior Nieuport fighters and the air over Verdun turned into a battlefield as both sides fought for air superiority.

Battle of Verdun

Main article: Battle of Verdun

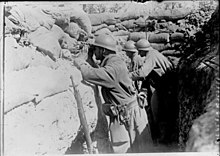
French soldiers observing enemy movements

The Battle of Verdun began on 21 February 1916 after a nine-day delay due to snow and blizzards. After a massive eight-hour artillery bombardment, the Germans did not expect much resistance as they slowly advanced on Verdun and its forts. Sporadic French resistance was encountered. The Germans took Fort Douaumont and then reinforcements halted the German advance by 28 February.

The Germans turned their focus to Le Mort Homme on the west bank of the Meuse which blocked the route to French artillery emplacements, from which the French fired across the river. After some of the most intense fighting of the campaign, the hill was taken by the Germans in late May. After a change in French command at Verdun from the defensive-minded Philippe Pétain to the offensive-minded Robert Nivelle, the French attempted to re-capture Fort Douaumont on 22 May but were easily repulsed. The Germans captured Fort Vaux on 7 June and with the aid of diphosgene gas, came within 1 kilometre (1,100 yd) of the last ridge before Verdun before being contained on 23 June.

Over the summer, the French slowly advanced. With the development of the rolling barrage, the French recaptured Fort Vaux in November and by December 1916 they had pushed the Germans back 2.1 kilometres (1.3 mi) from Fort Douaumont, in the process rotating 42 divisions through the battle. The Battle of Verdun—also known as the ‘Mincing Machine of Verdun’ or ‘Meuse Mill’—became a symbol of French determination and self-sacrifice.

Battle of the Somme

Main article: Battle of the Somme

British infantry advance near Ginchy. Photo by Ernest Brooks.

In the spring, Allied commanders had been concerned about the ability of the French Army to withstand the enormous losses at Verdun. The original plans for an attack around the River Somme were modified to let the British make the main effort. This would serve to relieve pressure on the French, as well as the Russians who had also suffered great losses. On 1 July, after a week of heavy rain, British divisions in Picardy began the Battle of the Somme with the Battle of Albert, supported by five French divisions on their right flank. The attack had been preceded by seven days of heavy artillery bombardment. The experienced French forces were successful in advancing but the British artillery cover had neither blasted away barbed wire, nor destroyed German trenches as effectively as was planned. They suffered the greatest number of casualties (killed, wounded and missing) in a single day in the history of the British Army, about 57,000.

The Verdun lesson learnt, the Allies’ tactical aim became the achievement of air superiority and until September, German aircraft were swept from the skies over the Somme. The success of the Allied air offensive caused a reorganisation of the German air arm and both sides began using large formations of aircraft rather than relying on individual combat. After regrouping, the battle continued throughout July and August, with some success for the British despite the reinforcement of the German lines. By August, General Haig had concluded that a breakthrough was unlikely and instead, switched tactics to a series of small unit actions. The effect was to straighten out the front line, which was thought necessary in preparation for a massive artillery bombardment with a major push.

The final phase of the battle of the Somme saw the first use of the tank on the battlefield. The Allies prepared an attack that would involve 13 British and Imperial divisions and four French corps. The attack made early progress, advancing 3,200–4,100 metres (3,500–4,500 yd) in places but the tanks had little effect due to their lack of numbers and mechanical unreliability. The final phase of the battle took place in October and early November, again producing limited gains with heavy loss of life. All told, the Somme battle had made penetrations of only 8 kilometres (5 mi) and failed to reach the original objectives. The British had suffered about 420,000 casualties and the French around 200,000. It is estimated that the Germans lost 465,000, although this figure is controversial.

The Somme led directly to major new developments in infantry organisation and tactics; despite the terrible losses of 1 July, some divisions had managed to achieve their objectives with minimal casualties. In examining the reasons behind losses and achievements, once the British war economy produced sufficient equipment and weapons, the army made the platoon the basic tactical unit, similar to the French and German armies. At the time of the Somme, British senior commanders insisted that the company (120 men) was the smallest unit of manoeuvre; less than a year later, the section of ten men would be so.

Hindenburg line

Main article: Hindenburg Line

The Hindenburg Line at Bullecourt seen from the air

In August 1916 the German leadership along the Western Front had changed as Falkenhayn resigned and was replaced by Hindenburg and Ludendorff. The new leaders soon recognised that the battles of Verdun and the Somme had depleted the offensive capabilities of the German Army. They decided that the German Army in the west would go over to the strategic defensive for most of 1917, while the Central powers would attack elsewhere.

During the Somme battle and through the winter months, the Germans created a fortification behind the Noyon Salient that would be called the Hindenburg Line, using the defensive principles elaborated since the defensive battles of 1915, including the use of Eingreif divisions. This was intended to shorten the German front, freeing 10 divisions for other duties. This line of fortifications ran from Arras south to St Quentin and shortened the front by about 50 kilometres (30 mi). British long-range reconnaissance aircraft first spotted the construction of the Hindenburg Line in November 1916.

1917

Main articles: Hindenburg Line and Western Front tactics, 1917

Map of the Western Front, 1917

The Hindenburg Line was built between 2 mi (3.2 km) and 30 mi (48 km) behind the German front line. On 25 February the German armies west of the line began Operation Alberich a withdrawal to the line and completed the retirement on 5 April, leaving a supply desert of scorched earth to be occupied by the Allies. This withdrawal negated the French strategy of attacking both flanks of the Noyon salient, as it no longer existed. The British continued offensive operations as the War Office claimed, with some justification, that this withdrawal resulted from the casualties the Germans received during the Battles of the Somme and Verdun, despite the Allies suffering greater losses.

On 6 April the United States declared war on Germany. In early 1915, following the sinking of the Lusitania, Germany had stopped unrestricted submarine warfare in the Atlantic because of concerns of drawing the United States into the conflict. With the growing discontent of the German public due to the food shortages, the government resumed unrestricted submarine warfare in February 1917. They calculated that a successful submarine and warship siege of Britain would force that country out of the war within six months, while American forces would take a year to become a serious factor on the Western Front. The submarine and surface ships had a long period of success before Britain resorted to the convoy system, bringing a large reduction in shipping losses.

British Army advancing on the Western Front (March 1917)

By 1917, the size of the British Army on the Western Front had grown to two-thirds of the size of the French force. In April 1917 the BEF began the Battle of Arras. The Canadian Corps and the 5th Division of the First Army, fought the Battle of Vimy Ridge, completing the capture of the ridge and the Third Army to the south achieved the deepest advance since trench warfare began. Later attacks were confronted by German reinforcements defending the area using the lessons learned on the Somme in 1916. British attacks were contained and, according to Gary Sheffield, a greater rate of daily loss was inflicted on the British than in “any other major battle”.

During the winter of 1916–1917, German air tactics had been improved, a fighter training school was opened at Valenciennes and better aircraft with twin guns were introduced. The result was higher losses of Allied aircraft, particularly for the British, Portuguese, Belgians and Australians who were struggling with outmoded aircraft, poor training and tactics. The Allied air successes over the Somme were not repeated. During their attack at Arras, the British lost 316 air crews and the Canadians lost 114 compared to 44 lost by the Germans. This became known to the Royal Flying Corps as Bloody April.

Nivelle Offensive

Main articles: Battle of Arras (1917)Nivelle Offensive, and 1917 French Army mutinies

Ruins of Arras in April 1917

The same month, the French Commander-in-chief, General Robert Nivelle, ordered a new offensive against the German trenches, promising that it would end the war within 48 hours. The 16 April attack, dubbed the Nivelle Offensive (also known as the Second Battle of the Aisne), would be 1.2 million men strong, preceded by a week-long artillery bombardment and accompanied by tanks. The offensive proceeded poorly as the French troops, with the help of two Russian brigades, had to negotiate rough, upward-sloping terrain in extremely bad weather. Planning had been dislocated by the voluntary German withdrawal to the Hindenburg Line. Secrecy had been compromised and German aircraft gained air superiority, making reconnaissance difficult and in places, the creeping barrage moved too fast for the French troops. Within a week the French suffered 120,000 casualties. Despite the casualties and his promise to halt the offensive if it did not produce a breakthrough, Nivelle ordered the attack to continue into May.

On 3 May the weary French 2nd Colonial Division, veterans of the Battle of Verdun, refused orders, arriving drunk and without their weapons. Lacking the means to punish an entire division, its officers did not immediately implement harsh measures against the mutineers. Mutinies occurred in 54 French divisions and 20,000 men deserted. Other Allied forces attacked but suffered massive casualties. Appeals to patriotism and duty followed, as did mass arrests and trials. The French soldiers returned to defend their trenches but refused to participate in further offensive action. On 15 May Nivelle was removed from command, replaced by Pétain who immediately stopped the offensive. The French would go on the defensive for the following months to avoid high casualties and to restore confidence in the French High Command, while the British assumed greater responsibility.

American Expeditionary Force

On 25 June the first US troops began to arrive in France, forming the American Expeditionary Force. However, the American units did not enter the trenches in divisional strength until October. The incoming troops required training and equipment before they could join in the effort, and for several months American units were relegated to support efforts. Despite this, however, their presence provided a much-needed boost to Allied morale, with the promise of further reinforcements that could tip the manpower balance towards the Allies.

Flanders offensive

Main articles: Battle of Messines (1917) and Third Battle of Ypres

Two United States soldiers run toward a bunker past the bodies of two German soldiers.

In June, the British launched an offensive in Flanders, in part to take the pressure off the French armies on the Aisne, after the French part of the Nivelle Offensive failed to achieve the strategic victory that had been planned and French troops began to mutiny. The offensive began on 7 June, with a British attack on Messines Ridge, south of Ypres, to retake the ground lost in the First and Second battles in 1914. Since 1915 specialist Royal Engineer tunnelling companies had been digging tunnels under the ridge, and about 500 t (490 long tons) of explosives had been planted in 21 mines under the German defences. Following several weeks of bombardment, the explosives in 19 of these mines were detonated, killing up to 7,000 German troops. The infantry advance that followed relied on three creeping barrages which the British infantry followed to capture the plateau and the east side of the ridge in one day. German counter-attacks were defeated and the southern flank of the Gheluvelt plateau was protected from German observation.

On 11 July 1917, during Unternehmen Strandfest (Operation Beachparty) at Nieuport on the coast, the Germans introduced a new weapon into the war when they fired a powerful blistering agent Sulfur mustard (Yellow Cross) gas. The artillery deployment allowed heavy concentrations of the gas to be used on selected targets. Mustard gas was persistent and could contaminate an area for days, denying it to the British, an additional demoralising factor. The Allies increased production of gas for chemical warfare but took until late 1918 to copy the Germans and begin using mustard gas.

From 31 July to 10 November the Third Battle of Ypres included the First Battle of Passchendaele and culminated in the Second Battle of Passchendaele. The battle had the original aim of capturing the ridges east of Ypres then advancing to Roulers and Thourout to close the main rail line supplying the German garrisons on the Western front north of Ypres. If successful the northern armies were then to capture the German submarine bases on the Belgian coast. It was later restricted to advancing the British Army onto the ridges around Ypres, as the unusually wet weather slowed British progress. The Canadian Corps relieved the II ANZAC Corps and took the village of Passchendaele on 6 November, despite rain, mud and many casualties. The offensive was costly in manpower for both sides for relatively little gain of ground against determined German resistance but the ground captured was of great tactical importance. In the drier periods, the British advance was inexorable and during the unusually wet August and in the Autumn rains that began in early October, the Germans achieved only costly defensive successes, which led the German commanders in early October to begin preparations for a general retreat. Both sides lost a combined total of over a half million men during this offensive.The battle has become a byword among some British revisionist historians for bloody and futile slaughter, whilst the Germans called Passchendaele “the greatest martyrdom of the war.”

Battle of Cambrai

Main article: Battle of Cambrai

On 20 November the British launched the first massed tank attack and the first attack using predicted artillery-fire (aiming artillery without firing the guns to obtain target data) at the Battle of Cambrai. The Allies attacked with 324 tanks (with one-third held in reserve) and twelve divisions, advancing behind a hurricane bombardment, against two German divisions. The machines carried fascines on their fronts to bridge trenches and the 13-foot-wide (4 m) German tank traps. Special “grapnel tanks” towed hooks to pull away the German barbed wire. The attack was a great success for the British, who penetrated further in six hours than at the Third Ypres in four months, at a cost of only 4,000 British casualties. The advance produced an awkward salient and a surprise German counter-offensive began on 30 November, which drove back the British in the south and failed in the north. Despite the reversal, the attack was seen as a success by the Allies, proving that tanks could overcome trench defences. The Germans realised that the use of tanks by the Allies posed a new threat to any defensive strategy they might mount. The battle had also seen the first mass use of German Stosstruppen on the Western front in the attack, who used infantry infiltration tactics to penetrate British defences, bypassing resistance and quickly advancing into the British rear.

1918

Map of the final German offensives, 1918

Following the successful Allied attack and penetration of the German defences at Cambrai, Ludendorff and Hindenburg determined that the only opportunity for German victory lay in a decisive attack along the Western front during the spring, before American manpower became overwhelming. On 3 March 1918, the Treaty of Brest-Litovsk was signed and Russia withdrew from the war. This would now have a dramatic effect on the conflict as 33 divisions were released from the Eastern Front for deployment to the west. The Germans occupied almost as much Russian territory under the provisions of the Treaty of Brest-Litovsk as they did in the Second World War but this considerably restricted their troop redeployment. The Germans achieved an advantage of 192 divisions in the west to the 178 Allied divisions, which allowed Germany to pull veteran units from the line and retrain them as Stosstruppen (40 infantry and 3 cavalry divisions were retained for German occupation duties in the east).

The Allies lacked unity of command and suffered from morale and manpower problems, the British and French armies were severely depleted and not in a position to attack in the first half of the year, while the majority of the newly arrived American troops were still training, with just six complete divisions in the line. Ludendorff decided on an offensive strategy beginning with a big attack against the British on the Somme, to separate them from the French and drive them back to the channel ports. The attack would combine the new storm troop tactics with over 700 aircraft, tanks and a carefully planned artillery barrage that would include gas attacks.

German spring offensives

Main article: German spring offensive

German tank in Roye, 21 March 1918

Operation Michael, the first of the German spring offensives, very nearly succeeded in driving the Allied armies apart, advancing to within shelling distance of Paris for the first time since 1914.As a result of the battle, the Allies agreed on unity of command. General Ferdinand Foch was appointed commander of all Allied forces in France. The unified Allies were better able to respond to each of the German drives and the offensive turned into a battle of attrition. In May, the American divisions also began to play an increasing role, winning their first victory in the Battle of Cantigny. By summer, between 250,000 and 300,000 American soldiers were arriving every month. A total of 2.1 million American troops would be deployed on this front before the war came to an end. The rapidly increasing American presence served as a counter for the large numbers of redeployed German forces.

Allied counter-offensives

Main articles: Second Battle of the MarneHundred Days Offensive, and Armistice of 11 November 1918

Italian regiments in 1918

In July, Foch began the Second Battle of the Marne, a counter-offensive against the Marne salient which was eliminated by August. The Battle of Amiens began two days later, with Franco-British forces spearheaded by Australian and Canadian troops, along with 600 tanks and 800 aircraft. Hindenburg named 8 August as the “Black Day of the German army.” The Italian 2nd Corps, commanded by General Alberico Albricci, also participated in the operations around Reims. German manpower had been severely depleted after four years of war and its economy and society were under great internal strain. The Allies fielded 216 divisions against 197 German divisions. The Hundred Days Offensive beginning in August proved the final straw and following this string of military defeats, German troops began to surrender in large numbers.As the Allied forces advanced, Prince Maximilian of Baden was appointed as Chancellor of Germany in October to negotiate an armistice. Ludendorff was forced out and fled to Sweden. The German retreat continued and the German Revolution put a new government in power. The Armistice of Compiègne was quickly signed, stopping hostilities on the Western Front on 11 November 1918, later known as Armistice Day. The German Imperial Monarchy collapsed when General Groener, the successor to Ludendorff, backed the moderate Social Democratic Government under Friedrich Ebert, to forestall a revolution like those in Russia the previous year.

Aftermath

Main article: Aftermath of World War I

NationalityKilledWoundedPOW
France1,395,000c. 6,000,000508,000
United Kingdom700,600c. 3,000,500223,600
Canada56,400259,700
United States117,000330,1004,430
Australia48,900175,900
Belgium80,200144,70010,200
New Zealand12,90034,800
India6,67015,7501,090
Pakistan6,67015,7501,090
Russia7,542[f]20,000
Italy4,500[g]10,500
South Africa3,2508,7202,220
Portugal1,29013,7506,680
Siam19
Allies2,440,941c. 10,029,670c. 757,310
Germany1,593,0005,116,000774,000
Austro-Hungary77913,1135,403
Central Powers1,593,779c. 5,129,113c. 779,403
Grand Totalc. 4.034,720c. 15,158,783c. 1,536,710

The war along the Western Front led the German government and its allies to sue for peace in spite of German success elsewhere. As a result, the terms of the peace were dictated by France, Britain and the United States, during the 1919 Paris Peace Conference. The result was the Treaty of Versailles, signed in June 1919 by a delegation of the new German government. The terms of the treaty constrained Germany as an economic and military power. The Versailles treaty returned the border provinces of Alsace-Lorraine to France, thus limiting the quantity of coal available to German industry. The Saar, which formed the west bank of the Rhine, would be demilitarized and controlled by Britain and France, while the Kiel Canal opened to international traffic. The treaty also drastically reshaped Eastern Europe. It severely limited the German armed forces by restricting the size of the army to 100,000 and prohibiting a navy or air force. The navy was sailed to Scapa Flow under the terms of surrender but was later scuttled as a reaction to the treaty.

Casualties

Main article: Casualties of World War I

The war in the trenches of the Western Front left tens of thousands of maimed soldiers and war widows. The unprecedented loss of life had a lasting effect on popular attitudes toward war, resulting later in an Allied reluctance to pursue an aggressive policy toward Adolf Hitler. Belgium suffered 30,000 civilian dead and France 40,000 (including 3,000 merchant sailors). The British lost 16,829 civilian dead; 1,260 civilians were killed in air and naval attacks, 908 civilians were killed at sea and there were 14,661 merchant marine deaths. Another 62,000 Belgian, 107,000 British and 300,000 French civilians died due to war-related causes.

Economic costs

See also: French war planning 1920–1940

Germany in 1919 was bankrupt, the people living in a state of semi-starvation and having no commerce with the remainder of the world. The Allies occupied the Rhine cities of Cologne, Koblenz and Mainz, with restoration dependent on payment of reparations. In Germany a Stab-in-the-back myth (Dolchstoßlegende) was propagated by Hindenburg, Ludendorff and other defeated generals, that the defeat was not the fault of the ‘good core’ of the army but due to certain left-wing groups within Germany who signed a disastrous armistice; this would later be exploited by nationalists and the Nazi party propaganda to excuse the overthrow of the Weimar Republic in 1930 and the imposition of the Nazi dictatorship after March 1933.

France suffered more casualties relative to its population than any other great power and the industrial north-east of the country was devastated by the war. The provinces overrun by Germany had produced 40 percent of French coal and 58 percent of its steel output. Once it was clear that Germany was going to be defeated, Ludendorff had ordered the destruction of the mines in France and Belgium. His goal was to cripple the industries of Germany’s main European rival. To prevent similar German attacks in the future, France later built a massive series of fortifications along the German border known as the Maginot Line.

WW1 Transportation and logistics getting supplies to the troups

One factor that was crucial in shaping the outcome of World War I was the transport system. As the troops were mobilised to the horrors of trench warfare on the Western Front in 1914, the problem of getting supplies to them, in the thick of the conflict, was a massive challenge for the War Office.

The railway system provided the necessary logistical capacity to transport supplies from Britain to massive armies in the field, including artillery shells, but once the supplies reached their destination in Europe, the new objective of getting them to the heart of the combat began.

Up to two million British soldiers were serving on the Western Front, split into divisions of around 12,000 men each. They required around 1,000 tons of supplies daily, including food, bullets, blankets, bandages and artillery batteries. This equated to two supply trains of 50 wagons each.

Even larger quantities of supplies were needed when a new offensive was being planned, as the War Office had to allow for the possibility of the troops being in one place for months while the operation proceeded.

Model B Truck

©Public Domain

Logistics challenges

The British troops had their own unique challenges, with the transportation system complicated by the English Channel. War supplies were taken by special ferry across the water in wagons, arriving at a Channel port in France. They would be loaded on to the French trains and taken to the main supply areas behind the British lines.

Once the items had arrived by rail, the next major task of taking them to the frontline began. The problem was that the goods had to be taken across around seven miles of rough terrain to the front. Anyone completing the transport run was in danger of being hit by long distance artillery shelling.

Horse-drawn vehicles were used for some of the transportation, but the daily round trip of around 14 miles was too much for them. Similarly, dogs (specially trained at the War Dog School of Instruction in Hampshire) were utilised in and around the trenches for carrying small amounts of supplies. Pack mules were also used in areas of difficult and muddy terrain.

When it came to transporting bulk shipments from the main railway storage areas to the frontline, large and reliable vehicles were needed. The war effort wouldn’t have been possible without the use of motorised transport, the mechanics who kept the vehicles in good repair and the drivers who risked their lives to complete the missions.
 

Motorised vehicles

More than 1,000 civilian lorries (and more than 300 buses) were requisitioned at the start of the war as military vehicles. They were shipped across the Channel by ferry.

The War Office had launched a scheme whereby the vehicles’ owners had been offered a subsidy to buy trucks and lorries that met the War Office’s specifications, on the grounds that the vehicles could be used temporarily in Europe to transport supplies.

London buses were among those requisitioned and these remained in service until the end of the war in 1918. The War Office also ordered thousands more heavy goods vehicles from British manufacturers, and later, from American companies.

Although there was still a reliance on horse-drawn transport, the war effort increasingly depended on motorised transport. The problem of using horses was that horse feed took up more space than the supplies being sent for the troops.

Beginning, in July 2016, the conditions during the Somme campaign caused fresh problems for the lorries and buses, since a combination of torrential rain, inadequate roads and the weight of the supply-laden lorries on narrow, solid rubber tyres, led to many of the vehicles becoming bogged down in the mud.

It was a major feat for the drivers and mechanics to keep them going to supply the British artillery with the 28 million shells needed for the Somme conflict. The lorries were transporting 20,000 tonnes of supplies every day, along a front of around 12 miles. It was an ongoing massive challenge to distribute them adequately.
 

FWD Model B truck

Among the heavy goods vehicles commonly used to transport supplies was the FWD Model B truck, constructed in the United States. It was used by the US, Britain and Russia during World War I and was so well-built that it saw further service in World War II.

It had first been manufactured in 1912, before the war, by the Four-Wheel Drive Auto Company (FWD), although it had been built to military specifications. More than 17,500 of the trucks were built and many of them were taken into military service.

Based on an earlier model, the 1908 “Battleship” lorry, which had first been built in Clintonville, Wisconsin, the design was revolutionary in that it had a four-wheel drive set-up that was more practical.

More than 14,000 of the trucks were used by the American services, 3,000 were used by the British and around 82 were used by the Imperial Russian forces.

In late 1916, the British began to construct further lengths of light railway tracks to ease the strain on the supply chain. Although they helped to bridge part of the gap, they were also vulnerable to enemy fire.

In 1917, a newly created Allied Labour Corps, including thousands of recruits from Egypt, China, India and other Empire countries, was set up to help keep the supply chain moving and support the defensive lines for the duration of the war, until it finally ended on 11th November 1918.